Free Consultation Call Us: (404) 428-3561

Home Office Closet Ideas for a Stylish and Functional Workspace

Home Office Closet Ideas for a Stylish and Functional Workspace

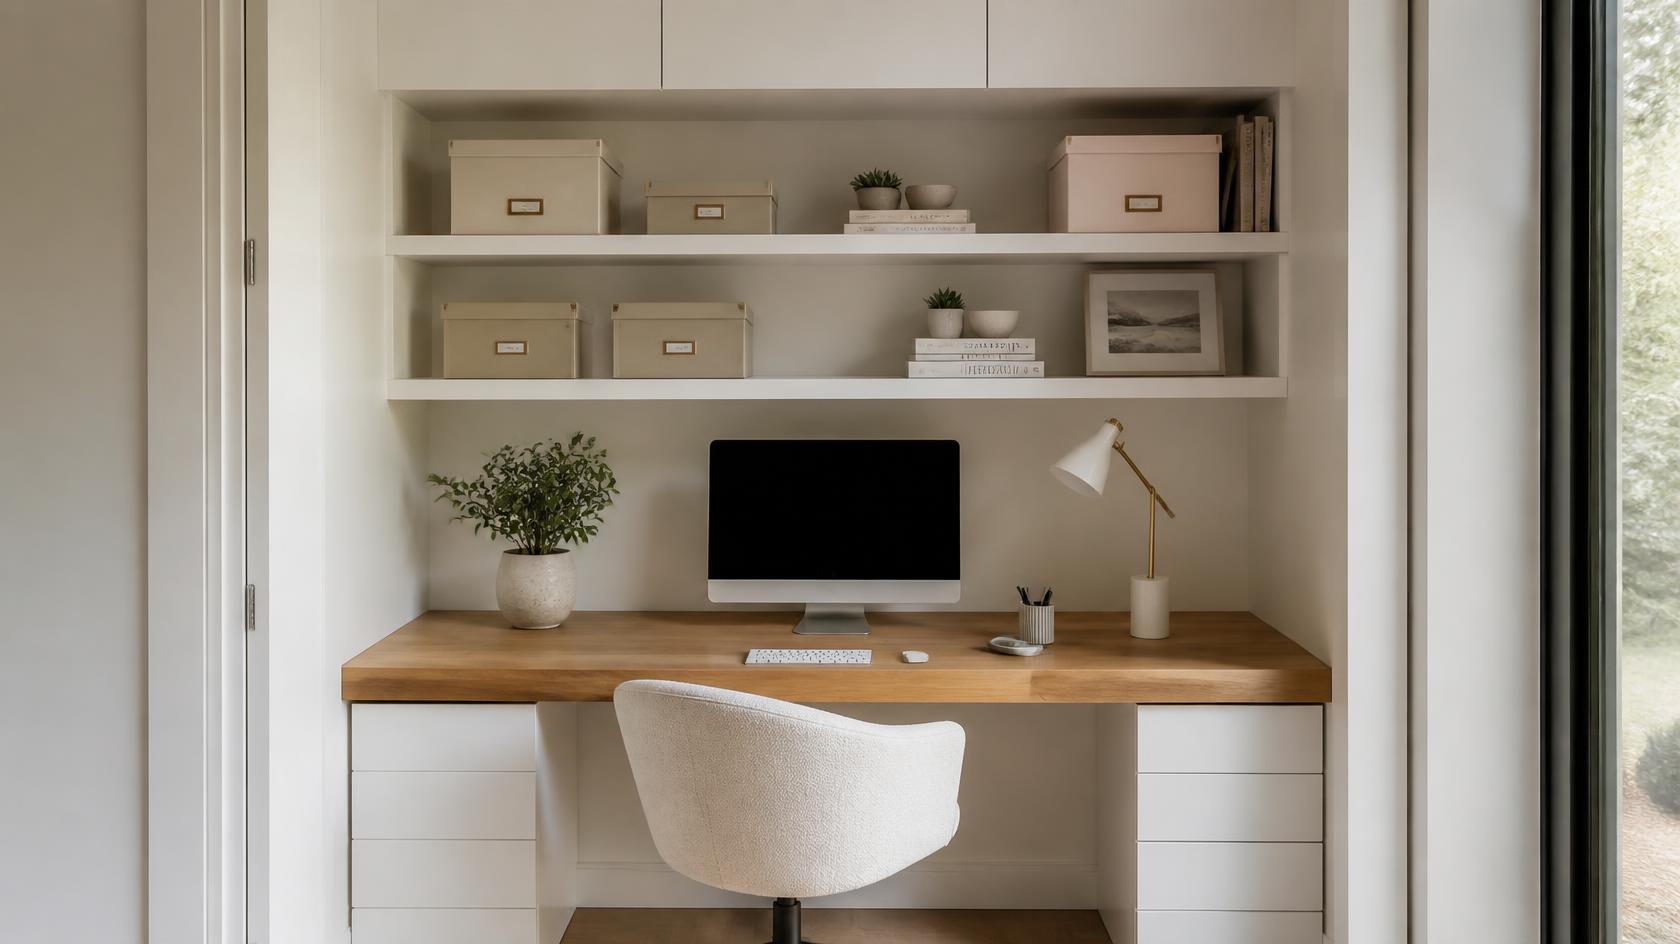
A home office closet, often called a "cloffice" , is a built-in workspace integrated inside a converted reach-in or walk-in closet. By retrofitting closet space with a floating desk surface, custom upper shelving, built-in task lighting, and integrated wire management, it provides a quiet, fully functional remote workspace that can be completely hidden away behind closed bi-fold, pocket, or sliding doors.

What Is a Home Office Closet and How Does a Cloffice Work?

A home office closet is a dedicated work environment engineered within an existing closet niche, converting underutilized hanging space into an ergonomic work area. It incorporates a reinforced desktop, built-in upper storage, accessible power outlets, and task lighting. When the workday ends, doors close to hide office clutter and preserve living space.

Remote work and hybrid schedules have forced homeowners to find creative ways to fit productive workspaces into guest bedrooms, hallways, and living spaces. Squeezing a bulky commercial desk into a bedroom disrupts the room's aesthetic and leaves work equipment on display 24/7.

Converting a closet into a desk space solves this spatial overlap cleanly. By taking advantage of recessed architectural alcoves, a home office closet provides vertical storage for monitors, printers, and filing without encroaching on room floor space. It delivers psychological boundaries for remote workers: when you close the closet doors at 5:00 PM, your work disappears completely from view.

How Do I Choose the Best Home Office Closet Layout for My Space?

Choosing the best home office closet layout depends on closet depth, door opening style, and technical equipment needs. Shallow reach-in closets thrive with straight floating desk runs, standard 24-inch deep closets accommodate keyboard trays and dual monitors, and small walk-ins support L-shaped built-in wrap-around desks.

Home Office LayoutBest Suited ForTypical Setup
Floating Desk SetupShallow Reach-In ClosetLaptop, writing space, and light office use
Built-In WorkstationStandard Reach-In ClosetDesktop or dual-monitor setup, drawers, and upper storage
L-Shaped Walk-In OfficeWalk-In ClosetLarger workstation, multiple monitors, printer, and file storage
Fold-Down DeskCompact Closet or NicheLaptop or tablet use and occasional work

Shallow Reach-In Closet Conversions

Shallow closets (under 20 inches deep) require smart spatial adjustments. Using a pull-out keyboard tray or an adjustable drop-leaf desk flap provides necessary legroom without letting desktop equipment hit the closet doors when closed. Upper shelving handles books and vertical storage.

Standard 24-Inch Built-In Desk Setup

A standard reach-in closet offers roughly 24 inches of depth and 4 to 6 feet of width—the sweet spot for an ergonomic workstation. This footprint supports a 30-inch high desktop, dual 27-inch monitor arms mounted to back wall studs, and upper built-in cabinetry for hidden printers and paper storage.

Walk-In Closet "Cloffice" Suites

In larger walk-in closets, you can dedicate one wall to clothing storage while converting an end wall into a built-in office station. This setup creates a private workspace away from main household noise, ideal for video conferencing calls.

What Are the Most Important Dimensions for a Home Office Closet?

The essential dimensions for a comfortable home office closet include a desktop height of 28 to 30 inches from the floor, a minimum desk depth of 20 to 24 inches for screen clearance, a minimum width of 36 inches, and upper shelves positioned at least 18 to 22 inches above the work surface.

Key ergonomic dimensions to keep in mind when planning your built-in desk setup include:

  • Desktop Surface Height: Standard seated height is 29 inches from the finished floor to the top of the desk.
  • Knee Clearance Depth: Ensure at least 18 to 22 inches of open legroom under the desk to allow normal office chair movement.
  • Upper Shelf Clearance: Position your lowest upper shelf 18 to 20 inches above the desktop surface to clear monitor arms and laptop screens cleanly.
  • Monitor Viewing Distance: Maintain 20 to 28 inches between your seating position and the display screen to minimize eye strain.

How Much Does a Home Office Closet Cost?

A custom home office closet typically costs between $1,000 and $15,000+, depending on the size of the space, cabinetry, materials, lighting, electrical work, and level of customization. Basic closet office setups generally start around $1,000 to $2,500, while custom built-in home offices typically range from $2,500 to $6,000. Premium designs with custom cabinetry, integrated lighting, concealed wiring, specialty storage, and high-end finishes can cost $6,000 to $15,000 or more.

Home Office TypeTypical Installed CostTypical Features
Basic Closet Office Setup$1,000–$2,500Work surface, open shelving, basic storage, and cable management
Custom Built-In Home Office$2,500–$6,000Custom desktop, cabinetry, soft-close drawers, shelving, integrated cable management, and task lighting
Premium Custom Home Office$6,000–$15,000+Premium cabinetry and finishes, integrated LED lighting, concealed wiring, built-in outlets, specialty storage, and custom hardware

Major Cost Drivers Explained

  1. Electrical Work: Hardwiring new duplex electrical outlets, USB-C grommet ports, and dedicated circuit breakers into an interior closet wall typically adds $300 to $800 in electrician labor.
  2. Door Configurations: Keeping original hinged doors saves money. Swapping them for space-saving bi-fold, pocket, or sliding barn doors adds hardware and labor expenses.
  3. Desktop Materials: Thermally fused laminate provides durable, scratch-resistant desk surfaces at lower price points, while solid butcher block, stained oak, or quartz tops increase material costs.

Home Office Closet vs. Traditional Spare Room Office: Which Is Better?

A home office closet is better for preserving dedicated guest bedrooms, keeping living areas uncluttered, and forcing minimalist organization. A traditional spare room office provides superior floor space and acoustic isolation, but consumes an entire bedroom that could otherwise serve family or guest needs.

Comparison FactorHome Office ClosetSpare Room Office
Space RequiredUses an existing closet or compact areaRequires a dedicated room
Ability to Conceal WorkspaceCan often be hidden behind doorsWorkspace typically remains visible
Room FlexibilityPreserves other rooms for additional usesUses a room primarily as an office
Storage IntegrationCustom shelving and cabinetry can be built around the workspaceStorage depends on furniture or built-ins selected
PrivacyDepends on closet size, location, and doorsTypically offers greater separation and acoustic privacy

Converting an unused reach-in closet in a secondary guest room preserves the bed and floor space for visitors. Rather than maintaining a full room that sits empty 90% of the time, the home office closet handles daily work routines quietly without taking over the living area.

What Are Common Home Office Closet Design Mistakes to Avoid?

The most common home office closet design mistakes include neglecting electrical power placement, selecting an ill-fitting chair that blocks door clearance, installing insufficient task lighting, ignoring cord routing management, and failing to account for proper air circulation inside closed spaces.

  • Forgetting In-Closet Power Outlets: Relying on extension cords running out of the closet opening creates tripping hazards and prevents doors from closing flat.
  • Overlooking Chair Storage Clearance: Standard office chairs with wide 5-star wheeled bases often fail to fit inside shallow closets when doors are closed. Choose low-profile arms or dedicated tuck-in task seating.
  • Inadequate Work Lighting: Standard single overhead closet bulbs cast harsh shadows directly onto your keyboard. Recessed undertone LED strip lighting keeps the desk surface bright.
  • Trapping Heat with Closed Doors: Running desktop computers or heavy monitors inside tight closets generates heat. Installing a ventilated door panel or subtle quiet exhaust fan keeps hardware cool.
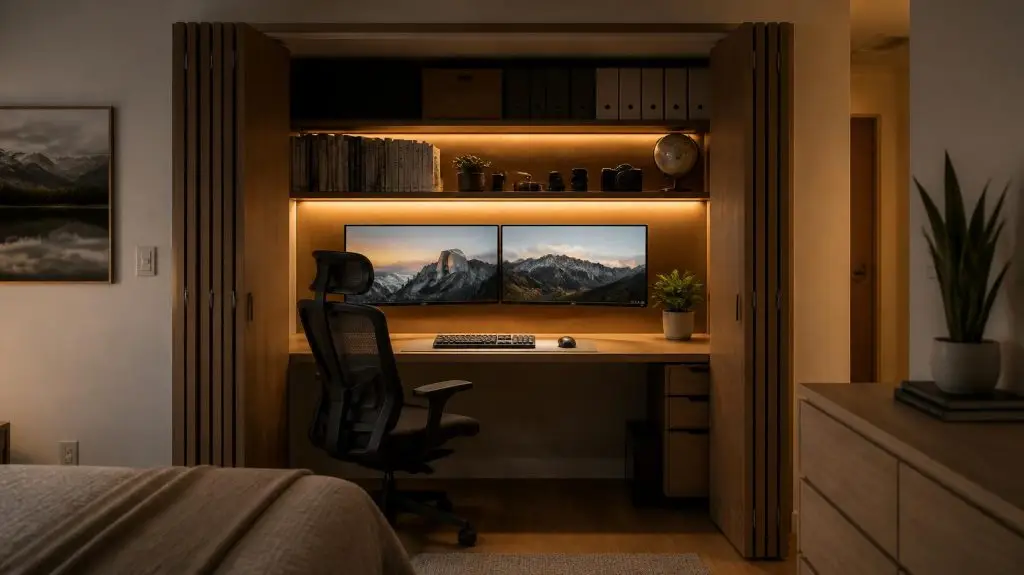
compact cloffice home office closet

Step-by-Step Guide: How to Build a Functional Home Office Closet

To build a functional home office closet, remove original clothes rods, repair drywall, install accessible wall power outlets, mount a solid desktop at 29 inches, add adjustable upper shelving for storage, and run concealed cable management tracks.

  1. Clear and Prepare the Space: Remove all existing wire racks, clothes rods, and trim. Patch drywall holes, sand smooth, and paint the interior a light, light-reflecting color.
  2. Rough-In Electrical Lines: Hire a licensed electrician to run box outlets directly above desk height (32 inches) and below desk level (18 inches) for clean power routing.
  3. Mount Desktop Support Cleats: Anchor 1x2-inch solid wood cleats into wall studs along the back and sides of the closet to create a stable perimeter support for your main desk surface.
  4. Install Main Desktop: Place your chosen butcher block or custom laminate desktop surface onto the cleats, securing it from underneath with heavy-duty screws.
  5. Add Adjustable Upper Shelving: Install vertical track standards onto wall studs to support upper shelves for books, printers, and decorative accent lighting.
  6. Route Cables and Mount Lighting: Drill desktop grommet holes for monitor cables, mount under-shelf LED lighting bars, and secure power strips beneath the desk deck.

Expert Tips for Cable Management and Lighting in Small Workstations

For cable management in small closet workstations, install an under-desk cable tray, use grommet desk holes, run adhesive channel raceways along back wall corners, and combine 3000K under-shelf LED strip lighting with glare-free monitor light bars.

LightingCable Management
Integrated task lightingDesktop cable grommets
Under-shelf LED lightingConcealed cable channels
Adjustable lighting controlsIntegrated or concealed power access

Small spaces amplify visual mess. Loose laptop chargers, monitor cables, and surge protectors quickly destroy the clean look of a converted workstation. Securing a heavy-duty metal cable tray directly beneath the desktop hides power bricks off the floor.

For lighting, avoid floor lamps that take up precious legroom. Mount continuous LED channel lighting under your lower storage shelf to cast warm, even light across the keyboard area without reflecting off display monitors.

Frequently Asked Questions About Home Office Closets

Can you close closet doors with a computer monitor inside?

Yes, as long as your closet shelf depth is at least 20 to 24 inches or you use adjustable monitor arms that push screens flat against the back wall. Measure screen depth and monitor stand dimensions before building shelves.

What type of doors are best for a home office closet?

Bi-fold doors, sliding pocket doors, and double French doors work best. Bi-fold and pocket doors pull completely out of the way to leave side clearance for your office chair, whereas standard sliding bypass doors always block half of the workspace opening.

How do I get electrical power into a closet for an office?

Power should be brought into the closet by extending a circuit from an adjacent bedroom wall outlet. A licensed electrician can cut a box opening inside the closet wall and pull power safely behind the drywall.

Is a home office closet ergonomic for full-time remote work?

Yes, provided you maintain standard ergonomic heights: a 29-inch desk height, an adjustable task chair, eye-level monitor positioning, and sufficient leg clearance beneath the main desktop.

What is a cloffice and how much space do you need for one?

A cloffice (a combination of "closet" and "office") is a space-saving workstation built inside a converted reach-in or walk-in closet alcove. To build a functional cloffice, you need a minimum closet footprint of 36 inches in width and 20 to 24 inches in depth to comfortably accommodate a desktop surface, monitor setup, and legroom.,

Can you close closet doors with a dual-monitor setup inside a cloffice?

Yes, you can completely close closet doors over a dual-monitor cloffice setup if your desk depth is at least 22 inches or if you use wall-mounted adjustable monitor arms. Articulating monitor arms allow you to push display screens flat against the back wall when the workday ends, ensuring doors glide shut cleanly.

Can I put a printer inside a home office closet?

Yes. Printers fit easily on upper shelves (15 inches or deeper) or on pull-out sliding bottom trays built below the main desk surface for easy paper loading.

How do I keep a small office closet from feeling dark and cramped?

Paint the closet interior in light satin or semi-gloss white paint to bounce light, install recessed undertone LED lighting, and consider adding an accent wall wallpaper behind your desktop for visual depth.

Do I need permission or permits to convert a closet into an office?

Cosmetic changes like adding shelves or desktops do not require permits. Adding new electrical wiring or moving structural walls may require standard local residential electrical permits.

What is the minimum desk width needed for a home office closet?

The absolute minimum functional desk width is 32 to 36 inches for a single laptop setup. A comfortable dual-monitor setup requires a width of 48 to 60 inches.

How do you vent heat out of a closed office closet?

You can install louvered wood doors that allow passive airflow or mount a quiet USB-powered intake/exhaust fan trim kit along the upper cabinet crown molding.

Does converting a bedroom closet into a cloffice hurt home resale value?

No, a well-designed cloffice does not hurt resale value, especially when built with modular or adjustable shelving tracks. Modern homebuyers highly value flexible multi-purpose spaces. As long as the desktop and shelving can easily revert back to traditional clothes hanging storage, a cloffice is viewed as a valuable home feature.

Transform Your Living Space with Custom Workstation Storage

Designing a functional home office closet requires balancing structural support, wire routing, and sleek interior integration. Whether you are converting a small guest room reach-in closet into a cozy daily workstation or building an extensive walk-in suite office, expert craftsmanship ensures every inch works efficiently. Explore tailored built-in workspace options, primary suite storage ideas, and custom home office designs at Clear Closets to create a home where productivity and living space coexist seamlessly.
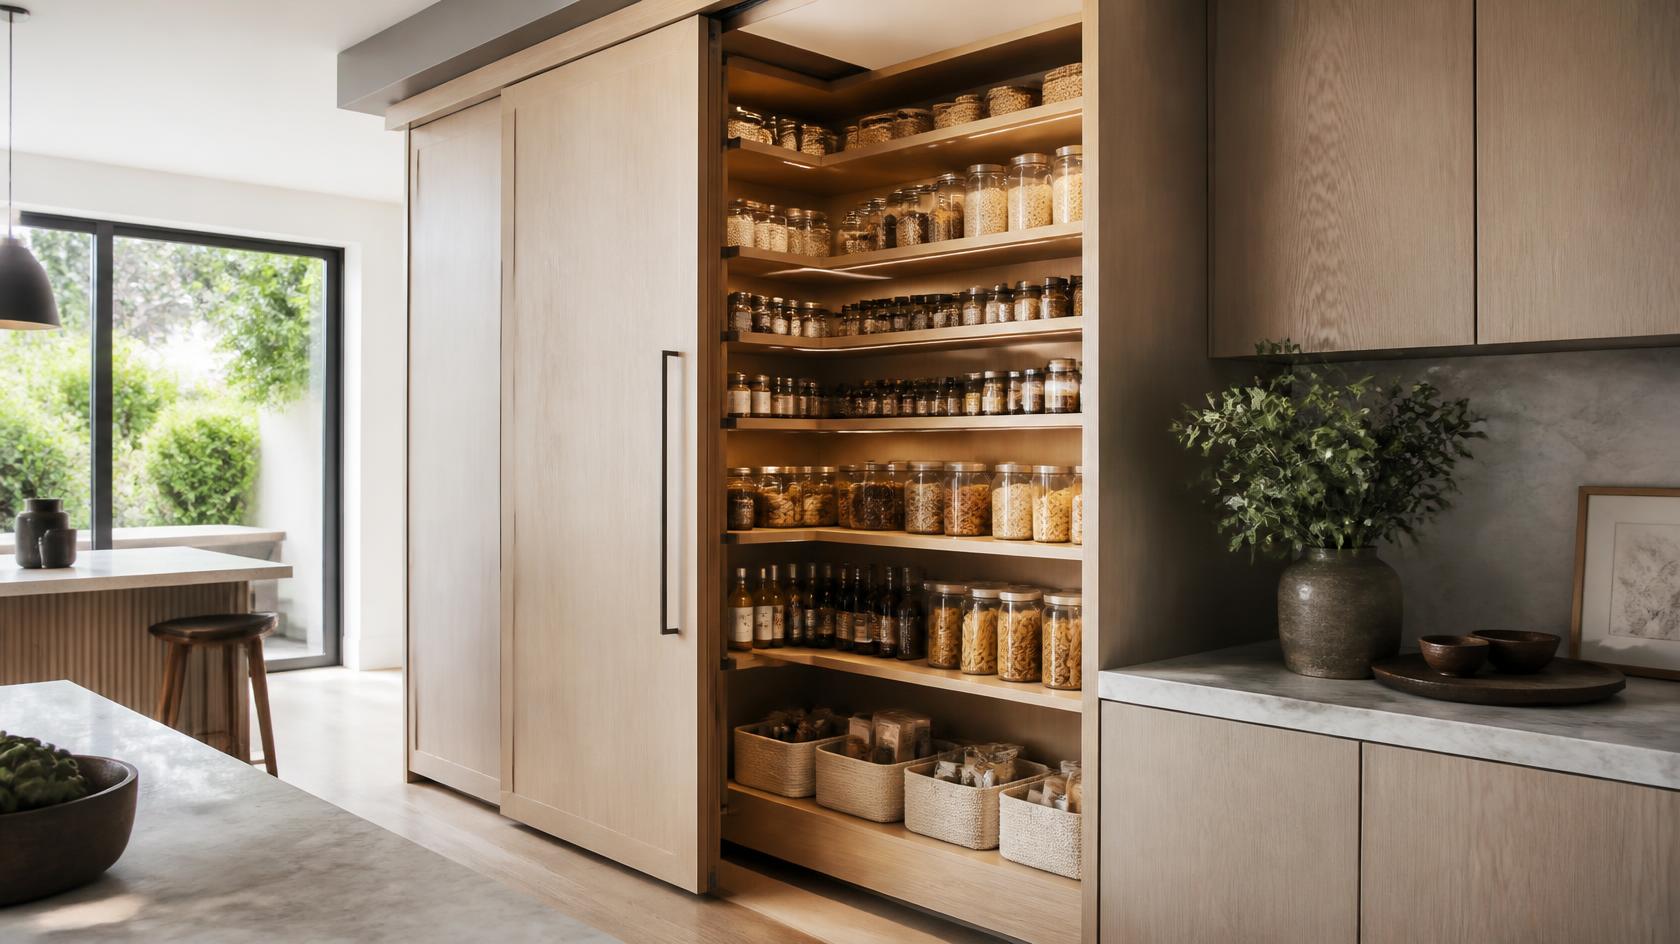
Sliding Pantry Ideas for a More Organized Kitchen

Sliding Pantry Ideas for a More Organized Kitchen

A sliding pantry, also known as a pull-out pantry, is a specialized kitchen cabinet mechanism featuring full-extension sliding tracks that pull entire vertical shelving units forward. Designed to fit into narrow gaps or full-height tall cabinets, a sliding pantry provides complete 360-degree visibility and side access to dry goods, spices, and small appliances without requiring deep cabinet digging.

What Is a Sliding Pantry and How Does It Improve Kitchen Efficiency?

A sliding pantry is a space-saving cabinet system engineered with heavy-duty ball-bearing glides or soft-close runners that extend vertical shelves entirely out of a cabinet wall. Unlike traditional deep stationary shelves where canned goods get lost in dark corners, sliding pantries bring food items directly to the cook, maximizing storage density and reducing food waste.

In traditional kitchen cabinets with deep, fixed shelves (typically 24 inches deep), items stored toward the back frequently go forgotten until long after their expiration dates. Reaching into lower or upper cabinet depths requires uncomfortable crouching or stooping, creating daily kitchen friction during meal preparation.

Installing a sliding pantry replaces static depth with full-extension movement. By pulling the entire cabinet contents forward into the open kitchen space, homeowners gain immediate visual access to both sides of every shelf. This spatial accessibility streamlines grocery unpacking, meal preparation, and inventory management, making it an essential upgrade for modern kitchen renovations.

How Do I Choose the Best Sliding Pantry Design for My Kitchen Layout?

Choosing the best sliding pantry design depends on available cabinet width, total weight load requirements, and existing kitchen floor plan constraints. Narrow 6-to-12-inch gap pull-outs utilize awkward spaces next to refrigerators, full-height tall cabinet pull-outs maximize vertical storage, and base cabinet sliding drawers improve under-counter accessibility.

Sliding Pantry TypeTypical Cabinet WidthBest For
Narrow Pull-Out Pantry6–12 in.Spices, oils, canned goods, and baking supplies
Full-Height Pull-Out Pantry15–30 in.Dry goods, packaged foods, and larger pantry items
Base Cabinet Pull-Out Shelves18–36 in.Pots, pans, small appliances, and heavier kitchen items
Swing-Out Pantry System24–36 in.High-capacity storage with easier access to multiple shelf levels

Slim Gap Pull-Out Racks

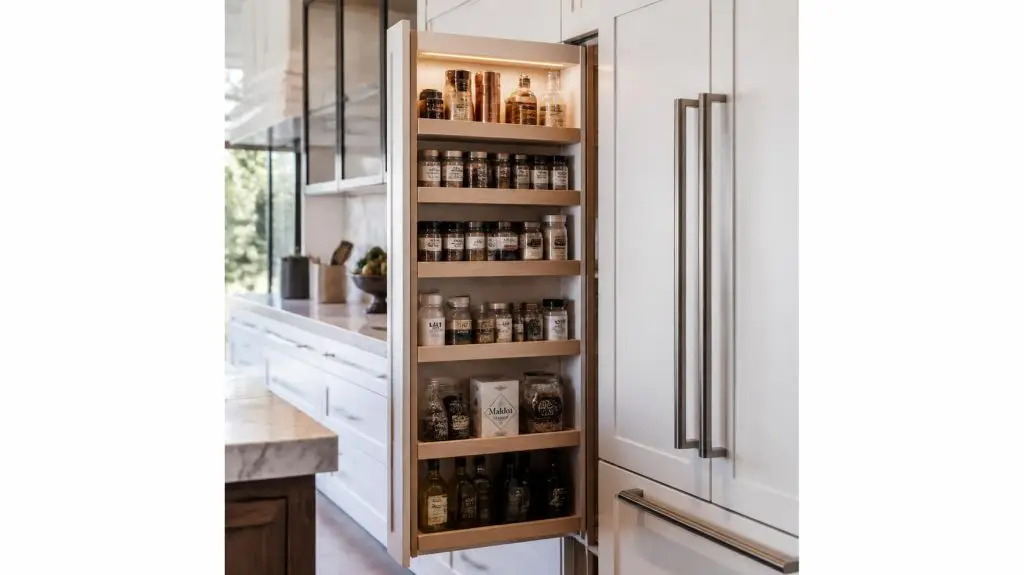
The 6-to-12-inch gap between a refrigerator and surrounding cabinetry often sits unused. Installing a narrow slim pull-out sliding pantry turns this tight architectural nook into high-density storage for spice jars, oils, vinegars, and rolled baking paper.

Full-Height Tall Cabinet Pull-Outs

For primary kitchen pantry walls, a full-height tall cabinet sliding system utilizes full floor-to-ceiling space. Heavy-duty bottom slides handle up to 250 pounds of canned goods, dry grains, and bottled beverages, extending smoothly with soft-close dampening.

Individual Sliding Drawer Trays

Rather than pulling out a single tall structure, built-in individual sliding drawers (roll-out shelf trays) allow you to pull out one specific tier at a time behind traditional cabinet doors. This reduces the weight you move during routine cooking tasks.

What Are the Best Features to Include in a Custom Sliding Pantry?

The best features for a custom sliding pantry include adjustable shelf heights, soft-close heavy-duty glides, solid wood or anti-slip bottom surfaces, chrome or matte black guardrails, and integrated door-mounted storage racks. These components ensure smooth operation, prevent tipping, and maximize internal volume.

  • Heavy-Duty Soft-Close Glides: Quality runners prevent heavy pull-out units from slamming or shaking, protecting delicate glass jars and liquid containers from tipping over.
  • Solid Bottom Trays with Anti-Slip Liners: Smooth solid wood or melamine shelf bases are far easier to clean than open wire mesh shelves, preventing small spice bottles from wobbling.
  • Adjustable Shelf Intervals: Footwear-like height variations exist in groceries; adjustable shelf brackets allow you to raise or lower tiers for tall cereal boxes or short tuna cans.
  • Full-Extension Ball-Bearing Tracks: Full extension ensures the rearmost 3 inches of the pantry pull completely out past the cabinet face for effortless top-down viewing.

How Much Does a Sliding Pantry Cost to Install?

A sliding pantry installation costs between $350 and $2,800 on average. Retrofitting an existing cabinet with prefabricated sliding metal rack kits costs between $200 and $600, while custom built-in wood pull-out pantries with soft-close commercial hardware range from $1,200 to $3,500+.

Pantry SolutionTypical Installed CostTypical Features
Retrofit Pull-Out System$300–$800Pull-out baskets or shelves, sliding hardware, and installation within an existing cabinet
Semi-Custom Pull-Out Pantry$800–$2,000Wood or premium laminate shelving, soft-close slides, and customized storage configurations
Fully Custom Sliding Pantry$2,000–$5,000+Custom cabinetry, premium hardware, full-extension slides, integrated storage accessories, and optional lighting

Key Cost Considerations

  1. Hardware Load Capacity: Standard slide hardware rated for 75 lbs is budget-friendly. Heavy-duty commercial slides rated for 200+ lbs increase hardware costs but prevent shelf sagging over time.
  2. Cabinet Millwork Adjustments: Modifying existing cabinet faces or installing custom-matched cabinet door panels adds custom carpentry labor costs.
  3. Material Selection: Steel wire basket inserts offer economical utility, whereas solid maple, walnut, or lacquer-finished tray boxes require higher material investments.
narrow custom pull-out spice sliding pantry

Metal Wire Pull-Outs vs. Solid Wood Sliding Shelves: Which Is Better?

Solid wood sliding shelves are superior for overall stability, ease of cleaning, preventing small bottle tipping, and luxury kitchen aesthetics. Metal wire pull-out racks offer lower upfront costs and improved air circulation, but allow small items to tip sideways and let flour or sugar spills drop down to lower tiers.

Comparison FactorSolid Wood Pull-Out ShelvesMetal Wire Pull-Out Racks
Small-Item StorageSolid surface supports small containers easilySmaller items may require bins or liners
Spill ManagementSolid surface contains spills more effectivelyOpen construction allows spills to pass through
Weight CapacityVaries by construction and slide hardwareVaries by rack design and hardware
AppearanceFurniture-like, integrated cabinetry lookLightweight, functional appearance
CostTypically higherTypically more affordable

While wire racks are widely available in big-box retail stores, homeowners frequently find that small spice bottles, baking powder tins, and packet boxes tip sideways between wire gaps. Solid-bottom pull-out trays lined with washable mats keep pantry items upright and contain accidental liquid drips safely.

What Are Common Sliding Pantry Design Mistakes to Avoid?

The most common sliding pantry design mistakes include overloading slide mechanisms past weight ratings, failing to account for door hinge clearance, installing fixed shelf heights that waste vertical space, choosing cheap non-soft-close tracks, and neglecting side-rail heights needed to prevent tall items from falling.

  • Ignoring Door Hinge Clearance: Installing pull-out drawers inside traditional cabinet doors without offset spacer blocks causes sliding hardware to scrape against cabinet door hinges.
  • Exceeding Weight Capacities: Stacking dozens of glass jars and heavy flour bags on light-duty slides causes tracks to bind, grind, or fail prematurely.
  • Low Side Guardrails: Using shallow 1-inch tray lips on high-tier pull-outs allows tall oil bottles or cereal boxes to tip over the side when the pantry is pulled open quickly.
  • Fixed Shelf Heights: Installing rigid, non-adjustable sliding tiers prevents you from reconfiguring storage space as grocery buying habits change.

Step-by-Step Guide: How to Organize a Sliding Pantry for Maximum Efficiency

To organize a sliding pantry effectively, place heavy cans and liquid bottles on bottom tiers, group cooking essentials at waist level, store lightweight boxed goods on upper shelves, use clear airtight containers, and label shelf zones clearly.

  1. Audit and Group Pantry Items: Empty all cabinet contents. Group items into clear categories: baking supplies, canned goods, breakfast grains, oils/sauces, and snacks.
  2. Assign Tiers Based on Item Weight: Place heavy items (beverage cases, flour sacks, large oil jugs) on the bottom sliding tier to keep the center of gravity low and stable.
  3. Establish Daily Prep Zones: Position high-frequency ingredients—such as cooking oils, salt, pepper, and primary spices—on middle shelves located between waist and chest height.
  4. Decant Dry Goods into Clear Bins: Transfer flour, sugar, rice, and pasta into uniform square or rectangular clear acrylic containers. Square containers eliminate wasted rounded gaps on sliding shelves.
  5. Install Side Guard Railings or Dividers: Use adjustable wooden or acrylic shelf dividers to keep narrow spice bottles from sliding around during movement.
  6. Label Tier Edges: Apply subtle labels on shelf edges so family members return groceries to their designated zones consistently.

Expert Tips for Maintaining Pull-Out Hardware and Smooth Glides

To maintain pull-out hardware, clean track channels twice a year using a dry vacuum brush, apply dry silicone lubricant spray to ball bearings, tighten mounting screws annually, and avoid hanging heavy bags on extended pantry frames.

Pull-Out Pantry Maintenance:

Clean the Tracks
Vacuum dust and debris as needed.

Check the Hardware
Inspect mounting screws and slide alignment periodically.

Lubricate When Needed
Use only the lubricant recommended by the hardware manufacturer.

Avoid Overloading
Stay within the manufacturer’s specified weight capacity.

Kitchen pantries collect flour dust, sugar grains, and stray crumbs over time. When loose debris falls into lower slide tracks, it mixes with factory grease, creating a thick sludge that causes drawers to stick or roll unevenly.

Avoid spraying wet WD-40 or heavy grease into cabinet tracks, as this attracts dirt. Instead, vacuum channels thoroughly using a narrow crevice tool, wipe rails clean with a microfiber cloth, and apply a light coat of dry PTFE silicone spray lubricant to maintain a effortless glide.

Frequently Asked Questions About Sliding Pantries

What is the minimum cabinet width needed for a sliding pantry?

The absolute minimum functional cabinet width for a sliding pantry is 6 inches for narrow spice pull-outs. For general dry food pantry storage, a minimum width of 12 to 15 inches is recommended.

Can you add sliding pull-out shelves to existing kitchen cabinets?

Yes. You can retrofit existing static cabinets by installing aftermarket sliding shelf kits or custom-measured wood roll-out trays mounted directly to the cabinet floor or interior side walls.

How much weight can a full-height sliding pantry hold?

Weight capacity varies by hardware grade. Standard residential pull-out pantries hold 75 to 100 pounds, while heavy-duty commercial soft-close slide systems handle 200 to 250 pounds safely.

Are pull-out pantries better than standard pantry shelves?

Yes, pull-out pantries are vastly superior for accessibility, organization, and visibility. They bring items stored at the back out into the open, eliminating dark corners and reducing forgotten expired food.

How do you keep items from falling off sliding pantry shelves?

Prevent items from falling by choosing trays with raised side guardrails (at least 3 to 4 inches high), using anti-slip shelf liners, and packing items snugly using square clear storage containers.

What is the difference between a pull-out pantry and a roll-out shelf?

A pull-out pantry features one single connected vertical frame where all shelves move forward together when pulled. Roll-out shelves are individual sliding drawers mounted behind traditional cabinet doors that pull out one at a time.

How deep should a kitchen sliding pantry cabinet be?

Standard kitchen base and tall pantry cabinets are 24 inches deep. Sliding pantry hardware is designed specifically to utilize this full 24-inch depth efficiently.

Do sliding pantries waste cabinet space on the sides?

Sliding pantries lose approximately 1 to 1.5 inches of total horizontal width to accommodate side glide tracks and cabinet side clearance, but they gain far more usable volume by utilizing full cabinet depth.

How do you clean behind a full-height sliding pantry?

Most modern soft-close sliding pantries feature quick-release lever clips on the bottom slide tracks. Pressing these clips allows you to disconnect and slide the entire shelf frame out of the cabinet frame for thorough cleaning.

What wood is best for custom sliding pantry drawers?

Solid maple, birch plywood with hardwood edge banding, and high-density Baltic birch are the premier materials for sliding pantry drawers due to their dimensional stability, smooth finish, and screw-holding strength.

Enhance Your Kitchen Storage with Custom Cabinetry Solutions

Creating an efficient, stress-free kitchen relies on clever spatial engineering and smooth, durable hardware integration. Whether you want to turn an awkward narrow gap into a high-capacity spice pull-out or outfit your main kitchen with a full-height luxury sliding pantry wall, custom craftsmanship ensures every inch serves a purpose. Explore full-home storage ideas, custom kitchen pantry integration, and master layout solutions at Clear Closets to build a home designed around your daily life.

Custom Shoe Closet Ideas for Better Storage, Shelving & Design

Custom Shoe Closet Ideas for Better Storage, Shelving & Design

A shoe closet is a dedicated, custom-designed storage space engineered to organize, protect, and display footwear efficiently. Utilizing tailored adjustable shelving, angled display racks, integrated LED lighting, and pull-out trays, a modern shoe closet maximizes vertical space while preserving shoe shape and quality. It transforms messy floors into accessible, luxury storage suited for walk-in suites, master bedrooms, and entryway mudrooms.

What Is a Shoe Closet and Why Do You Need One?

It is a specialized storage system designed specifically to accommodate various footwear styles—from high heels and knee-high boots to low-profile sneakers—while keeping them accessible, visible, and protected from wear, dust, and crushing. Unlike standard flat closet shelving, dedicated shoe closets utilize specialized depths, angled displays, and adjustable components to maximize spatial efficiency.

CUSTOM SHOE CLOSET SYSTEM

Vertical ShelvingAngled Display ShelvesBoot & Tall Shoe Storage
Maximizes vertical spaceImproves visibility and presentationProvides proper clearance for taller footwear

Better Visibility • Easier Access • Proper Shoe Care

When footwear is piled on bedroom floors or squeezed into generic bottom shelves, shoes lose their shape, suffer material scuffs, and create visual clutter. Installing a dedicated shoe storage solution fundamentally changes your daily routine. By elevating footwear to eye level and utilizing tailored compartments, homeowners save time during morning routines while drastically extending the lifespan of high-end leather, suede, and athletic footwear.

Beyond mere functionality, custom footwear storage serves as an architectural highlight within modern home designs. Incorporating dedicated footwear displays into master suites or luxury walk-in closets creates a boutique-style atmosphere. It bridges the gap between everyday utility and high-end interior design, turning your personal wardrobe into a organized presentation.

How Do I Choose the Best Shoe Closet Layout for My Space?

Choosing the best shoe closet layout requires evaluating your total shoe count, the specific mix of footwear heights, and your available physical footprint. Walk-in luxury closets benefit from full-height perimeter shoe walls, reach-in closets thrive with pull-out slatted racks, and entryways rely on narrow, vertical drop-down cabinet designs.

Layout TypeBest Suited ForIdeal Footwear & Use
Full Shoe WallLarge Walk-In ClosetsLarge shoe collections, heels, sneakers, and statement footwear
Pull-Out Shoe RacksReach-In Closets & Compact SpacesFlats, loafers, sneakers, and everyday shoes
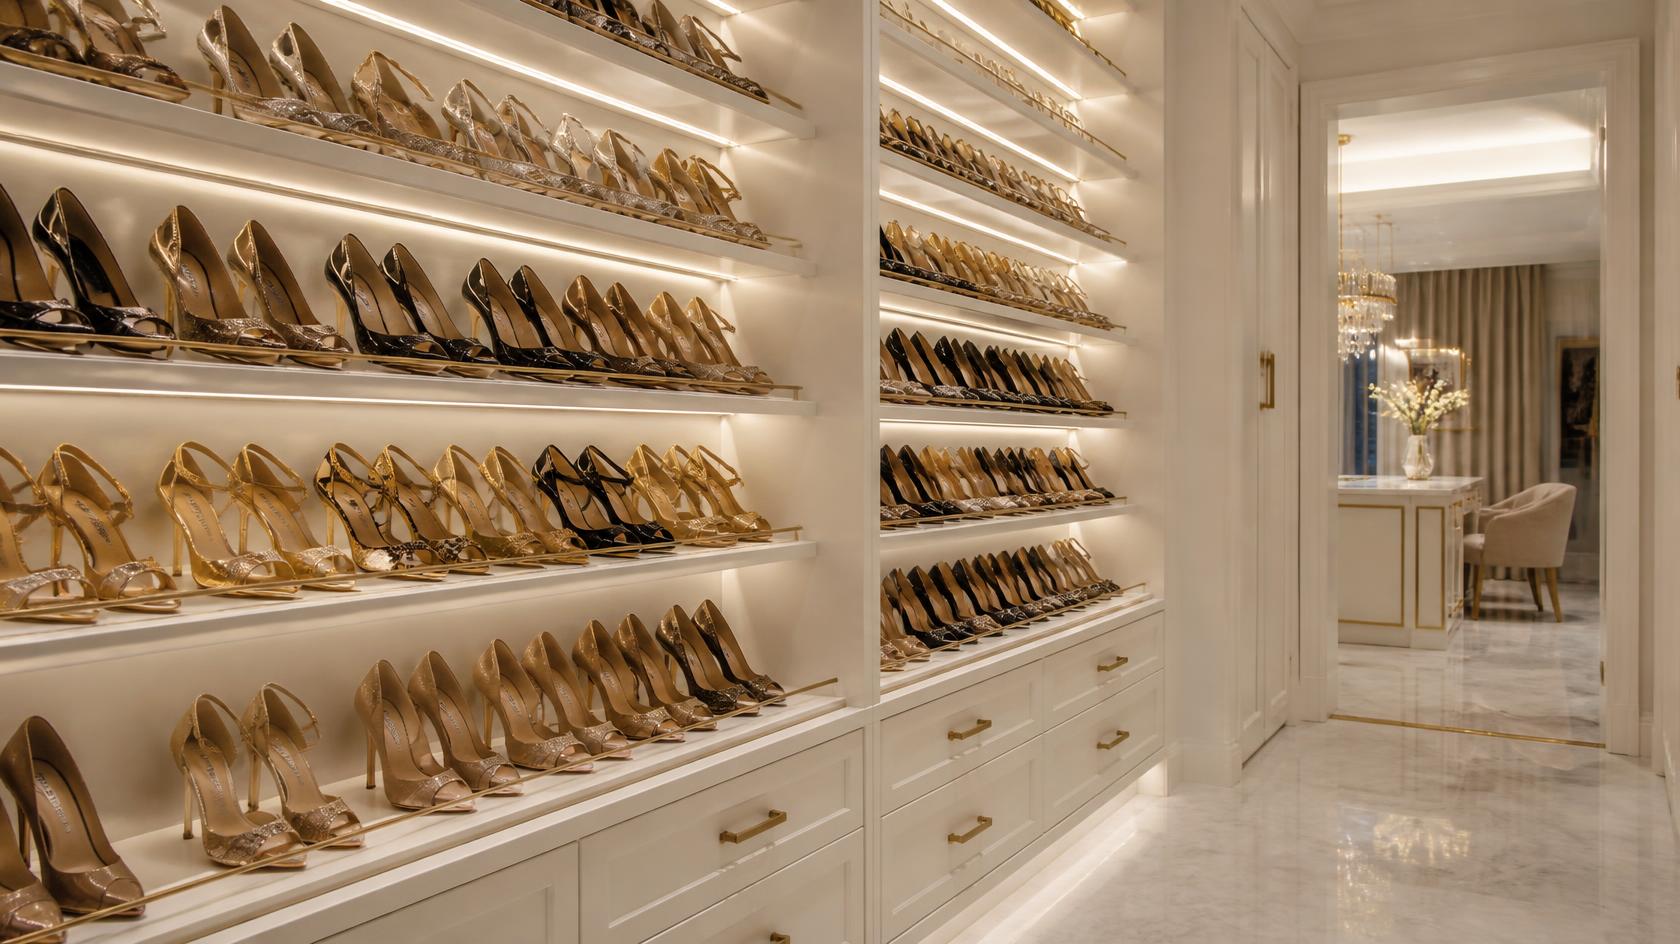
Angled Shoe ShelvingWalk-In Closets & Display AreasHeels, dress shoes, and footwear intended for display
Boot StorageWalk-In Closets, Mudrooms & EntrywaysTall boots, winter boots, and everyday boot storage

Walk-In Shoe Walls

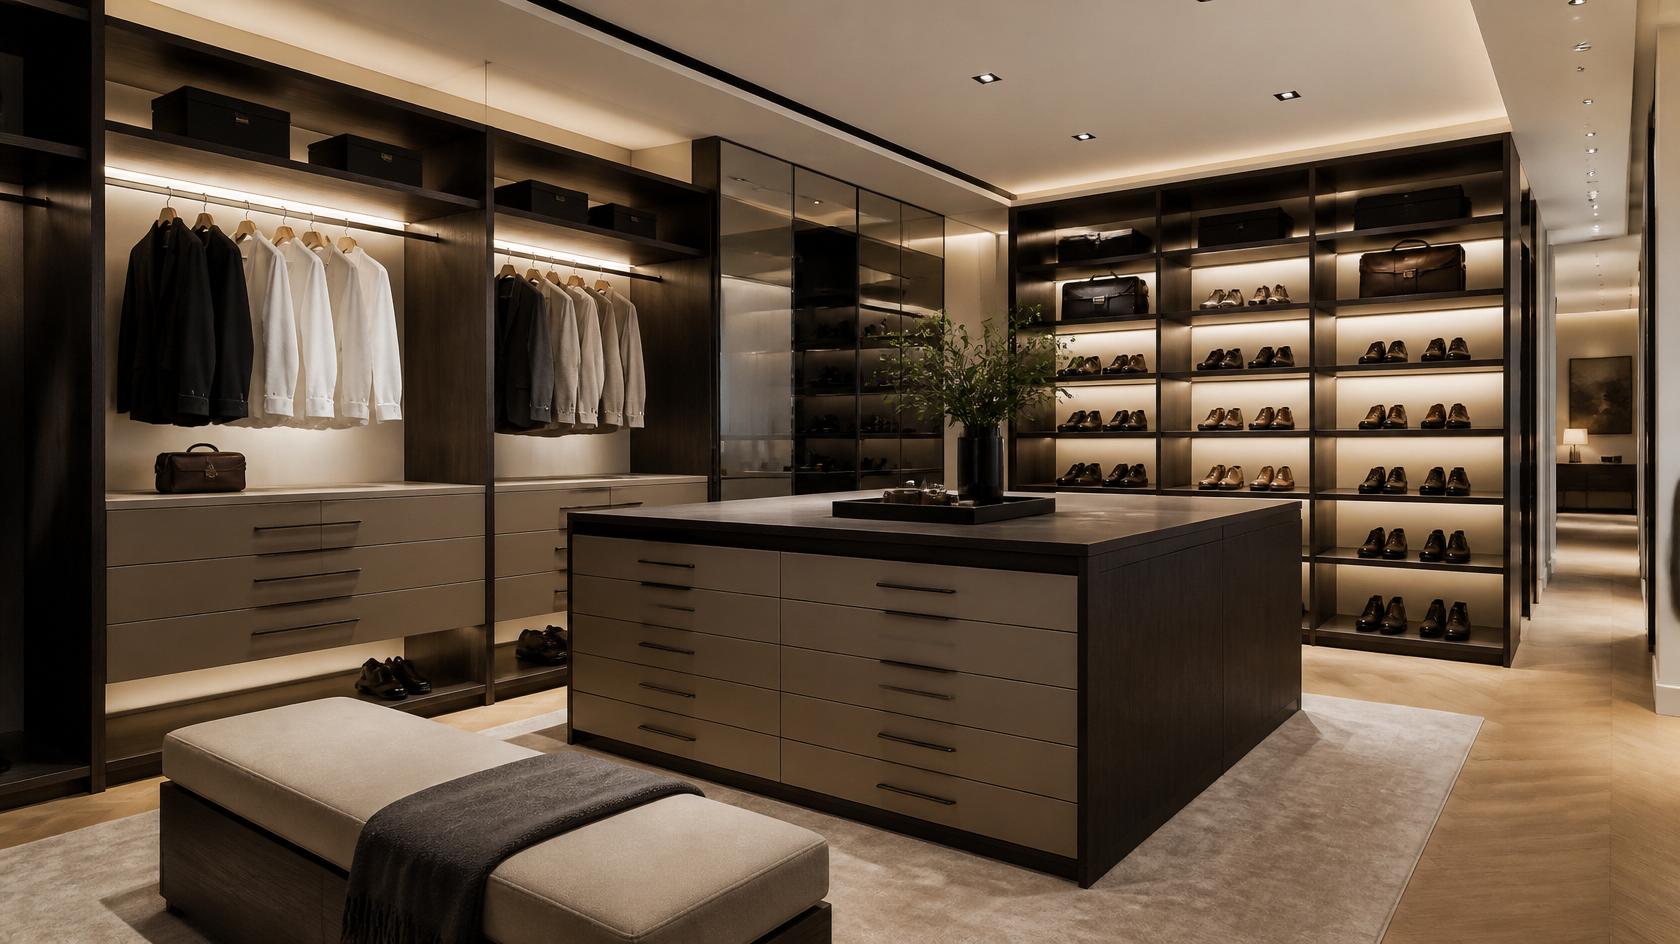
A dedicated shoe wall serves as the centerpiece of a primary bedroom walk-in suite. By utilizing full vertical height from floor to ceiling, a shoe wall provides complete visibility over your entire collection. Incorporating backlighting and adjustable shelf heights allows you to showcase statement pieces alongside daily essentials without sacrificing accessibility.

Reach-In Shoe Storage

For traditional bedroom closets with shallow depths (typically 24 inches), specialized hardware keeps footwear organized without stealing hanging space. Slatted pull-out trays, rolling drawers, and door-mounted vertical racks allow you to store shoes 2 to 3 pairs deep while keeping every item easily reachable with a smooth glide.

Entryway & Mudroom Systems

Entryway shoe organization focuses on high-traffic durability and soil management. These units utilize open cubbies for quick shoe changes, ventilated lower drop-zones, and integrated bench seating. They prevent outdoor dirt from entering main living spaces while maintaining a clean front-entry presentation.

What Are the Best Shoe Storage Features for Luxury Bedrooms?

The best luxury shoe storage features include angled display shelves with brushed metal toe stops, integrated motion-activated warm LED lighting, glass-front display cabinets, and custom velvet-lined pull-out trays. These features combine aesthetic elegance with active preservation for luxury heels, designer sneakers, and seasonal footwear.

👑 Essential Layers of Luxury Shoe Storage

  1. Micro-Suede & Velvet Pull-Out Trays Protects delicate soles and custom accessories with soft-touch lining.
  2. Angled Shelves with Metal Toe Stops Presents shoes at a 30° viewing angle while keeping them securely in place.
  3. 3000K Warm LED Strip Channel Lighting Casts indirect, shadow-free illumination across every tier.
  4. Glass-Front Enclosed Cabinets Shields high-value designer collections from ambient dust and UV exposure.

Integrating custom footwear storage into high-end bedroom suites elevates a home's aesthetic while keeping items pristine. Here are the defining elements of a luxury setup:

  • Angled Display Racks: Set at a 30-degree incline, angled shelves present shoes at the optimal viewing angle, mimicking high-end retail boutiques. Metal accent rails prevent shoes from sliding forward.
  • Integrated Strip Lighting: Recessed LED channels (3000K warm white) cast soft, indirect illumination directly onto shelves, eliminating dark shadows on lower racks.
  • Enclosed Glass Cabinets: For high-value designer collections, tempered glass-front cabinetry protects sensitive leathers and suedes from ambient dust and UV exposure.
  • Custom Boot Suspension: Tall boots often crease or flop over when left on flat surfaces. Custom hanging boot clips or built-in padded boot forms maintain shaft integrity.

How Much Does a Custom Shoe Closet Cost?

A custom shoe closet typically costs between $1,000 and $15,000+, depending on its size, materials, cabinetry, lighting, and level of customization. Simple reach-in shoe storage sits at the lower end of the range, while luxury walk-in shoe closets with premium cabinetry, glass-front displays, and integrated lighting can cost $6,000 to $15,000 or more.

Shoe Closet TypeTypical Installed CostIncluded Features
Reach-In Shoe Closet$1,000 – $2,500Durable melamine shelving, adjustable shelves, multiple shoe levels, and practical open storage.
Custom Built-In Shoe Closet$2,500 – $6,000Custom shelving, angled shoe displays, soft-close drawers, decorative hardware, and optional accent lighting.
Luxury Walk-In Shoe Closet$6,000 – $15,000+Premium cabinetry or wood finishes, floor-to-ceiling shoe displays, glass-front cabinets, integrated LED lighting, drawers, and custom accessory storage.

Key Cost Factors Explained

1. Material Choice

Thermally fused laminate (TFL) offers extreme scratch resistance and budget stability, making it popular for high-use closets. Solid hardwoods, custom stained veneers, and painted lacquer finishes represent premium investments that increase overall project costs.

2. Specialized Hardware

Standard flat shelves are economical. However, adding high-grade soft-close pull-out trays, heavy-duty glides, metal fence rails, and custom angled brackets incrementally adds to the total hardware budget.

3. Integrated Electronics

Low-voltage LED system wiring, transformer placement, touch dimmers, and motion sensors require precise millwork channel routing and electrical installation, contributing to the overall labor and material investment.

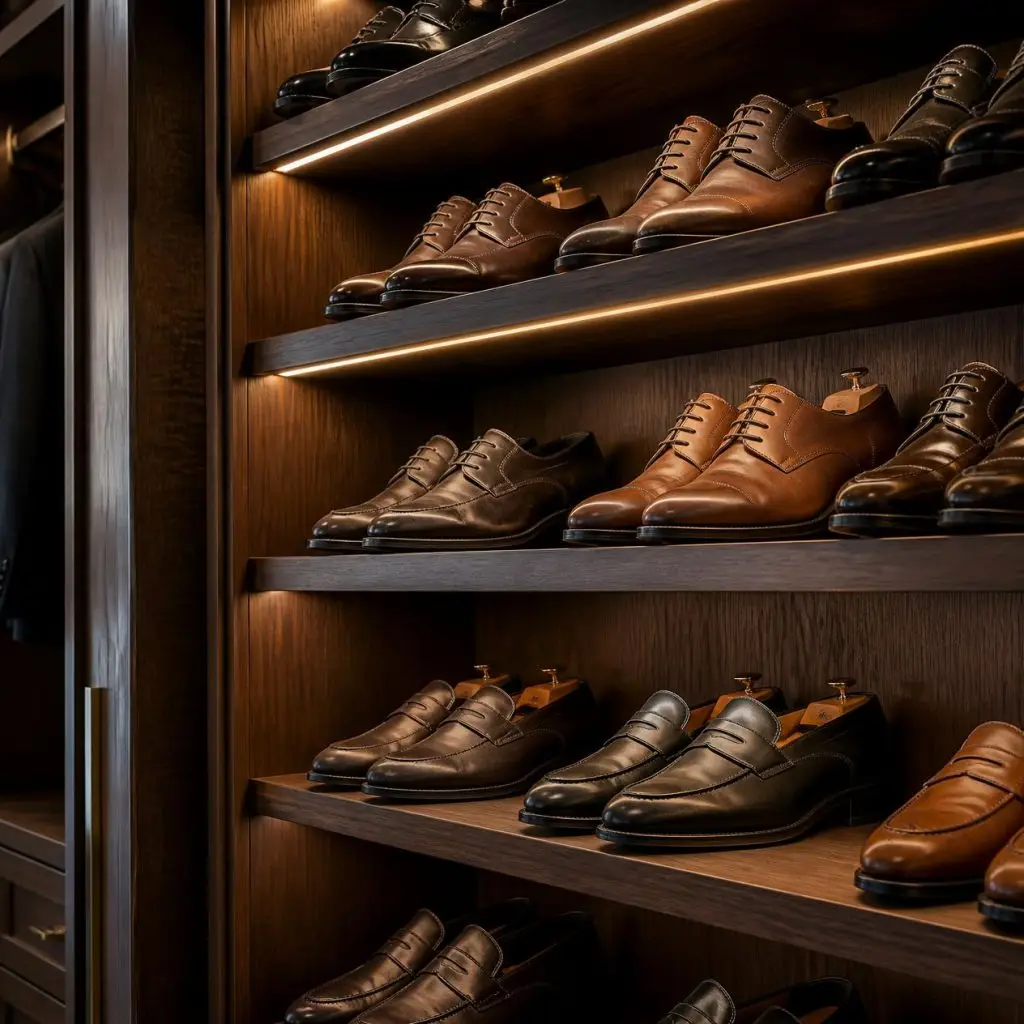
custom luxury dark shoe closet

Custom Shoe Closets vs. Pre-Made Organizers: Which Is Better?

Custom shoe closets are superior for long-term durability, exact spatial fit, weight capacity, and tailored dimensions for specific footwear collections. Pre-made organizers offer low initial costs and immediate installation, but often waste vertical space, use inferior particle board, and lack the strength required for heavy boot storage.

FeatureCustom Shoe ClosetPre-Made Organizer
Space UtilizationDesigned to fit the exact dimensions of the spaceStandard sizes may leave unused space
Shelf AdjustabilityShelving can be customized for different shoe types and heightsAdjustment options vary by system
Storage CapacityDesigned around the homeowner’s specific shoe collection and storage needsLimited to predetermined configurations
Materials & DurabilityChoice of higher-quality materials, finishes, and hardwareMaterials and hardware vary by product and price point
Design IntegrationCan coordinate with the room’s cabinetry, finishes, lighting, and overall styleLimited to available styles, colors, and finishes

While off-the-shelf plastic cubbies or light wire racks seem convenient, they frequently fall short in real-world scenarios. Standard store-bought units assume all shoes share identical dimensions. They fail to accommodate winter work boots, high-top sneakers, or tall heels efficiently, resulting in wasted shelf height.

Custom systems utilize adjustable pin systems, letting you change shelf intervals on 32mm standards. As your collection evolves across seasons, shelf spacing adjusts instantly to prevent squishing or underutilizing valuable cabinet space.

What Are Common Shoe Closet Design Mistakes to Avoid?

The most common shoe closet design mistakes include choosing uniform shelf heights, failing to account for proper ventilation, using insufficient shelf depth, neglecting lighting on lower levels, and ignoring seasonal shoe rotation needs. Avoiding these errors ensures long-term functionality and protects footwear investments.

  • Uniform Shelf Heights: Footwear varies dramatically in height. Setting all shelves at 7 inches leaves flats with wasted overhead space while forcing ankle boots to be stored sideways.
  • Inadequate Shelf Depth: Standard footwear requires 12 to 14 inches of shelf depth. Oversized sneakers or men's shoe sizes 12 and above often hang off 10-inch retail shelves, preventing cabinet doors from closing cleanly.
  • Ignoring Air Ventilation: Leather and athletic footwear require airflow to dry completely after wear. Enclosed cabinets without passive rear ventilation vents trap moisture, leading to odors and material degradation.
  • Neglecting Lower Shelf Visibility: Unlit lower shelves become dark drop-zones where shoes get forgotten. Extending LED channels or pull-out drawer hardware to bottom levels keeps every pair visible.

Step-by-Step Guide: How to Organize a Shoe Closet Effectively

To organize a shoe closet effectively, start by purging unworn pairs, group remaining footwear by style and frequency of use, adjust shelf heights to fit specific heel and shaft dimensions, place high-traffic pairs at eye level, and store out-of-season footwear on upper shelves.

6 Steps to Organize a Shoe Closet

01 Purge & Edit02 Categorize03 Match Shelf Heights04 Assign Storage Zones05 Place by Frequency of Use06 Rotate Seasonally

  1. Purge and Categorize: Remove every pair of shoes from your current closet. Separate them into daily wear, work/formal, athletic, seasonal, and donation piles.
  2. Measure Footwear Dimensions: Group your shoes by height (flats/sneakers, mid-heels/ankle boots, tall boots) and measure the tallest pair in each group to set correct shelf gaps.
  3. Establish Eye-Level Zones: Reserve the prime real estate between chest and knee height for your 4 to 6 most frequently worn pairs.
  4. Invert High Heels for Density: Place high-heeled shoes facing opposite directions (one toe facing out, one heel facing out) on shelves. This clever trick fits 15–20% more shoes per shelf.
  5. Utilize Clear Boot Shapers: Insert acrylic or padded boot trees into tall boots before placing them on shelves to maintain vertical structure and eliminate ankle creases.
  6. Rotate Seasonally: Move summer sandals to upper perimeter shelves during winter months, lowering cold-weather footwear into active daily zones.

Expert Tips for Preserving Leather and Suede in Storage

To preserve leather and suede shoes in storage, maintain climate-controlled room temperatures between 60°F and 70°F, keep humidity around 45–50%, use aromatic cedar shoe trees, keep footwear out of direct sunlight, and leave a minimum 1-inch air gap between pairs on shelves.

Ideal Storage Conditions

TemperatureHumidityVentilationLight Exposure
60–70°F45–50%Gentle air circulationAway from direct sunlight
Cedar Shoe Trees
Help maintain shape and manage moisture.
UV-Protected Storage
Helps reduce fading and prolonged light exposure.

High-end footwear is an investment that degrades quickly under improper storage conditions. Direct sunlight through bedroom windows dries out natural leathers and bleaches suede dyes over time. Placing UV-filtering window treatments or opting for tint-protected glass-front cabinet doors protects footwear finishes.

Avoid plastic storage boxes for natural leathers. Trapped humidity causes mold growth, while volatile organic compounds in synthetic boxes break down shoe glues. Opt for breathable cotton dust bags or open adjustable shelving with cedar shoe trees to absorb interior foot moisture and maintain tension across shoe uppers.

Frequently Asked Questions About Shoe Closets

How deep should a custom shoe closet shelf be?

A custom shoe shelf should ideally be 12 to 14 inches deep. This depth comfortably accommodates standard women's and men's footwear up to size 13 without heels or toes extending past the edge. For larger shoe sizes or bulky winter boots, 15-inch depth is recommended.

How much vertical space do I need between shoe shelves?

Vertical space depends on footwear type. Allow 6 to 7 inches for flats, sandals, and low sneakers; 8 to 10 inches for high heels and ankle boots; and 16 to 20 inches for mid-calf and tall knee-high boots. Installing adjustable shelf tracks offers the best long-term flexibility.

Is it better to store shoes in boxes or on open shelves?

Open shelves are better for everyday visibility, convenient access, and proper air circulation. Original cardboard shoe boxes protect rare or seasonal shoes from dust, but they obscure visibility. Clear, ventilated acrylic boxes offer a balanced alternative for long-term collector storage.

How do you prevent shoe closets from smelling?

Prevent odors by ensuring proper air ventilation within cabinetry, allowing shoes to air out for 24 hours before storing them in enclosed cabinets, using aromatic cedar inserts, and placing natural activated charcoal odor-absorbing bags on lower shelves.

Can you add shoe storage to a small reach-in closet?

Yes. Reach-in closets benefit greatly from pull-out slatted shoe drawers, vertical over-the-door rack hardware, or adjustable bottom-tier shelving inserts. Utilizing pull-out mechanisms doubles storage density by utilizing full closet depth without blocking access.

What is the best lighting for a luxury shoe display?

The best lighting is continuous LED strip channel lighting installed vertically along cabinet side panels or recessed under individual shelf fronts. A color temperature of 3000K (warm white) accurately reflects true footwear colors without generating damaging heat.

How many pairs of shoes fit on a 36-inch closet shelf?

A standard 36-inch wide shelf comfortably holds 4 pairs of average men’s shoes or 4 to 5 pairs of women’s shoes. Utilizing toe-to-heel alternating placement strategies can occasionally allow up to 5 full pairs on a 36-inch shelf.

Are angled shoe shelves worth the extra cost?

Yes, angled shoe shelves are worth it for walk-in suites and designer collections where visual presentation is prioritized. They allow you to see footwear profiles clearly at lower or higher shelf levels. However, flat shelves store slightly more pairs per square foot.

How do I store tall boots without ruining their shape?

Store tall boots using rigid acrylic or foam boot shapers inserted inside the shaft to keep them upright. Alternatively, install custom boot suspension tracks featuring non-marking hanging clips that hold boots off the floor surface.

What materials are best for mudroom shoe closets?

Thermally fused laminate (TFL) and moisture-resistant marine-grade plywood are best for mudrooms. These materials withstand wet soles, melting snow, road salt, and abrasive dirt far better than painted wood or low-grade particle board.

Transform Your Home with Custom Storage Solutions

Designing a functional, beautiful shoe storage system requires balancing spatial engineering with refined interior design. Whether you want to turn a spare wall into a boutique shoe display or seamlessly blend a custom shoe closet into a broader master suite remodel, tailored craftsmanship makes all the difference. Explore full-home custom storage possibilities, layout options, and primary bedroom integration guides at Clear Closets to build a home environment where every item has its perfect place.

How to Arrange a Closet

Spatial Design & Home Curation

How to Arrange a Closet for Ultimate Wardrobe Curation

By Clear Closets Editorial Team

A beautifully curated closet is more than just a storage unit; it is a personal boutique, a sanctuary of style, and the spatial foundation of a stress-free morning. Too often, high-end wardrobes are compromised by poor layouts, mismatched hangers, and cluttered shelves. Elevating your daily routine begins with understanding the art of spatial design.

By treating your wardrobe as an active exhibition rather than a storage locker, you can transform daily dressing into an inspiring ritual. This definitive guide reveals how to arrange a closet using the same styling secrets, spatial formulas, and design principles trusted by interior architects. Before structuring your layout, ensure you have decluttered effectively by checking our masterclass on how to get rid of things, or explore expert decluttering insights for additional design ideas.


What is the best way to design a luxury closet layout?

💡 Key Takeaway

The best luxury closet layout integrates personalized spatial zoning based on your daily wardrobe habits. This involves dividing your closet into distinct zones: active eye-level hanging rods for daily attire, custom drawers with integrated dividers for accessories, and open, illuminated top shelving to display premium handbags, footwear, and seasonal collections.

Understanding Spatial Zones

When studying how to arrange a closet, spatial flow is everything. In luxury interior design, we categorize closet space into three distinct tiers:

  • The Hot Zone (Eye-to-Waist Level): This is your prime real estate. Reserve this area for daily wear, tailored blazers, and your favorite trousers. Access should be effortless.
  • The Cold Zone (Below the Knees): Ideal for pull-out shoe racks, heavy laundry hampers, and deep drawers containing lounge or athletic wear.
  • The Sky Zone (Above the Head): Reserved for seasonal preservation, travel luggage, and display-only heirloom pieces.

Are custom closet systems worth the investment?

💡 Key Takeaway

Custom closet systems are highly worth the investment because they eliminate dead space, protect luxury fabrics from structural wear, and increase overall home resale value. Unlike generic retail shelving, bespoke systems tailor every inch of hanging height, drawer depth, and shoe storage to the exact dimensions of your wardrobe.

Comparing Closet Solutions: Custom vs. DIY Wire Shelving

Standard wire shelving often sags under weight, snags delicate fabrics like silk and cashmere, and fails to utilize vertical space efficiently. Let us examine how professional engineering compares to basic retail options:

Feature Standard DIY Shelving Bespoke Custom Closets
Fabric Preservation Poor (Wire edges can snag lace and silks) Excellent (Smooth, premium wood finishes)
Weight Capacity Low (Prone to bending or detaching) Heavy-Duty (Engineered wall mounts)
Space Optimization Static heights leave up to 40% unused space 100% maximized via adjustable modular shelving
Aesthetic & Value Basic, transactional utility High-end architectural beauty elevating home value
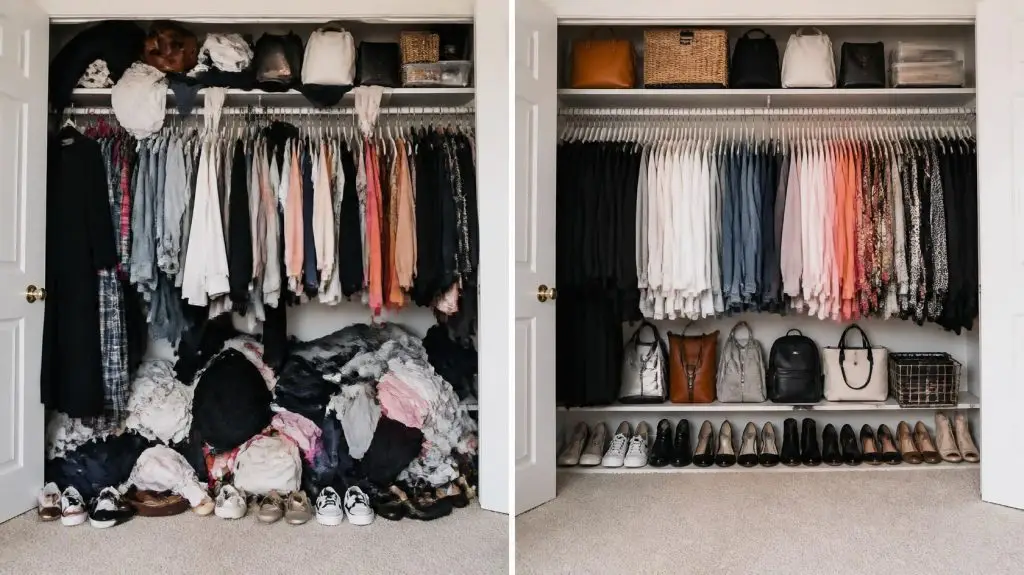
How to Arrange a Closet and organise your clothes

How do I choose between hanging and folding my clothes?

💡 Key Takeaway

Choose to hang lightweight, structured garments that are prone to wrinkling, such as linen trousers, silk blouses, and wool blazers. Choose to fold heavy knitwear, cashmere sweaters, activewear, and denim. Hanging heavy knits stretches out the shoulder seams, permanently ruining the tailored silhouette of your premium pieces.

The Golden Rules of Wardrobe Preservation

To preserve the longevity of your clothing investment, you must treat your fabrics with the respect they deserve. Many people make the mistake of hanging everything, which prematurely wears down high-quality fibers.

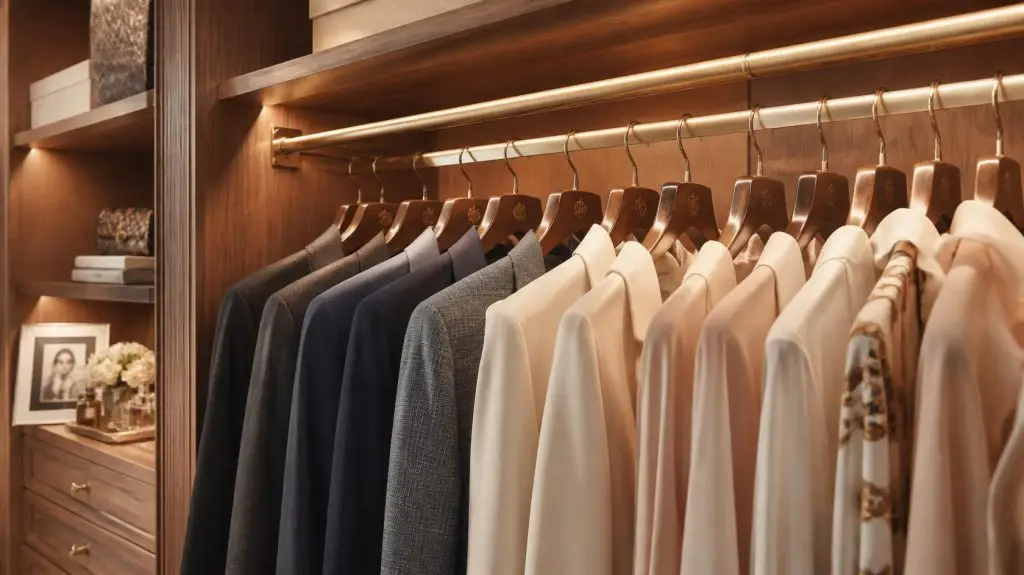
  • The Hanger Standard: Toss out wire and cheap plastic hangers immediately. Instead, invest in slim, non-slip velvet hangers for silk, or wide-shoulder cedar hangers for heavy tailored suits. This preserves the natural shoulder structure.
  • The Folding Formula: Utilize "file-folding" for t-shirts and activewear inside drawers. This allows you to see every shirt from a top-down view, eliminating the need to dig through messy stacks.
  • The Seasonal Rotation: Every spring and autumn, rotate your wardrobe. Place off-season items in breathable, zippered canvas bags on high shelves, keeping your current season's wardrobe highly visible.

What common mistakes do people make when arranging a closet?

💡 Key Takeaway

The most common mistakes include using mismatched hangers, over-packing hanging rods, ignoring vertical space, and storing shoes directly on the floor. These habits crush delicate fabrics, restrict air circulation—which leads to stale odors—and visually shrink the perceived size of your closet, making daily coordination chaotic.

Real-World Scenarios and How to Avoid Them

Imagine running late for a high-stakes board meeting. You reach into a packed closet, pull out a silk dress shirt, and find it heavily creased because it was wedged tightly between two heavy blazers. You are forced to spend ten minutes steaming it, throwing off your entire morning schedule.

This is the direct result of over-packing rods. A luxury wardrobe requires breathing room. Keep a strict finger-width of space between every single hanger on your rod. This simple rule prevents wrinkles, keeps clothes smelling fresh, and highlights the beauty of your collection.

Another classic error is leaving shoes in piles on the floor. Not only does this damage fine leather and suede, but it also creates visual chaos. Elevate your footwear onto angled, illuminated shelving or clean pull-out trays to preserve their shape and display them as art.

How to Arrange a Closet

How much does a custom closet system cost in 2026?

💡 Key Takeaway

In 2026, the cost of a custom closet system typically ranges from $2,500 to $15,000+, depending on spatial dimensions, materials, and specialized integrations. High-end walk-in configurations featuring custom millwork, premium LED lighting, soft-close drawers, and velvet jewelry trays fall on the premium end of the spectrum.

Investing in Your Home's Architecture

While DIY solutions seem cost-effective initially, they frequently require replacement and lack structural durability. A bespoke custom build is integrated directly into your home's architecture. It functions as a long-term capital improvement that prospective homebuyers highly prioritize, yielding a remarkably high return on investment (ROI).

If you are ready to move away from generic storage and elevate your home, exploring our custom closet design services is the ultimate way to marry function with absolute luxury.


Frequently Asked Questions

Which hanger style is best for a high-end wardrobe?

Slim velvet hangers are ideal for maximizing space and preventing silk or satin from slipping. For tailored suits, coats, and blazers, wide wooden cedar hangers are necessary to maintain the jacket's structural integrity.

How do I arrange a closet with very deep corners?

Deep corners are often underutilized. The best approach is installing corner-specific hanging rods or pull-out rotating corner shelves (lazy Susans) designed for handbags or folded knits.

Should I color-coordinate my clothes?

Yes. Color-coordinating from light to dark within each clothing category creates visual harmony, reduces cognitive overload when choosing an outfit, and mimics a high-end boutique aesthetic.

How often should I reorganise my closet?

We recommend a light reset at the transition of every season (twice a year). This is the perfect time to clean shelves, rotate out-of-season clothes, and assess what needs repair or donation.

What is the ideal hanging height for double-hang rods?

Standard double-hang rods are usually set at 40 inches and 80 inches from the floor. This provides perfect clearance for folded pants, shirts, and short jackets without dragging on the ground.

How do I prevent my closet from smelling musty?

Avoid over-packing so air can circulate. You can also use cedar blocks, lavender sachets, or low-profile active charcoal dehumidifiers to keep the air crisp and dry.

How should I store my premium handbags?

Stuff handbags with acid-free tissue paper to help them maintain their shape. Store them upright on open shelving, spaced apart, or inside breathable dust bags.

Are wire drawers good for storing clothes?

Generally, no. Wire drawers can leave indentations on soft knits and cottons. Solid wood or lined drawers are far superior for protecting premium garments.

Begin Your Spatial Transformation

Mastering how to arrange a closet is an act of self-care. It streamlines your morning, protects your sartorial investments, and brings a sense of calm to your living space. If you are ready to transition from basic storage to an exquisite, tailored wardrobe experience, we invite you to design with us.

Schedule a Free Consultation

How to Get Rid of Things

Mindful Design & Curation

How to Get Rid of Things and Live Clutter-Free

By Clear Closets Editorial Team

Clutter is a silent thief of peace. It crowds our physical spaces, drains our mental energy, and distracts us from the beauty of our homes. Yet, despite knowing this, the physical process of getting rid of stuff can feel incredibly daunting. It is rarely a matter of physical labor; rather, it is an emotional and psychological negotiation with our past, our guilt, and our anxieties about the future.

To truly learn how to get rid of things, you must shift your mindset. You are not losing your possessions; you are reclaiming your space, your time, and your clarity. This masterclass outlines a sophisticated, guilt-free system to curate your home so that every object you own serves a deliberate purpose. If you are also looking to optimize your wardrobe structure after decluttering, explore our complete guide on how to arrange a closet for expert spatial design formulas, or check out this practical list of 30 quick items to clear out for instant inspiration.


Why is getting rid of stuff so difficult?

💡 Key Takeaway

Getting rid of stuff is difficult because human psychology links possessions with identity, memory, and security. We suffer from loss aversion and the sunk cost fallacy, mistakenly believing that holding onto unused items honors their past financial expense or emotional significance, when in reality, it only creates spatial and mental burden.

Psychological Anchors

If you struggle with decluttering, understand that it is a natural psychological response. Professional organizers recognize three primary mental anchors:

  • The Sunk Cost Trap: Feeling forced to keep an item simply because it was expensive. Remind yourself: the money is spent, and keeping an unused item won't bring it back. It is only costing you space now.
  • The "Someday" Delusion: Keeping items for hypothetical future scenarios. If you haven't used it in a year, the statistical likelihood of needing it in the future is less than 1%.
  • Inherited Guilt: Keeping family heirlooms, gifts, or vintage items that do not fit your personal style out of fear of offending someone. Your relationships exist in your heart, not in cardboard boxes in your attic.

Which decluttering method is best for high-end homes?

💡 Key Takeaway

The best decluttering method for high-end homes is the Curated Four-Zone Method. This systematic approach divides all items in a room into four distinct, clean categories: Keep, Donate/Sell, Recycle, and the Transitional Maybe Box. This removes emotional friction, allowing you to make fast, objective decisions without visual mess.

The Four-Zone Execution Guide

When curating a room, place four large, elegant canvas bins or boxes in the center of the space. Never move on to another room until every single item in your current space has been placed into one of these zones:

  1. The Keep Zone: Items that align perfectly with your current lifestyle, bring you genuine joy, and are in excellent structural condition.
  2. The Curated Donation/Sell Zone: Premium items that no longer serve you but hold incredible value for someone else. This includes donating luxury clothing to professional women's shelters or selling designer pieces on consignment.
  3. The Responsible Recycle Zone: Damaged, stained, broken, or outdated items that cannot be repaired. Dispose of these responsibly according to local recycling standards.
  4. The Transitional Maybe Box: The ultimate safety net. If you are deeply torn on an item, place it inside this box. Seal the box, write a date ninety days from now on the top, and store it in your garage or attic. If you do not open it to retrieve the item within those three months, donate the sealed box without opening it.

How do I decide what to keep and what to let go?

💡 Key Takeaway

You can decide what to keep by asking yourself if you have worn or used the item in the past twelve months, and if you would buy it again at full price today. If an item does not fit your body, your aesthetic, or your daily routine right now, it should be let go.

4 Critical Questions to Evaluate Your Belongings

When you feel stuck on a particular garment or item, run it through this quick checklist:

The Question If the Answer is YES If the Answer is NO
Have I used this in the last 12 months? Keep it (if it's in good condition) Donate or recycle it
Would I buy this again today? Keep it (it still matches your taste) Let it go (your style has evolved)
Does it fit my body/lifestyle right now? Keep and style it Let it go (stop saving "aspirational" items)
Is it easy to replace if needed? Donate it (free up the space) Keep it (if it is truly rare/functional)

What are the most common mistakes when getting rid of stuff?

💡 Key Takeaway

The most common mistakes are trying to tackle the entire house at once, starting with highly sentimental items, and failing to establish an organized system for the things you keep. These errors cause emotional exhaustion, leading to half-finished projects and immediate clutter rebound.

How to Avoid Burnout: Real-World Experiences

A classic mistake we observe is the "Weekend Blitz." A homeowner, suddenly inspired, empties every closet, dresser, and cabinet onto their bedroom floor on a Saturday morning. By Saturday evening, they are exhausted, emotionally drained, surrounded by a mountain of clothes, and end up stuffing everything back into the closet out of pure frustration.

To avoid this, start incredibly small. Begin with a single drawer, a single shelf, or a single category (like coats). This builds momentum and gives you a satisfying sense of accomplishment without the overwhelming mess.

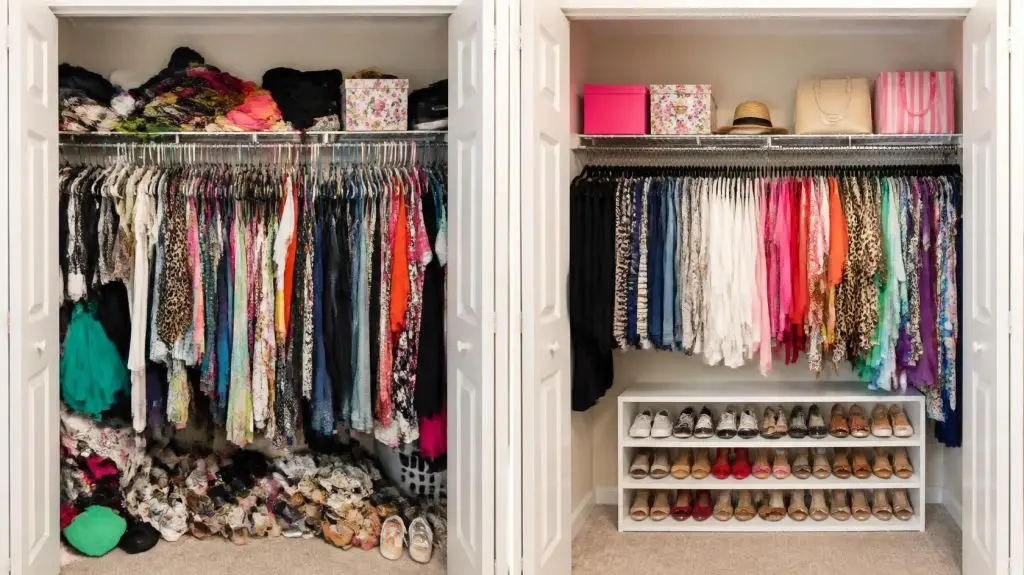
Furthermore, remember that decluttering is only half the battle. Once you have curated your items, you must provide them with a structured, high-quality home. If you keep throwing your curated clothes back onto poor, dysfunctional wire shelves, clutter will inevitably return. Investing in a professional custom closet design service ensures every shoe, bag, and tailored shirt has an engineered home, making order effortless.

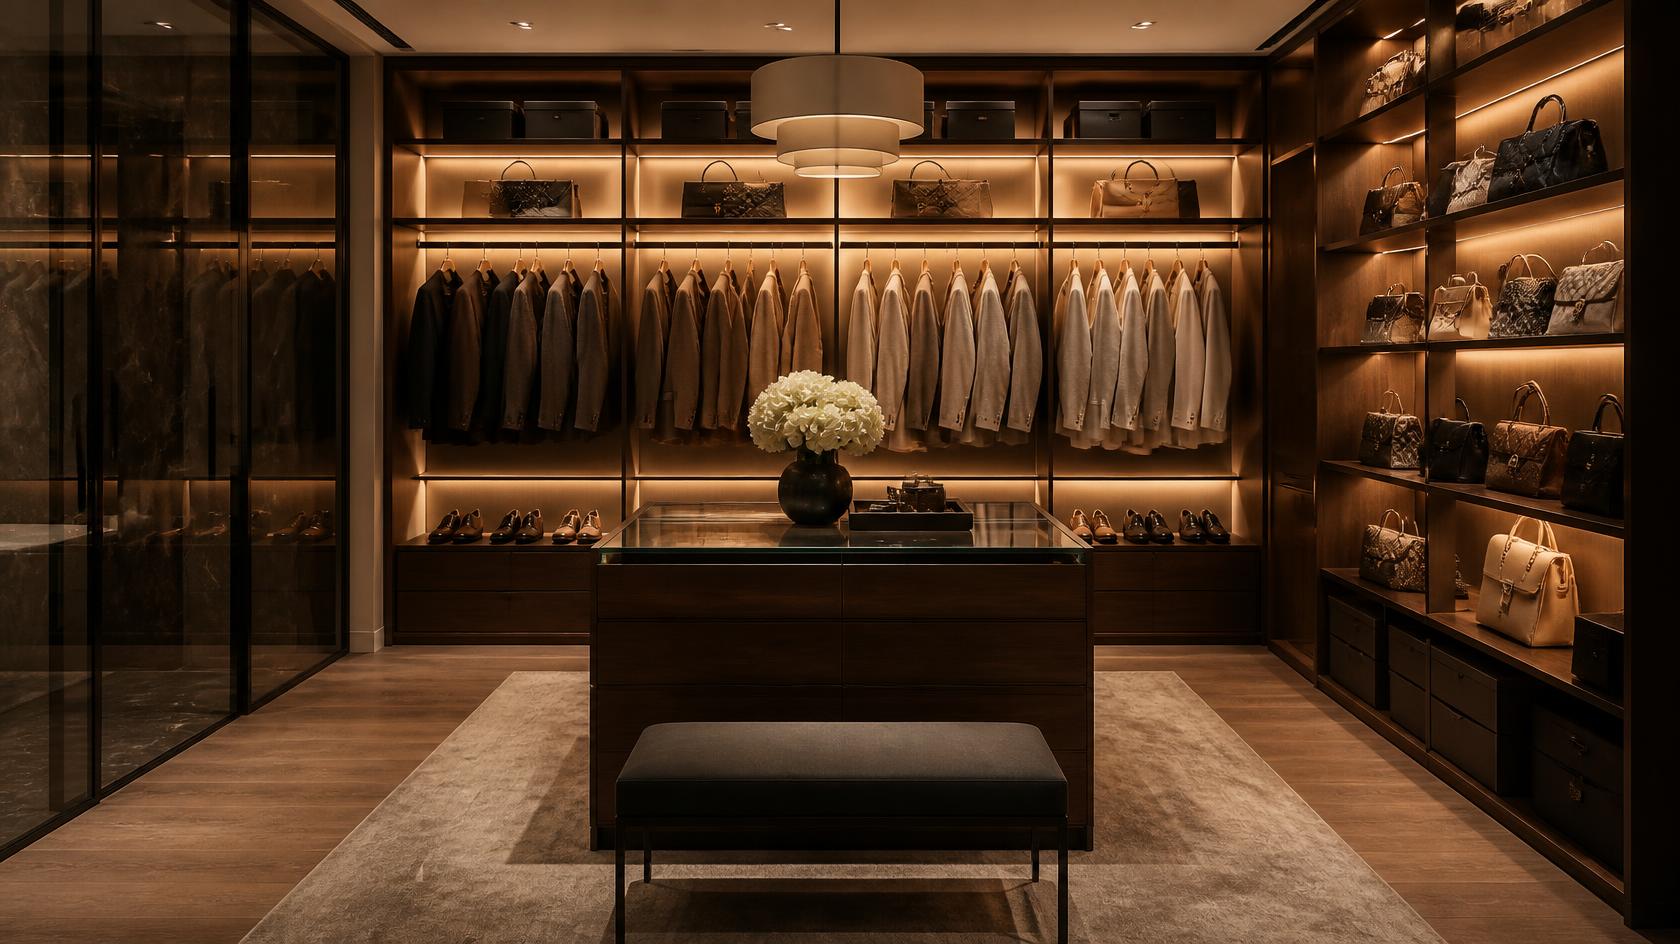
How to Get Rid of Things in your walk-in closet

How should I handle sentimental items that I don't use?

💡 Key Takeaway

Handle sentimental items by separating the memory from the physical object. Take high-resolution photographs of large sentimental items to store digitally, or select one "hero" piece to professionally frame or display, allowing you to donate the remaining duplicate items with peace of mind.

Preserving Memories Without the Clutter

Consider your old college journals, a massive collection of childhood trophies, or your grandmother's vintage china set that you never use because it is hand-wash only. Keeping these stored in dusty cardboard boxes in your attic does not honor the memories. Instead:

  • Create a Digital Memory Book: Scan old letters, artwork, and photos into a beautiful, secure cloud drive. This preserves the history forever while taking up zero physical square footage.
  • The "Hero Piece" Strategy: If you have a 12-piece china set, keep one stunning tea cup and saucer to display on an open kitchen shelf. Donate the remaining pieces to someone who will cherish and use them daily.
  • Gift with Intention: Pass family heirlooms down to younger relatives who are moving into new homes and actively need the items, rather than hoarding them out of guilt.

Frequently Asked Questions

How do I start decluttering when I am completely overwhelmed?

Start with a non-emotional area, like your pantry or medicine cabinet, to build your decision-making muscles before tackling highly personal items like clothing or photos.

Is it better to sell or donate my old designer clothes?

If an item is in mint condition and from a sought-after luxury brand, luxury consignment is a great option. However, if you want immediate mental clarity, donating to a worthy cause offers instant gratification.

What is the 20/20 rule for decluttering?

If you can replace an item in under 20 minutes for less than $20, you can safely let it go. This is highly effective for random cables, duplicate kitchen tools, and cheap accessories.

How do I stop buying things I don't need?

Implement a "one-in, one-out" rule. For every new item you bring into your home, you must donate or recycle one old item. This keeps your curated home in perfect equilibrium.

How do I deal with a partner who is a hoarder?

Lead by example. Focus entirely on decluttering your own personal spaces and shared living rooms. Once they experience the peace of a cleared environment, they are often inspired to join in.

What should I do with old wire hangers and retail plastic bags?

Many dry cleaners will gladly take back and reuse wire hangers, and local grocery stores often have designated drop-off bins to recycle plastic film and bags responsibly.

How can I keep my closet looking organized long-term?

Assign an exact, dedicated spot for every item. If you don't have enough shelf space, it is a sign that you either need to declutter further or install a more efficient closet system.

Is a capsule wardrobe actually practical?

Absolutely. A curated capsule wardrobe of high-quality, interchangeable basics makes getting dressed faster, reduces decision fatigue, and ensures you always look polished.

Ready to Curate Your Dream Home?

Learning how to get rid of things is an incredibly liberating experience. Once you strip away the excess, you are left with room to breathe, create, and focus on what truly matters. Complete your home's transformation by organizing what you love within a beautifully tailored custom system.

Schedule a Free Consultation

Murphy Beds with Smart Storage and Modern Designs

Murphy Beds with Smart Storage and Modern Designs

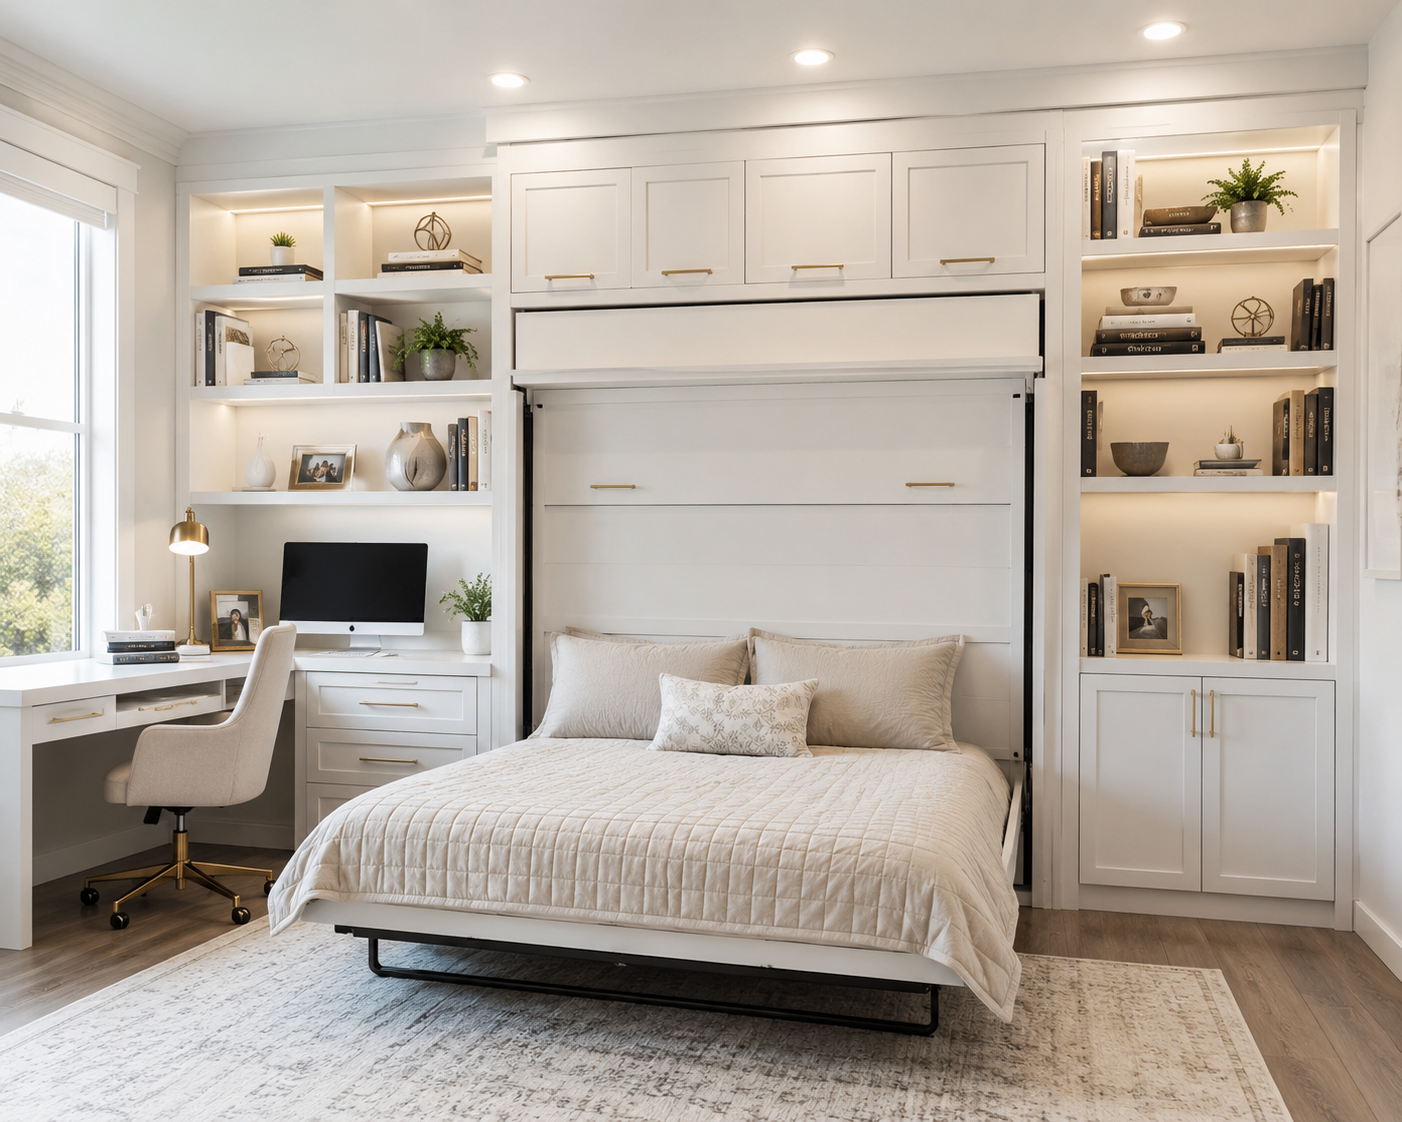
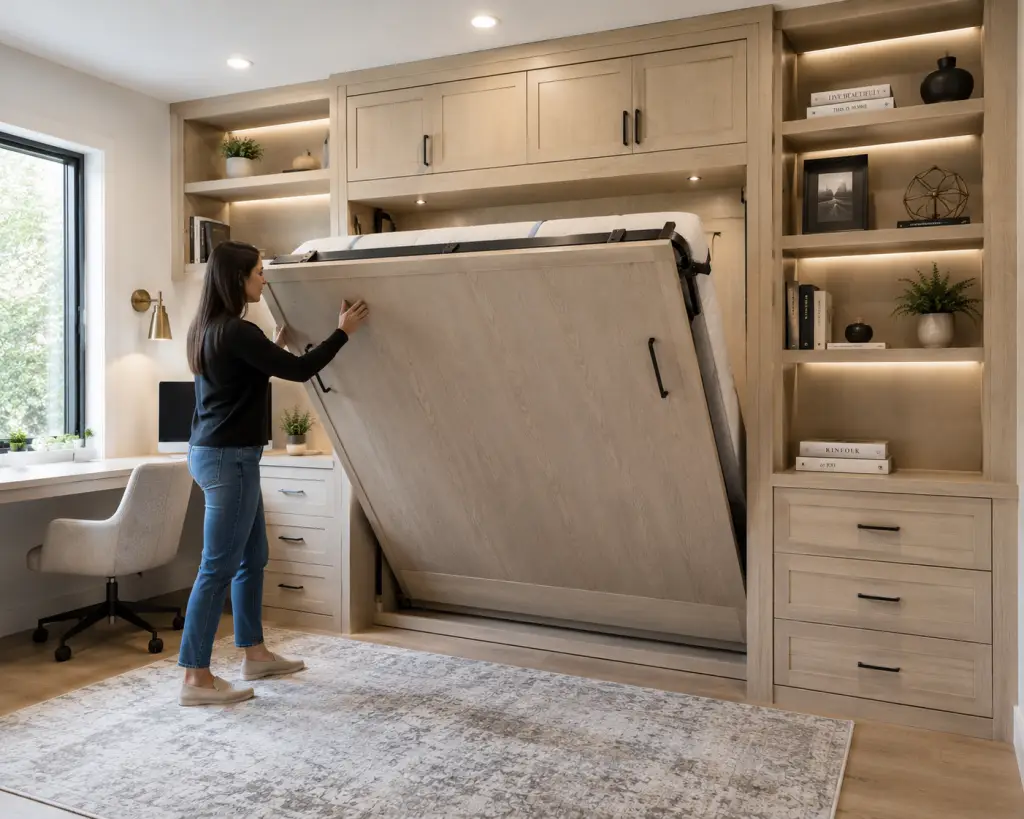
Murphy beds (also known as wall beds) are pull-down bedding systems hinged inside vertical cabinets or wall enclosures. Operating on counterbalanced piston or spring mechanisms, murphy beds allow a full-sized mattress to store vertically against a wall when not in use. This converts guest bedrooms, home offices, and basements into multi-functional living spaces without sacrificing floor area.

What is a Murphy Bed and How Does It Function?

A murphy bed is a space-saving furniture system engineered to lift a standard mattress vertically into a decorative wall cabinet. Operating on heavy-duty counterbalanced lift mechanisms, these systems allow a single room to serve as a high-capacity home office, gym, or playroom during the day, and a comfortable bedroom at night.

In modern residential architecture, maximizing usable square footage is a top priority for homeowners. Traditional guest rooms often sit empty 90% of the year, wasting 120 to 200 square feet of valuable floor space on a stationary bed frame.

Integrating a fold-down bed system solves this spatial inefficiency. By pairing a pull-down bed frame with surrounding custom cabinetry, you reclaim the central floor area for daily activities. Through smart space planning, wall beds fold away smoothly, transforming raw wall space into built-in desks, book towers, and storage units without disturbing your main room layout.

What are the Main Benefits of Installing a Murphy Bed System?

Installing a wall bed maximizes living space, creates multi-purpose rooms, and provides real mattress comfort for houseguests. Furthermore, surrounding wall beds with high-quality built-in storage made from durable materials turns empty walls into functional millwork, directly improving everyday household organization and raising your home's long-term resale value.

  • Multi-Functional Space Planning: Turns a single room into a dual-purpose space, such as a home office by day and a guest suite by night.
  • Real Mattress Comfort: Unlike uncomfortable pull-out sofa beds or air mattresses, wall beds accommodate standard coil or memory foam mattresses up to 12 inches thick.
  • Integrated Storage Solutions: Surrounding cabinets can feature clothing hanging rods, library bookshelves, file drawers, and floating desktops.
  • Increased Residential Equity: In luxury homes, custom wall bed systems act as permanent architectural features that appeal heavily to potential buyers.

How Much Do Custom Murphy Beds Cost?

Custom Murphy beds typically cost between $3,000 and $15,000+, depending on size, materials, lift mechanism, and surrounding cabinetry. While basic standalone wall beds sit on the lower end, full-wall units featuring custom office desks, glass display towers, and lighting occupy the premium tier.

To help you budget for your room transformation, let us review the average price ranges:

Project ScopeAverage Price RangeKey Features & Structural Highlights
Full Wall Murphy Bed System$7,000 – $15,000+Queen size frame; natural white oak or walnut wood veneers; built-in desk; side cabinets; integrated LED lighting.
Built-In Murphy Bed System$3,500 – $7,000Piston or spring mechanism; painted MDF or plywood box; shaker cabinets; soft-close drawers; crown molding.
Basic Murphy Cabinet Bed$2,000 – $3,500Standalone cabinet frame; standard piston mechanism; basic laminate or painted finish; no side storage towers.

Piston vs. Spring Lift Mechanisms: Which is Best?

The choice between piston gas springs and steel spring mechanisms comes down to longevity, smooth operation, and maintenance needs. Gas pistons offer whisper-quiet, fluid movement with fewer moving parts, whereas steel spring systems are highly adjustable for heavy mattresses but require periodic tension adjustments over time.

Lift Mechanisms Compared

Understanding the mechanics behind pull-down beds ensures your system operates safely and effortlessly:

FeatureGas Piston MechanismsSteel Spring Mechanisms
Operation & FeelSmooth, continuous hydraulic motion; requires minimal physical force to lift or lower.Firm, counterbalanced pull; tension changes slightly as the mattress lowers.
Noise LevelWhisper-quiet with zero squeaking or metallic creaks during movement.May produce minor spring tension creaks over years of extended use.
Adjustment & MaintenanceSealed units requiring zero maintenance; replaced as a single module if pressure drops.Adjustable spring counts to fine-tune lifting power for different mattress weights.
Safety FeaturesBuilt-in pressure stops prevent the bed from dropping or snapping closed accidentally.Requires proper spring calibration to prevent sudden recoil or heavy drops.

MDF vs. Plywood: What is the Best Material for Wall Bed Cabinetry?

Choosing the best cabinet material depends on whether you prefer a painted or natural wood finish. High-density MDF is the gold standard for smooth, painted finishes because it resists joint cracking, while cabinet-grade plywood is the premier structural choice for anchoring heavy lift mechanisms into wall studs.

Material Options Compared

Understanding cabinet substrates ensures your wall bed system handles daily mechanical strain without sagging:

  • Medium-Density Fiberboard (MDF): Made from fine wood fibers bound with resin, MDF is flat, dense, and uniform. It does not warp or split with humidity shifts, making it the ideal substrate for a smooth, painted finish on shaker cabinets and front door panels.
  • Cabinet-Grade Plywood: Constructed from alternating layers of wood veneer, plywood provides exceptional screw-holding strength and structural rigidity. It is the preferred material for building heavy cabinet enclosures that anchor directly into wall studs.
  • Natural Hardwoods (White Oak / Walnut): Natural hardwood veneers like white oak and walnut bring organic warmth to custom interior design. White oak provides a bright, modern Scandinavian tone, while walnut offers a rich, classic mid-century look.
Opening a Murphy Bed

What Common Murphy Bed Mistakes Should You Avoid?

The most frequent mistakes when choosing wall beds are buying mattresses that are too thick, failing to anchor into wall studs, and ignoring room swing clearance. Using a mattress over 12 inches thick prevents the bed frame from closing, while poor wall mounting creates serious structural safety hazards.

Avoid these critical design and installation pitfalls when planning your space:

  • Exceeding Maximum Mattress Thickness: Most wall bed frames are engineered for mattresses between 9 and 12 inches thick. Using a plush pillow-top mattress that exceeds depth limits will prevent the cabinet doors from latching shut.
  • Anchoring to Drywall Alone: Wall beds carry heavy dynamic loads when pulled down. A wall bed cabinet must be anchored directly into solid wood studs or masonry walls using heavy-duty lag bolts, never drywall anchors.
  • Ignoring Floor Swing Clearances: A folded-down queen wall bed extends 80 to 85 inches outward into the room. Measure floor space carefully to ensure the bed frame clears ceiling fans, rugs, and side tables.
  • Using Budget Drawer Slides on Side Towers: Side cabinets accompanying wall beds often hold heavy office files or books. Always specify heavy-duty drawer slides and soft-close hinges for daily durability.

How to Successfully Implement a Custom Wall Bed Project

Implementing a wall bed installation requires evaluating room clearances, selecting mechanism hardware, and preparing the wall structure. Start by measuring floor depth swing radii, anchoring cabinet frames into wall studs, routing low-voltage lighting wires, and finishing the cabinet exterior with decorative moldings.

Follow this five-step implementation process for a seamless installation:

1.Measure Clearances and Locating Wall Studs:Step 1.

Measure the room's ceiling height, wall width, and open floor projection. Locate and mark solid wood wall studs where the heavy cabinet enclosure will anchor.

2.Assemble and Anchor the Cabinet Frame:Step 2.

Construct the main cabinet enclosure using high-density plywood or MDF. Secure the top header directly to wall studs using heavy-duty mounting plates and steel lag bolts.

3.Install the Lift Mechanism and Mattress Tray:Step 3.

Mount the piston or spring lift mechanisms to the cabinet side walls. Attach the steel mattress frame, drop-down leg supports, and elastic mattress retention straps.

4.Build Surrounding Side Storage Towers:Step 4.

Attach side cabinetry towers featuring file drawers, floating desktops, or open library shelves. Use smooth drawer slides and soft-close hinges for all cabinet doors.

5.Add Trim, Lighting, and Front Panels:Step 5.

Attach front decorative panels (such as shaker cabinet faces) to the bed underside. Wrap cabinet tops with crown molding and install low-voltage LED lighting reading channels.

Expert Styling and Space-Saving Tips for Wall Beds

  • Integrate a Flip-Down Desk: Install a drop-down desktop panel on the face of the closed bed cabinet. When the bed is folded up, the desk sits flat for daytime work without needing extra floor space.
  • Incorporate Headboard LED Reading Lights: Route low-voltage LED lighting channels inside the cabinet header. This provides focused reading light for guests without needing table lamps on side stands.
  • Use Elastic Mattress Straps: Secure the mattress and bedding to the frame using heavy-duty elastic crisscross straps so pillows and sheets stay neatly in place when the bed is stored vertically.
  • Match Surrounding Millwork: Finish surrounding side cabinets with baseboards and crown molding that match your home's existing trim to give the entire wall unit a built-in furniture look.

Frequently Asked Questions

Are murphy beds comfortable for everyday sleep?

Yes. Because wall beds use standard coil, latex, or memory foam mattresses supported by sturdy slat systems, they offer the exact same comfort and support as a traditional platform bed.

Can I use a regular mattress in a murphy bed?

Yes, as long as the mattress matches standard dimensional sizes (Twin, Full, Queen) and does not exceed the cabinet's maximum depth capacity (typically 10 to 12 inches thick). Avoid overly heavy or flexible latex mattresses that bow when stored vertically.

Do murphy beds ruin mattresses over time?

No. Quality wall beds feature elastic retention straps and sturdy mattress slats that hold the mattress flat against the frame, preventing sagging or lumpiness when stored vertically.

How much weight can a murphy bed hold?

Most residential wall bed frames are engineered to support between 600 and 1,000 pounds of total weight, including the mattress and occupants.

Can a single person lower and lift a murphy bed easily?

Yes. Thanks to counterbalanced gas pistons or steel springs, the bed frame requires only 5 to 10 pounds of lifting force to lower or raise smoothly.

What is the difference between a vertical and horizontal murphy bed?

Vertical wall beds fold down from the headboard and require higher ceilings (8 feet or higher). Horizontal wall beds fold down along the side edge, making them ideal for rooms with low ceilings, sloped attics, or under-window placement.

Are murphy beds safe for homes with children?

Yes, modern systems feature safety stops, counterbalanced mechanisms, and locking latches that prevent the bed from lowering unexpectedly or closing during use.

Do I need a box spring with a murphy bed?

No. Wall beds utilize integrated wood slats or wire mesh decks to support the mattress directly, eliminating the need for a bulky box spring.

Transform Your Multi-Purpose Rooms with Clear Closets

Are you ready to reclaim your floor space, turn a spare bedroom into a high-functioning home office, and provide houseguests with a comfortable night's sleep? The design and master cabinetry team at Clear Closets is here to help you bring your storage ideas to life. From custom murphy beds and home offices to master walk-in closets, pantries, and laundry rooms, we manage the entire project—from 3D spatial planning to clean, professional installation.

We proudly design and build custom storage systems throughout Alpharetta, Roswell, Johns Creek, and the greater Atlanta metro area. Contact the design experts at Clear Closets to schedule your complimentary custom design consultation today.

Kids Closets Designed to Grow with Every Stage

Kids Closets Designed to Grow with Every Stage

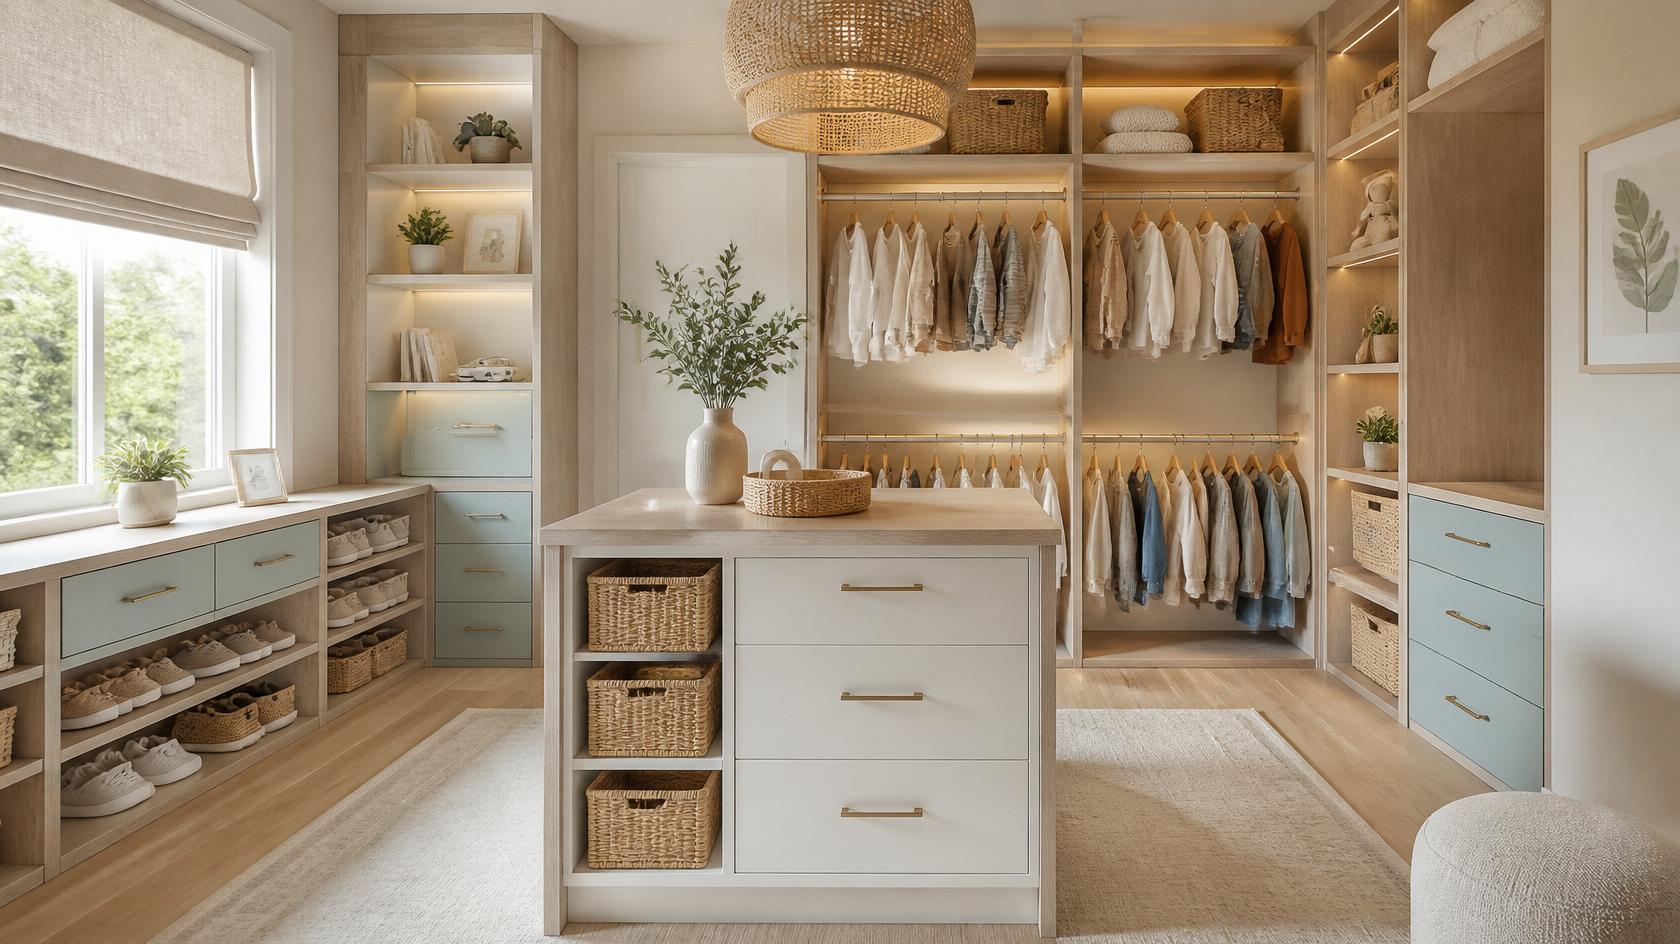
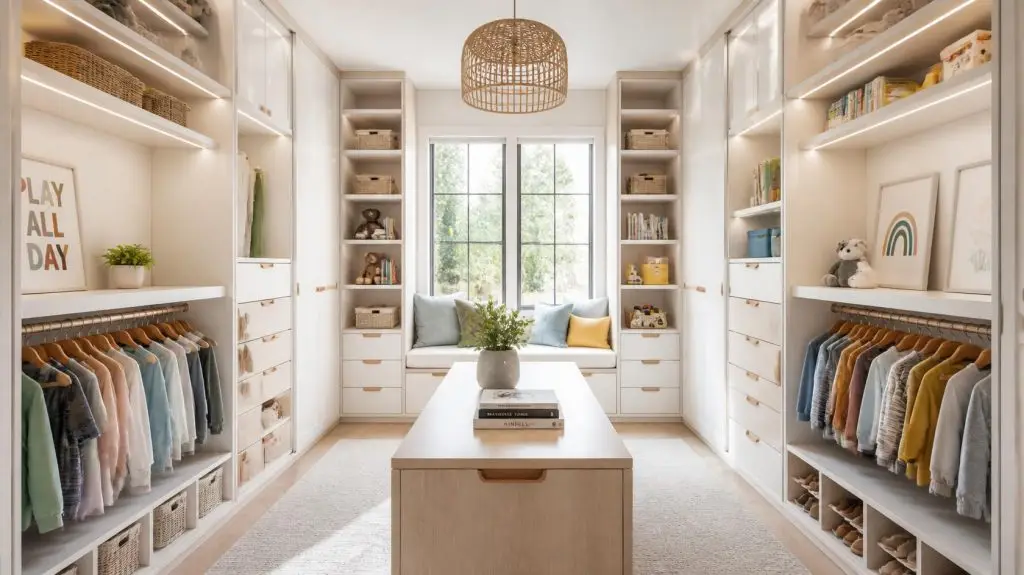
Kids closets are specialized storage systems designed to promote independence and adapt as children grow from toddlers into teenagers. By utilizing lower hanging rods, accessible cubbies, pull-out bins, and adjustable custom cabinetry, these organizers allow young children to reach their own clothes and toys, keeping bedrooms clutter-free while maximizing vertical wall space.

What are Adjustable Kids Closets and How Do They Work?

Kids closets are dynamic, height-adjustable organization systems built to handle changing wardrobe sizes and toy collections over time. Unlike static adult wardrobes, these systems use moveable pin tracks, reconfigurable hanging rods, and modular drawer towers so parents can adjust shelf heights as their children grow.

In many family homes, children's bedrooms quickly become ground zero for daily clutter. Standard builder-grade wire shelves are usually mounted 65 inches high—far out of reach for a five-year-old. This forces parents to fetch every pair of socks, shirt, and toy, creating extra morning work and leaving clothes piled on the floor.

Designing dedicated children's storage solves these daily routines. By using smart space planning, you can place daily shirts, school uniforms, and play clothes within arm's reach of your child. As they grow into teenagers with longer clothing, hanging rods can be raised, turning low toy cubbies into adult double-hanging sections without needing a full remodel.

What are the Main Benefits of Upgrading a Child's Closet?

Upgrading a child's closet fosters self-reliance, reduces morning routine stress, and keeps bedrooms organized. Furthermore, installing durable built-in storage made from quality materials provides an adaptable feature that seamlessly transitions into teenage and young adult storage, directly enhancing your home's long-term resale value.

  • Promotes Childhood Independence: Low hanging rods and open bin cubbies empower toddlers and young children to dress themselves and clean up their toys independently.
  • Adaptable Vertical Space: Adjustable shelf pins allow you to raise hanging rods and reconfigure shelves every few years without replacing the main cabinet boxes.
  • Concealed Toy and Sports Storage: Deep lower drawers hide sports gear, board games, and extra bedding out of plain sight, keeping the main bedroom uncluttered.
  • Long-Term Home Value: In luxury homes, versatile bedroom storage systems that adapt to any age group are considered valuable built-in features by home buyers.

How Much Do Custom Kids Closets Cost?

Custom kids closets typically cost between $800 and $8,500+, depending on room dimensions, drawer counts, and material selections. While simple reach-in organizers with open melamine shelving sit on the lower end, large walk-in closets featuring painted wood cabinets, soft-close drawers, and integrated lighting represent higher-tier investments.

To help you budget for your child's bedroom makeover, let us review the average price ranges:

System Style & ScopeAverage Price RangeKey Features & Structural Highlights
Custom Walk-In Kids Closet$3,500 – $8,000+Floor-to-ceiling cabinetry; adjustable MDF or plywood frames; painted shaker cabinetry; soft-close drawers; LED lighting.
Custom Built-In Reach-In$1,800 – $3,500Adjustable double-hanging rods; central drawer tower; open shoe cubbies; full-extension drawer slides; adjustable shelving.
Modular Kids Closet$800 – $1,800Wall-mounted melamine panels; open adjustable melamine shelving; moveable chrome hanging rods; removable storage bins.

Adjustable Track Systems vs. Fixed Built-In Cabinets: Which is Best?

Choosing between an adjustable track system and a fixed built-in cabinet depends on how long you want the setup to adapt. Adjustable track systems offer total flexibility to move shelves and rods every few years, while fixed built-ins provide a permanent, furniture-grade look that works best for older kids and teenagers.

Comparing Storage System Approaches

Let us evaluate these two popular approaches to help you decide which fits your child's room best:

FeatureAdjustable Track SystemsFixed Built-In Cabinetry
Height FlexibilityHigh; rods, shelves, and bins can be moved up or down in seconds.Moderate; shelf heights are adjustable, but main cabinet box frames remain fixed.
Aesthetic IntegrationCasual look; metal wall tracks are partially visible behind shelves.High-end furniture look; integrates seamlessly with home millwork and baseboards.
Weight CapacityModerate; ideal for children's clothes, shoes, and lightweight toys.Exceptional; anchored directly to wall studs to handle heavy adult clothing.
Longevity & GrowthPerfect for toddlers through middle school years.Ideal for middle schoolers, teenagers, and guest room transitions.

MDF vs. Plywood: What is the Best Cabinet Material for Children's Rooms?

Selecting the best material depends on whether you prefer a smooth painted finish or a durable natural wood grain. High-density MDF is the gold standard for smooth, painted shaker doors that resist cracking, while multi-layered plywood is the premier structural choice for holding heavy toy loads without sagging.

Material Options Compared

Understanding cabinet materials ensures your children's built-ins withstand daily play and wear:

  • Medium-Density Fiberboard (MDF): Made from fine wood fibers bound with resin, MDF is flat, dense, and uniform. It does not warp or split with humidity shifts, making it the ideal substrate for a smooth, painted finish on shaker cabinets and drawer fronts.
  • Cabinet-Grade Plywood: Constructed from alternating layers of wood veneer, plywood provides exceptional strength and screw-holding power. It is the preferred material for building heavy cabinet boxes that support heavy toy bins or book collections.
  • Natural Hardwoods (White Oak / Walnut): Natural hardwoods like white oak and walnut bring warmth to a home's custom carpentry. While less common in young kids' rooms, light white oak is increasingly popular for modern, gender-neutral teenage bedroom designs.

What Common Kids Closet Design Mistakes Should You Avoid?

The most frequent mistakes in kids closet design are mounting hanging rods too high, ignoring safety anchors, and using open drawers without soft-close dampers. Placing daily items out of reach forces children to pull on shelves, while failing to secure heavy drawer towers to wall studs creates serious tipping hazards.

Avoid these critical design and safety pitfalls when planning your child's space:

  • Mounting Hanging Rods at Adult Heights: Mounting rods at the standard 65-inch height prevents young kids from hanging up their own shirts. Place primary rods 30 to 36 inches from the floor for toddlers and elementary age children.
  • Forgetting Heavy-Duty Soft-Close Hinges: Young children often slam cabinet doors and drawers, which can pinch fingers and damage cabinet frames. Always specify heavy-duty soft-close hinges and drawer slides.
  • Skipping Wall Stud Anchoring: Children occasionally try to climb open shelving to reach high toys. Every floor or wall-mounted drawer tower must be anchored securely into wall studs using heavy-duty steel brackets.
  • Using Deep, Undivided Drawers for Small Items: Deep drawers become chaotic catch-alls for socks, underwear, and small toys. Use shallow drawers fitted with removable canvas or acrylic dividers to keep small items sorted.

How to Successfully Implement a Growing Kids Closet System

Implementing a growing closet system requires zoning storage by height, incorporating open bins for easy cleanup, and choosing adaptable materials. Start by placing daily clothes on low rods, installing pull-out baskets at floor level for toys, and reserving top shelves for seasonal items and out-of-size clothing.

Follow this five-step implementation process for a functional children's closet:

  • Step 1: Audit Current and Future Storage Needs: Take everything out of the closet. Sort items into daily clothing, shoes, toys, and out-of-season gear. Determine how much vertical space your child needs right now versus what they will need in 3 to 5 years.
  • Step 2: Establish Height Zones: Divide the closet into three distinct vertical zones:
    • Low Zone (0 to 36 inches): Low hanging rods, open shoe cubbies, and canvas toy bins for easy child access.
    • Middle Zone (36 to 60 inches): Drawers for folded shirts, socks, and activewear, plus eye-level display shelves.
    • Top Zone (60+ inches): High storage shelves for out-of-season winter coats, extra bedding, and keepsake boxes managed by parents.
  • Step 3: Build Sturdy Cabinet Frames: Work with a custom cabinet maker to install sturdy plywood or MDF frames fitted with full-length adjustable shelf pin tracks.
  • Step 4: Add Soft-Close Drawers and Dividers: Install smooth drawers using full-extension drawer slides. Add internal dividers to keep socks, underwear, and accessories organized.
  • Step 5: Finish with Crown Molding and Low-Voltage Lighting: Wrap the top of custom built-ins with crown molding for a clean finish, and add motion-activated low-voltage LED lighting strips so kids can see inside dark corners easily.

Expert Styling and Organization Tips for Children's Storage

  • Use Color-Coded Hangers: Assign specific hanger colors to different clothing categories (e.g., white for school uniforms, blue for play shirts) to help young children sort clothes visually.
  • Label Bins with Picture Icons: For toddlers who cannot read yet, attach picture labels to the fronts of fabric storage bins showing images of socks, shoes, or toys.
  • Incorporate Pull-Out Laundry Hampers: Place a tilt-out or pull-out canvas hamper inside lower cabinetry. This makes throwing dirty clothes away as easy as dropping them into an open basket.
  • Add Low Valet Hooks: Mount small valet hooks on cabinet side panels at a child's eye level for hanging backpacks, jackets, and lunchboxes right when they get home from school.
kids closets design

Frequently Asked Questions

What is the ideal height for a child's closet rod?

For toddlers and young children (ages 3 to 7), mount the primary hanging rod 30 to 36 inches above the floor. For older children (ages 8 to 12), raise the rod to 42 to 48 inches.

How do I make a small reach-in closet work for two kids sharing a room?

Divide the closet vertically down the middle into two symmetrical halves. Assign each child their own side with double-hanging rods, shoe cubbies, and labeled drawer storage.

Are custom built-in closets worth it for kids' rooms?

Yes, absolutely. High-quality adjustable built-ins grow with your child from toddlerhood through their teenage years, preventing the need to buy multiple dressers and adding built-in value to your home.

What is the best material for kids' closet shelving?

Smooth, painted MDF or durable melamine-coated plywood are the best choices. They are easy to wipe clean with a damp cloth, resist scratches from toy bins, and do not warp.

How can I keep my child's closet organized as they grow?

Schedule an annual closet refresh at the start of each school year. Raise hanging rods, adjust shelf heights, donate outgrown clothing, and swap out low toy bins for sweater or shoe storage.

What is the safest drawer hardware for children?

Use full-extension drawer slides equipped with soft-close dampers and integrated stop catches. This prevents drawers from slamming on fingers or pulling completely out of the cabinet frame.

Should I put doors on a child's closet?

Sliding pocket doors or open cabinet layouts work best for young children, as swinging bi-fold doors can pinch small hands and block access in tight bedrooms.

How do motion-sensor LED lights help in kids' closets?

Motion-sensor LED lighting strips turn on automatically when a child opens the closet door, ensuring they can see clothes clearly without struggling to reach a high wall switch.

Design Your Child's Ideal Space with Clear Closets

Are you ready to eliminate bedroom floor clutter, encourage your children to stay organized, and design an adaptable closet system that grows alongside your family? The design and master cabinetry team at Clear Closets is here to bring your ideas to life. From custom kids' closets and master walk-ins to pantries, laundry rooms, and home offices, we manage the entire project—from 3D spatial planning to clean, professional installation.

We proudly design and build custom storage systems throughout Alpharetta, Roswell, Johns Creek, and the greater Atlanta metro area. Contact the design experts at Clear Closets to schedule your complimentary custom design consultation today.

Closet Lighting Ideas for a Brighter and More Luxurious Closet

Closet Lighting Ideas for a Brighter and More Luxurious Closet

Effective closet lighting ideas combine layered ambient ceiling light with targeted low-voltage LED lighting channels routed directly into wardrobe shelving. To illuminate a closet properly, use 3500K to 4000K neutral white LEDs along vertical cabinet face frames. This placement eliminates harsh shadows, makes clothing colors look true to life, and satisfies residential electrical building codes.

What is Modern Closet Lighting and How Does It Work?

Modern closet lighting is an integrated network of ambient ceiling fixtures and low-voltage accent lights engineered to illuminate clothing inventory clearly. Far beyond a single incandescent bulb, current systems use recessed LED channels, motion sensors, and strategic space planning to eliminate dark corners, improve accessibility, and complement your home's interior design.

In standard residential construction, closet lighting is often treated as an afterthought. Builders frequently install a single flush-mount ceiling dome or a bare bulb socket above the door frame. When you stand inside the closet to select an outfit, your head and shoulders cast a heavy shadow over lower shelves and hanging rods.

Upgrading your closet layout requires a layered lighting strategy. Integrating low-voltage LED lighting directly into your custom cabinetry ensures that light reaches every shelf, drawer, and shoe rack. This transforms a dark utility alcove into a bright, well-lit dressing area where you can easily distinguish dark navy from black.

What are the Main Benefits of Upgrading Your Closet Lighting?

Upgrading your closet lighting improves color accuracy, prevents accidental styling mistakes, and speeds up your morning routine. In addition, installing energy-efficient, low-voltage LED systems alongside high-end built-in storage reduces fire risks, highlights fine material finishes like white oak or walnut, and directly enhances overall home equity and resale value.

  • Accurate Color Rendering: High-CRI (Color Rendering Index) lighting ensures your navy suits, black jackets, and charcoal pants appear in their true colors.
  • Elimination of Shadows: Integrated shelf lighting casts direct illumination onto folded sweaters and shoe displays, removing harsh overhead shadows.
  • Improved Energy Efficiency & Safety: Modern low-voltage LEDs operate at cold temperatures, eliminating the fire hazards associated with hot incandescent bulbs placed near hanging clothes.
  • Elevated Residential Equity: In luxury homes, beautifully lit wardrobes act as striking architectural features that leave a lasting impression on prospective buyers.

How Much Do Different Closet Lighting Systems Cost?

Closet lighting installations typically cost between $50 and $4,500+, depending on whether you choose battery-operated fixtures or hardwired, integrated LED channels. While surface-mounted battery puck lights sit at the entry-level price point, custom hardwired systems with vertical aluminum tracks, motion sensors, and dedicated transformers represent premium investments.

To help you budget for your home storage renovation, let us review the average cost ranges:

Lighting System ScopeAverage Price RangeKey Fixtures & Installation Highlights
Integrated Architectural LEDs$1,800 – $4,500+Hardwired 24V low-voltage drivers; recessed vertical aluminum channels; diffuse cover lenses; automated magnetic door switches; integrated into millwork.
Hardwired Overhead & Accent$600 – $1,800Recessed ceiling cans or flush-mount fixtures; hardwired under-shelf puck lights; wall switch controls; professional electrical installation.
Surface-Mounted Battery Fixtures$50 – $300Rechargeable stick-on LED strip bars; battery puck lights; motion sensors; easy DIY installation with no electrical wiring.

LED Strip Channels vs. Puck Lights vs. Overhead Fixtures: Which is Best?

Choosing the best closet lighting depends on your storage layout, ceiling height, and cabinetry construction. Vertical LED strip channels offer the most even, shadow-free illumination across all shelf levels, puck lights excel at spotlighting specific display nooks, and central overhead fixtures provide general ambient light across the room floor.

Comparing Closet Lighting Options

Let us evaluate these three primary lighting approaches to help you build the right combination for your space:

FeatureVertical LED Strip ChannelsRecessed Puck LightsOverhead Ceiling Fixtures
Light DistributionContinuous, shadowless light running top-to-bottom across all shelves.Concentrated pools of light pointing downward on specific items.Broad ambient light filling the room center; casts shadows on side shelves.
Installation MethodRecessed into vertical route channels in plywood or MDF side panels.Drilled into the undersides of fixed horizontal shelves or top headers.Mounted to central ceiling junction boxes by a licensed electrician.
Best ApplicationOpen shoe shelves, hanging rod bays, and full-height wardrobe towers.Display cubbies, glass-top island drawers, and vanity countertops.Walk-in closet dressing areas and central walkways.
Visual AppearanceSleek, modern, and completely hidden when viewing cabinets straight-on.Subtle circular light dots visible under upper cabinet headers.Decorative focal point (pendant, flush-mount, or chandelier).

What are the National Electrical Code (NEC) Rules for Closet Lighting?

National Electrical Code (NEC Article 410.16) enforces strict safety distances between light fixtures and clothing storage areas to prevent house fires. Bare incandescent bulbs are completely prohibited, while enclosed LEDs and recessed ceiling fixtures must maintain specific minimum clearances from hanging rods and open shelves.

Safety is paramount when planning lighting inside enclosed storage areas. Heat buildup from incorrect light fixtures placed too close to fabrics is a historical cause of residential fires.

To ensure your installation complies with local building codes, follow these standard distance guidelines:

  • Enclosed Surface-Mounted LEDs: Must maintain at least 12 inches of clearance from the nearest storage space (hanging rods or shelves).
  • Recessed LED Fixtures: Must maintain at least 6 inches of clearance from storage spaces when installed in ceilings or cabinet headers.
  • Surface-Mounted Fluorescent Fixtures: Must maintain a minimum 6-inch clearance from storage areas.
  • Prohibited Fixtures: Open-lamp incandescent bulbs, exposed halogen fixtures, and pendant lights with open bulbs are strictly forbidden inside clothes closets.

What Common Closet Lighting Mistakes Should You Avoid?

The most frequent mistakes in closet lighting design are choosing cold color temperatures, ignoring transformer placement, and relying on a single overhead light. Selecting blue-toned 6000K bulbs distorts fabric colors, while failing to hide low-voltage LED drivers results in unsightly power boxes cluttering your shelves.

Avoid these critical design and installation pitfalls when upgrading your closet:

  • Choosing Cool, Blue-Toned Bulbs (5000K–6000K): High color temperatures look sterile and cold, making dark clothes appear washed out or unnaturally blue. Stick to neutral white light (3500K to 4000K) with a high Color Rendering Index (90+ CRI).
  • Placing Lights Directly Overhead: Mounting a single fixture in the middle of the ceiling ensures that when you step up to a shelf, your body blocks the light, casting your clothes in darkness.
  • Forgetting Access to LED Drivers: Low-voltage LED tape requires a 12V or 24V transformer driver. Never bury transformers inside closed walls. Place them inside accessible top cabinet headers or behind magnetic access panels.
  • Using Bare LED Tape Without Diffuser Covers: Sticking raw LED tape directly to wood shelves creates harsh glare spots and visible light dots. Always mount LED tape inside extruded aluminum channels fitted with frosted plastic diffuser lenses.
closet lighting ideas

How to Successfully Implement an Integrated LED Lighting Plan

Implementing an integrated lighting plan requires routing wire channels, calculating transformer wattage loads, and selecting automated switch triggers. Start by running low-voltage wiring during the framing phase, recessing aluminum channels into cabinet panels, and connecting automatic door sensors that turn lights on when you enter.

Follow this five-step implementation process for a seamless lighting upgrade:

1.Rough-In Electrical and Driver Locations:Step 1.

Hire a licensed electrician to run 120V power to an accessible upper cabinet location where your low-voltage LED transformer driver will sit. Install wall switches or sensor wire runs before drywall is closed.

2.Route Aluminum Channels into Cabinet Panels:Step 2.

During custom carpentry manufacturing, route 1/2-inch vertical channels along the inside face frames of your plywood or MDF side panels. This allows aluminum tracks to sit completely flush with the wood.

3.Install LED Tape and Frosted Diffusers:Step 3.

Press high-density 24V LED tape (90+ CRI, 3500K) into the aluminum tracks. Snap frosted plastic diffuser covers over the tracks to soften the light and prevent harsh glare spots.

4.Connect Automated Sensor Switches:Step 4.

Install magnetic reed switches on closet doors or infrared motion sensors near the entry. These sensors automatically turn the low-voltage LED system on when the door opens and shut it off when closed.

5.Finish Trim and Test Color Temperature:Step 5.

Wrap top cabinet headers with decorative crown molding to hide upper wiring runs. Test the lighting alongside your actual clothing inventory to verify smooth dimming and accurate color rendering.

Expert Design Tips for High-Performance Closet Lighting

  • Illuminate the Closet Island Countertop: Hang a decorative pendant light or place recessed puck lights directly above your center island to provide focused task light for folding clothes and staging outfits.
  • Add Under-Toe-Kick Accent Strips: Run a low-voltage LED strip along the bottom toe-kick cutout of your base cabinets. This creates a floating visual effect and serves as a soft, automatic nightlight.
  • Highlight Glass Cabinet Doors: Place top puck lights inside upper glass-front cabinets to showcase luxury handbags, watches, and crystal accessories like a retail display case.
  • Coordinate with Cabinet Finishes: Warm white light (3000K–3500K) brings out the rich warmth of dark walnut cabinets, while crisp neutral white (4000K) pairs beautifully with painted shaker cabinets or light white oak.

Frequently Asked Questions

What is the best color temperature for closet lighting?

The best color temperature is between 3500K (neutral white) and 4000K (natural daylight white) with a Color Rendering Index (CRI) of 90 or higher. This ensures fabric colors are rendered accurately without looking overly yellow or cold blue.

Are wireless motion-sensor closet lights good?

Rechargeable battery-powered motion lights are a solid temporary option for rental units or quick retrofits. However, for a permanent, high-end look, hardwired low-voltage LED channels integrated into custom millwork offer far superior brightness and reliability.

Can I install LED strip lights in an existing closet?

Yes. You can surface-mount aluminum LED channels under existing wood shelves or along face frames, running low-voltage wiring behind back panels to an outlet driver.

What is Color Rendering Index (CRI) and why does it matter?

CRI measures how accurately a light source reveals true material colors compared to natural sunlight on a scale from 0 to 100. Always select LED lights with a CRI of 90 or higher for closet spaces so navy and black garments do not look identical.

How do motion sensors work in a walk-in closet?

Infrared (PIR) motion sensors detect heat and movement when you step into the room, triggering the lights instantly. Alternatively, magnetic jamb switches mounted on doors turn cabinet lights on the moment a closet door swings open.

Are LED closet lights a fire hazard?

Low-voltage LEDs operate at very low temperatures compared to traditional incandescent or halogen bulbs, making them exceptionally safe for close-proximity storage near hanging garments when installed to code.

Should closet lights be on a dimmer switch?

Yes, installing a dimmable LED driver allows you to adjust light levels based on the time of day, providing soft illumination during early mornings without blinding brightness.

Where should the light switch be placed for a walk-in closet?

Mount the primary wall switch right outside or just inside the closet entrance. For automated systems, pair the main switch with a door-jam sensor or ceiling motion detector for hands-free operation.

Brighten Your Home Storage with Clear Closets

Are you ready to eliminate dark corners, organize your wardrobe under crystal-clear lighting, and build a gorgeous custom dressing area? The design and master cabinetry team at Clear Closets is here to help you bring your ideas to life. From custom master walk-in closets and reach-ins to integrated LED lighting layouts, pantries, and laundry rooms, we handle every step—from 3D spatial planning to clean, professional installation.

We proudly design and build custom storage systems throughout Alpharetta, Roswell, Johns Creek, and the greater Atlanta metro area. Contact the design experts at Clear Closets to schedule your complimentary custom design consultation today.

Decorative Storage Cabinets That Blend Style with Everyday Storage

Decorative Storage Cabinets That Blend Style with Everyday Storage

Decorative storage cabinets are specialized furniture pieces and built-in units designed to combine visual appeal with functional organization. To optimize a room, decorative storage cabinets integrate custom doors, glass panels, and quality materials to conceal household clutter, display decor, and serve as architectural focal points in living rooms, dining spaces, entryways, and master suites.

What are Decorative Storage Cabinets and How Do They Work?

Decorative storage cabinets are dual-purpose cabinetry solutions that bridge the gap between interior design and practical home storage. Unlike basic utility shelving or plain plastic bins, these cabinets feature stylized door fronts, detailed trim, and furniture-grade materials to store household items out of sight while enhancing the room's overall aesthetic.

In contemporary home design, keeping living areas uncluttered without sacrificing personal style is a constant balancing act. Standard storage units often look utilitarian, while purely decorative accent tables offer little to no usable space for daily storage needs.

Integrating accent units into your space planning solves both challenges. Whether configured as a floating sideboard in a dining room, a hallway credenza, or built-in living room shelving, these cabinets combine structured custom cabinetry with decorative elements. Using targeted space planning, you can conceal everything from board games and extra linens to audio-visual equipment behind handsome door fronts, keeping your main living areas clean and welcoming.

What are the Main Benefits of Decorative Storage Cabinets?

Installing decorative storage cabinets eliminates visual clutter, organizes household overflow, and adds architectural character to blank walls. Furthermore, incorporating custom built-in cabinetry crafted from durable materials provides a long-lasting storage upgrade that enhances everyday functionality while increasing your home's aesthetic appeal and long-term resale value.

  • Concealed Clutter Control: Closing cabinet doors instantly hides loose toys, electronics, media cords, or extra tableware, maintaining a clean visual look.
  • Architectural Focal Points: Detailed door profiles, such as shaker cabinets or fluted wood panels, transform plain drywall into an attractive design feature.
  • Protection for Household Items: Enclosed storage keeps fine china, glassware, linens, and books safe from dust, ambient moisture, and pet hair.
  • Versatile Room Applications: Decorative cabinets work seamlessly across hallways, living rooms, dining spaces, entryways, and master bedrooms.

How Much Do Decorative Storage Cabinets Cost?

Decorative storage cabinets typically cost between $800 and $15,000+, depending on whether you choose freestanding furniture pieces or custom built-in installations. While basic prefabricated wood accent cabinets sit on the lower end, custom floor-to-ceiling cabinetry with hardwood veneers, stone tops, and integrated lighting occupy the premium tier.

To help you budget for your next home improvement project, let us compare the typical cost structures:

Cabinet Type & ScopeAverage Price RangeMaterial & Construction Highlights
Custom Built-In Storage Cabinet$5,000 – $15,000+Floor-to-ceiling cabinetry; natural white oak or walnut wood veneers; stone countertops; recessed LED lighting; crown molding.
Custom Built-In Cabinet$2,500 – $6,000Painted MDF or cabinet-grade plywood construction or sturdy plywood frames; shaker cabinets; full-extension drawer slides; soft-close hinges.
Freestanding Accent Cabinet$500 – $2,000Prefabricated composite or solid wood base; brushed nickel or matte black hardware; adjustable interior shelving; painted or stained finish.

Freestanding Accent Cabinets vs. Custom Built-In Storage: Which is Best?

Choosing between freestanding accent furniture and custom built-in cabinetry comes down to room dimensions, budget, and long-term storage needs. Freestanding cabinets offer portability and lower upfront costs, whereas built-in storage maximizes every inch of vertical wall space, provides superior weight capacity, and creates a seamless furniture look.

Comparing Built-In and Freestanding Storage

Let us evaluate these two primary storage approaches to help you decide which fits your lifestyle best:

FeatureCustom Built-In CabinetsFreestanding Accent Cabinets
Space UtilizationMaximizes 100% of vertical height and wall width; leaves no empty gaps.Fixed sizes leave gaps on sides, top, and behind the unit.
Storage CapacityHigh; accommodates heavy loads, wide shelves, and multi-tier drawers.Moderate; limited by small internal dimensions and fixed shelves.
Design IntegrationBlends seamlessly with existing millwork, baseboards, and wall colors.Standalone style that may contrast with room architecture.
Permanence & ROIPermanent structural addition that directly increases home equity.Portable furniture item that moves with you when you relocate.

MDF vs. Plywood: What is the Best Material for Decorative Cabinets?

Selecting the best cabinet material depends on whether you prefer a painted or stained wood finish. High-density MDF is the gold standard for smooth, painted finishes because it resists cracking along joints, while cabinet-grade plywood is the premier structural choice for holding heavy-weight loads under natural wood veneers.

Material Options Compared

Understanding cabinet materials ensures your storage units handle daily use without sagging over time:

  • Medium-Density Fiberboard (MDF): Made from fine wood fibers bound with resin, MDF is perfectly flat, dense, and uniform. It does not expand or contract with temperature shifts, making it the ideal substrate for a smooth, painted finish on shaker cabinets and decorative door panels.
  • Cabinet-Grade Plywood: Constructed from alternating layers of wood veneer, plywood provides exceptional lateral strength and screw-holding power. It is the preferred material for building heavy cabinet boxes that support stone tops or heavy book collections.
  • Natural Hardwoods (White Oak / Walnut): Staining natural hardwoods brings organic warmth and elegance to your interior design. White oak offers a bright, modern Scandinavian tone, while walnut delivers a rich, classic look that pairs beautifully with hardwood floors.

What Common Decorative Cabinet Mistakes Should You Avoid?

The most frequent mistakes when choosing decorative cabinets are selecting shallow depths for bulky items, neglecting cord management for electronics, and using low-quality hardware. Forgetting to verify shelf weight limits or choosing delicate door finishes in high-traffic hallways leads to early wear and functional frustration.

Keep these common design and layout pitfalls in mind to ensure your project runs smoothly:

  • Choosing Shallow Counter Depths: Standard 12-inch shallow accent cabinets cannot fit large serving platters, game boxes, or audio receivers. Ensure your main storage cabinet is at least 15 to 18 inches deep for versatile home storage.
  • Neglecting Cable Management: If you plan to place a television, lamp, or media player on or inside your cabinet, ensure the design includes rear wire grommets and internal ventilation cutouts to prevent overheating.
  • Using Budget Drawer Slides and Hinges: Cheap hardware wears out quickly under daily use. Always specify heavy-duty soft-close hinges and full-extension drawer slides that keep daily operation quiet and smooth.
  • Forgetting Proportional Scale: Placing a tiny accent cabinet on a massive 16-foot living room wall makes the room feel unbalanced. Match the cabinet scale to your wall dimensions or build out a full wall system.
decorative storage cabinets

How to Successfully Implement Decorative Cabinets in Your Home

Implementing decorative storage cabinets requires measuring your room layout, evaluating what you need to store, and selecting a door style that complements your home. Start by establishing clear walkways, choosing durable materials, adding internal organization systems, and topping the unit with decorative trim.

Follow this five-step process to plan a flawless cabinet installation:

  • Step 1: Audit Your Storage Needs: List the items you need to hide away—such as extra throw blankets, board games, liquor bottles, or dinnerware. Measure the largest items to determine necessary shelf depths and heights.
  • Step 2: Map Walkway Clearances: Measure your room footprint carefully. Ensure you maintain at least 36 inches of clear walking space in front of the cabinet so doors and drawers can open fully without blocking traffic.
  • Step 3: Select Your Door Profile: Choose a door style that matches your room's aesthetic. Classic shaker doors offer timeless appeal, glass-front doors showcase collectibles, and fluted or slatted wood panels add modern texture.
  • Step 4: Build Sturdy Cabinet Boxes: Work with a custom cabinet maker to construct box frames using high-density plywood or moisture-resistant MDF. Install adjustable shelf pins so you can reconfigure internal space over time.
  • Step 5: Finish with Trim and Lighting: Wrap the top and base of custom built-ins with crown molding and baseboards to match your home. Add low-voltage LED lighting channels inside glass cabinets or under floating shelves for ambient warmth.

Expert Styling and Organization Tips for Accent Cabinets

  • Balance Closed and Open Storage: Combine closed lower cabinetry with open upper floating shelves. Use the hidden lower cabinets for unsightly clutter and the open shelves to display books, vases, and framed photos.
  • Incorporate Adjustable Shelf Pins: Fixed shelves limit what you can store. Always specify adjustable shelf pin tracks so you can change shelf heights as your storage needs evolve.
  • Add Internal Drawer Insert Trays: Keep small items organized inside cabinet drawers by adding custom felt or wood dividers for silverware, remote controls, or office supplies.
  • Use Warm Accent Lighting: Install puck lights or continuous LED tape along the undersides of shelves. Soft 3000K warm white lighting turns a standard storage cabinet into a gorgeous evening backdrop.

Frequently Asked Questions

What is the standard depth for a decorative storage cabinet?

The standard depth for a decorative living room or dining room storage cabinet is 15 to 18 inches. This depth provides ample room for serving platters, media devices, and storage baskets while keeping a slim profile against the wall.

Can I use decorative storage cabinets in an entryway?

Yes, absolutely. A shallow decorative cabinet in an entryway acts as a stylish drop zone for keys, mail, shoes, and dog leashes, keeping your front entrance clean and organized.

How do soft-close hinges protect custom cabinetry?

Soft-close hinges use small hydraulic dampers to catch cabinet doors as they close, gently pulling them shut. This prevents slamming, protects glass inserts, and reduces wear on wood frames over time.

Are custom built-in cabinets better for resale value than freestanding furniture?

Yes. Custom built-in cabinetry is considered a permanent structural addition that appraises as home equity, appealing strongly to buyers in luxury homes.

What is the best wood finish for a modern decorative cabinet?

Natural white oak and rich walnut are the most popular wood-grain finishes in contemporary design. White oak provides a bright, Scandinavian feel, while walnut adds rich, mid-century warmth.

How do I hide television wires around a decorative media cabinet?

Design your custom cabinet with a hollow rear backing panel or wire chase. Route all HDMI lines and power cords behind the drywall or cabinet back directly to lower outlets.

What is the weight capacity of a plywood cabinet shelf?

A high-quality 3/4-inch cabinet-grade plywood shelf supported properly across a 36-inch span can comfortably hold 75 to 100 pounds without bowing or sagging.

How high should a dining room sideboard cabinet be?

Standard dining room sideboards and credenzas sit between 30 and 36 inches high, making them comfortable for serving food and staging drinks during dinner parties.

Design Your Ideal Storage with Clear Closets

Are you ready to clear out visual clutter, organize your home's living areas, and add gorgeous custom cabinetry to your space? The design and master cabinetry team at Clear Closets is here to help you bring your storage ideas to life. From custom decorative wall units and living room built-ins to master walk-in closets, pantries, and laundry systems, we manage the entire project—from initial 3D design plans to clean, professional installation.

We proudly design and build custom storage systems throughout Alpharetta, Roswell, Johns Creek, and the greater Atlanta metro area. Contact the design experts at Clear Closets to schedule your complimentary custom design consultation today.

Wood Countertops for Every Style and Budget

Wood Countertops for Every Style and Budget

Wood countertops are durable surfaces made from natural solid hardwoods, edge-grain planks, or end-grain butcher block. They cost between $30 and $150 per square foot depending on wood species like white oak or walnut. Ideal for kitchens, laundry rooms, and custom cabinetry, wood countertops require periodic sealing with food-safe oils or polyurethane to prevent water damage and warping.

What is a Wood Countertop?

A wood countertop is a custom-engineered surface crafted from solid hardwood slabs, edge-grain lumber, or end-grain butcher block blocks. Unlike synthetic laminates or stone, natural wood surfaces bring organic warmth, sound dampening, and repairability to kitchens, utility spaces, and built-in storage areas while seamlessly integrating with custom carpentry and millwork.

Wood countertops have evolved from simple utility surfaces into defining architectural features in modern home design. Homeowners frequently choose solid hardwoods to break up cold stone surfaces or to add warmth to custom cabinetry and shaker cabinets.

When planning space planning in luxury homes, wood provides a tactile quality that stone cannot match. Modern wood counters are engineered to resist moisture and dimensional shifting through precise kiln-drying and advanced joining techniques. Whether used on a kitchen island, for pantry makeover or a dedicated folding station in a laundry room closet, wood provides a versatile balance between structural durability and high-end aesthetic value.

What are the Main Benefits of Wood Countertops?

Wood countertops offer exceptional versatility, warmth, and longevity because they can be sanded and refinished multiple times over decades. They reduce noise from cookware, prevent glassware breakage, improve home resale value, and allow seamless integration with custom carpentry, soft-close hinges, and integrated LED lighting systems.

  • Aesthetic Warmth and Versatility: Natural grain patterns in species like walnut and white oak complement both modern interior design and traditional shaker cabinets.
  • Refinishability and Repairability: Unlike quartz or granite, which require costly specialized repairs if chipped, a damaged wood counter can be sanded down, re-stained, and sealed on-site.
  • Acoustic and Impact Cushioning: Wood absorbs sound waves and offers a softer impact landing, reducing kitchen noise and protecting delicate dishes.
  • Customization and Integration: Wood can easily be shaped to fit around built-in storage, custom cabinetry, crown molding, and unique nook dimensions during home storage upgrades.

How Much Do Wood Countertops Cost?

Wood countertops typically cost between $30 and $150+ per square foot for materials, with professional installation adding approximately $20 to $50 per square foot. Total project prices range from $1,200 for standard butcher block installations to over $6,000 for custom walnut or exotic hardwood surfaces paired with complex millwork.

The overall cost depends heavily on the chosen wood species, grain construction, and thickness. Below is a breakdown of realistic pricing structures and material specifications across common project types:

Wood Species & TypeAverage Price Range (per sq. ft.)Material & Structural Highlights
Standard Butcher Block (Maple/Birch)$30 – $60Edge-grain construction; highly durable; ideal for utility rooms and budget kitchen updates.
Premium White Oak & Walnut$75 – $120+Premium solid hardwood; rich figure and grain depth; pairs exceptionally well with custom cabinetry.
Premium Walnut Countertops$100 – $150+Superior knife resilience; self-healing grain; thick construction ideal for food preparation surfaces.

White Oak vs. Walnut vs. Maple: What is the Best Wood Species for Countertops?

The best wood species depends on your budget, usage intensity, and color scheme. White oak offers superior moisture resistance and tight grain; walnut provides rich dark tones that elevate luxury homes; maple delivers maximum hardness for heavy chopping and utility work.

Selecting the right wood species requires balancing hardness (measured on the Janka scale), grain stability, and color compatibility with surrounding home storage solutions:

  • White Oak: Highly stable with tight pores, making it inherently more resistant to moisture. Its light neutral tone pairs perfectly with painted shaker cabinets and modern space planning.
  • Walnut: Known for deep brown hues and elegant grain patterns. While slightly softer than maple, walnut adds instant resale value and acts as a focal point in high-end interior design.
  • Maple: Extremely dense and non-porous. It resists dents and scratches, making it the industry standard for functional butcher block prep zones and high-traffic areas.

Solid Wood vs. MDF vs. Plywood: Material Comparison for Moist Environments

Solid hardwood is ideal for dry prep areas and high-impact counters, whereas moisture-resistant plywood or engineered MDF with hardwood veneers offer superior dimensional stability in high-humidity areas like laundry room closets, preventing warping and joint separation caused by ambient moisture.

Choosing the right substrate is essential when installing wood surfaces near sinks, washers, or moisture-prone areas:

  • Solid Hardwood: Excellent for longevity and refinishing, but naturally expands and contracts across seasons. Requires proper mechanical fasteners that allow wood movement.
  • Cabinet-Grade Exterior Plywood: Features alternating wood-grain directions for extreme structural stability. Ideal for under-counter substructures and hidden built-in storage support.
  • Industrial-Grade MDF (Moisture-Resistant): Provides a completely flat surface that will not warp or telegraph imperfections, making it a stable base for veneer wraps in climate-controlled utility spaces.

How Do You Seal and Maintain Wood Countertops?

To maintain wood countertops, apply food-safe mineral oil or hardwax oil every 4–6 weeks for butcher blocks, or seal non-food prep areas with a satin polyurethane. Wipe up spills immediately, avoid leaving standing water near seams, and clean surfaces using pH-neutral wood cleaners.

Proper maintenance prevents water penetration, staining, and drying out:

  • For Food Prep (Butcher Blocks): Use food-grade mineral oil, beeswax, or organic butcher block conditioners. Apply generously, allow it to soak overnight, and wipe away excess.
  • For Decorative & Utility Surfaces: Apply hardwax oils (like Rubio Monocoat or Osmo) or water-based polyurethanes. These form a protective barrier that resists liquid penetration while maintaining a low-sheen, natural look.
  • Daily Care: Avoid harsh bleach or abrasive scrubbing pads. Use a damp microfiber cloth with mild dish soap, followed by a dry towel to eliminate residual moisture.
dark walnut wood countertops

What Common Mistakes Should You Avoid with Wood Countertops?

Common mistakes include sealing wood with non-food-safe chemicals on food prep zones, trapping standing water around sink cutouts, ignoring seasonal expansion gaps during installation, and placing hot pots directly on the wooden surface without trivets.

Avoid these frequent pitfalls during installation and daily use:

  • Over-tightening Fasteners: Screwing wood counters directly to base cabinets without slotted brackets or expansion washers prevents natural wood movement, leading to severe cracking.
  • Neglecting the Underside: Sealing only the top surface causes uneven moisture absorption, leading to upward or downward cupping over time. Always seal all six sides equally.
  • Placing Hot Pans Directly on Wood: Direct heat scorches the wood finish and can break down glue joints in laminated butcher blocks.
  • Ignoring Plumbing Clearance: Failing to leave sealed expansion gaps around undermount sinks allows water to seep into the end grain, causing wood rot and discoloration.

Frequently Asked Questions (FAQs)

Are wood countertops sanitary for kitchen use?

Yes. Studies show that natural hardwoods like maple and white oak have inherent antimicrobial properties that draw in and destroy bacteria, provided the wood is properly oiled and cleaned after use.

Can you install a sink in a wood countertop?

Yes, drop-in and undermount sinks can be installed with wood countertops. However, the cutout edges must be thoroughly sealed with marine-grade varnish or silicone sealant to prevent water from penetrating the raw wood.

How do I choose between edge-grain and end-grain wood countertops?

Choose edge-grain for long continuous plank aesthetics and lower cost. Choose end-grain (checkerboard pattern) if you intend to chop heavily on the surface, as knife blades slide between wood fibers without dulling.

Is white oak better than red oak for countertops?

Yes. White oak has closed tyloses (cellular structures) that block water absorption, whereas red oak has open pores that soak up liquids and stain easily when exposed to moisture.

Are wood countertops worth it compared to quartz?

Wood countertops are worth it if you value warmth, repairability, and acoustic comfort. While quartz requires less daily maintenance, wood can be sanded and restored indefinitely, extending its lifespan over decades.

How do wood countertops affect home resale value?

High-quality wood countertops paired with custom cabinetry, soft-close hinges, and crown molding increase perceived craft value in luxury homes, making spaces feel custom-designed rather than builder-grade.

How much expansion space is needed for wood countertop installation?

Leave a $1/8$-inch to $1/4$-inch expansion gap along walls and cabinet perimeters, hidden under backsplash tile or molding, to accommodate natural humidity shifts throughout the year.

Can you use wood countertops in a laundry room closet?

Yes. Wood countertops provide an excellent, smooth surface above washers and dryers for folding clothes, provided the surface is sealed against moisture and ambient steam.

Planning a home upgrade with custom storage solutions? Explore how custom carpentry, space planning, and premium materials come together to transform your home by visiting Clear Closets Contact Page.