Hiring a Closet Organizer in Atlanta

Hiring a Closet Organizer in Atlanta: Systems, Costs, and Tips

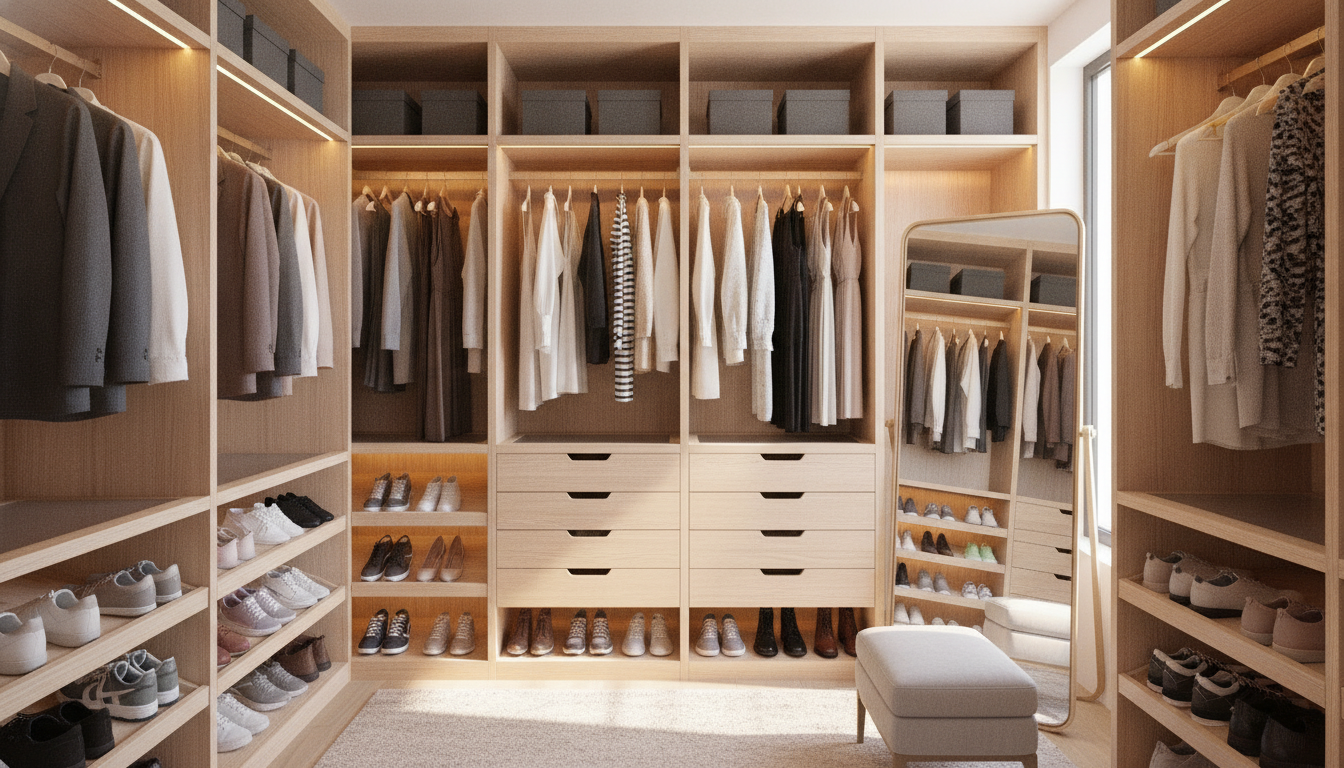
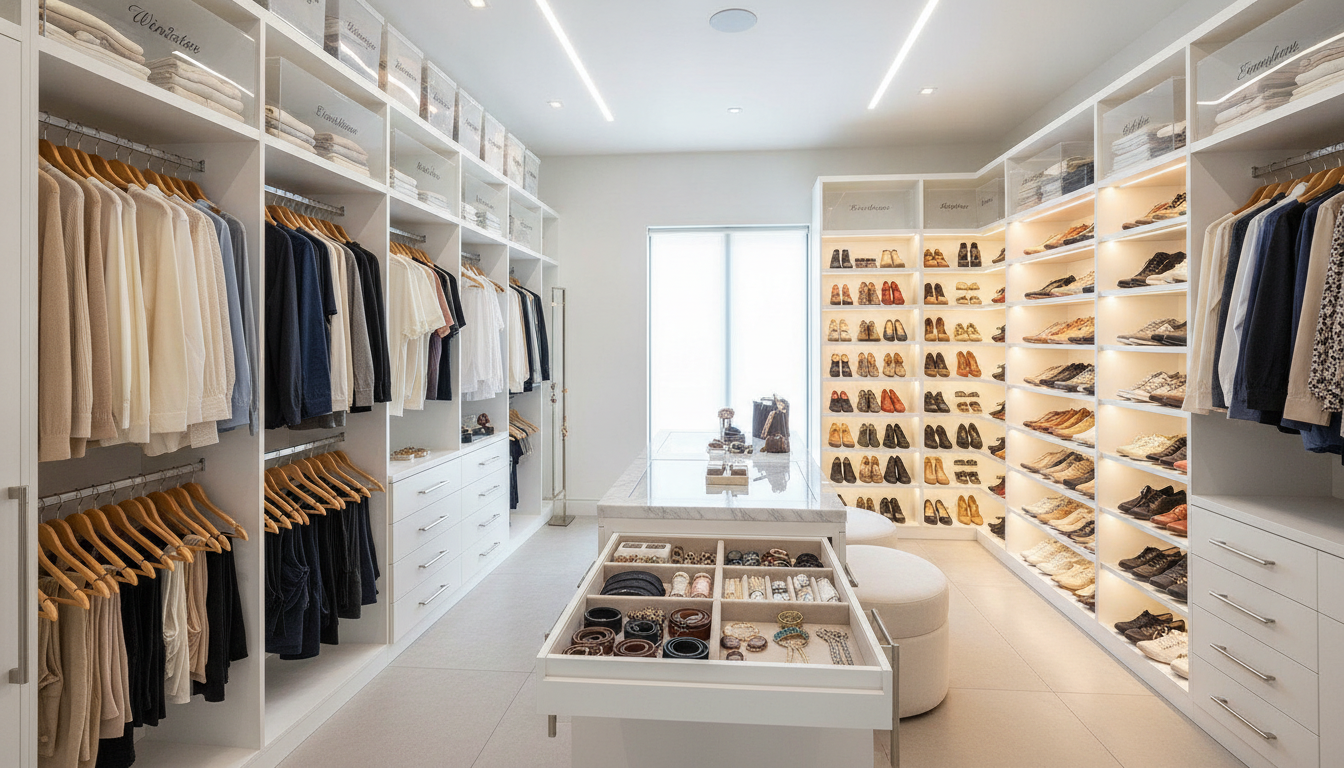
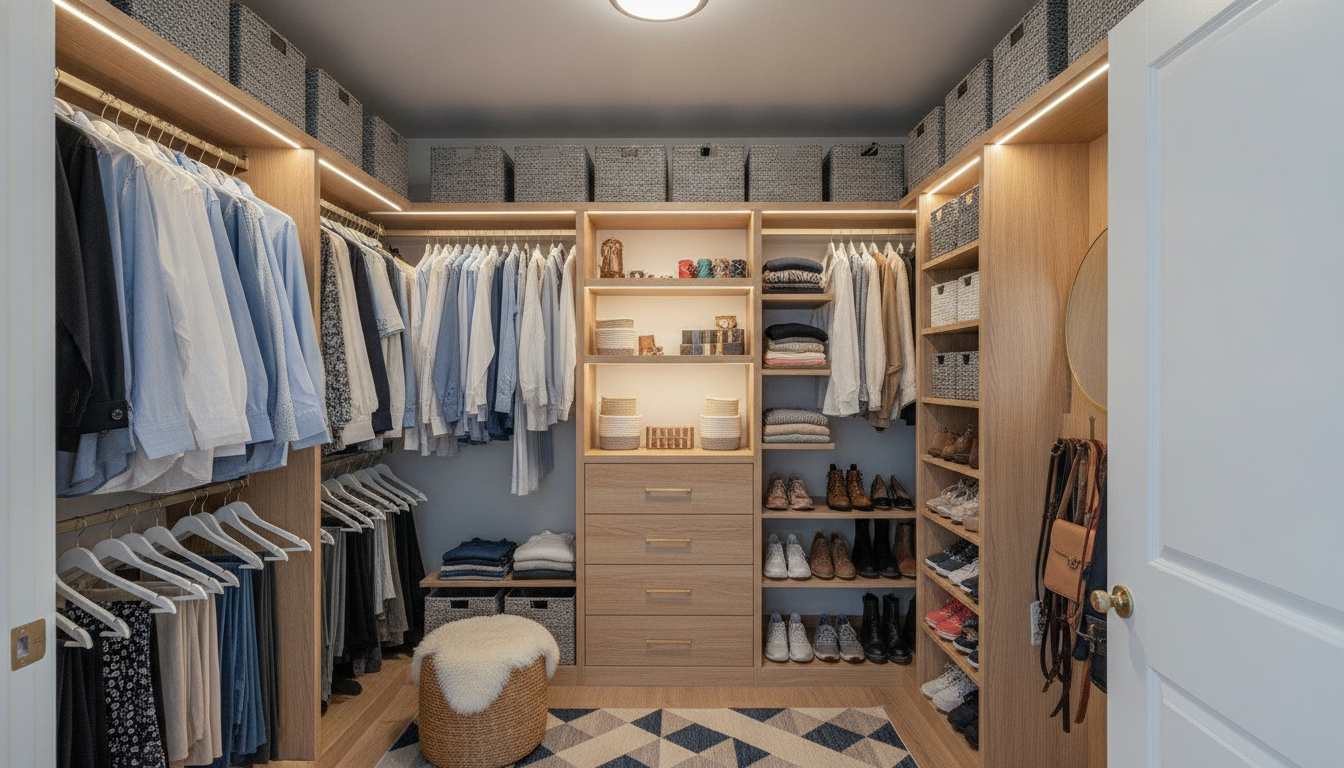
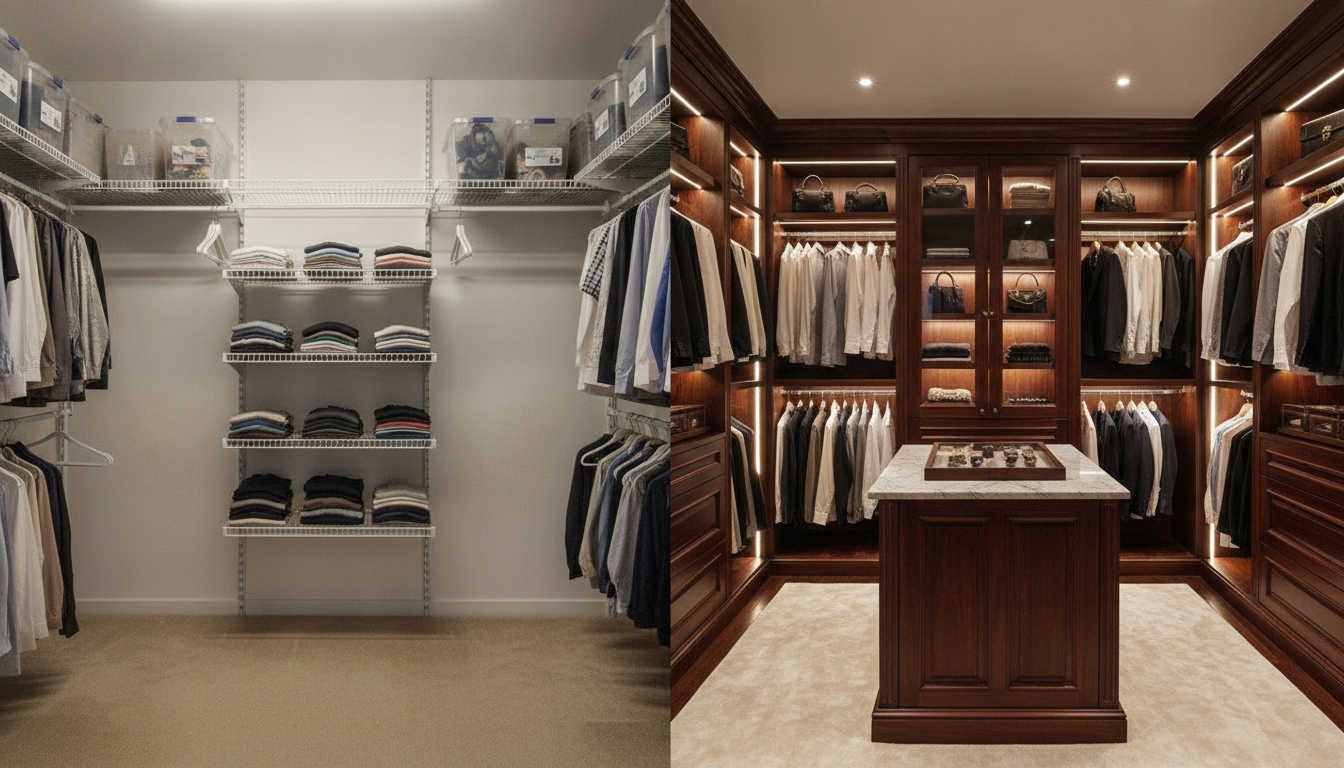
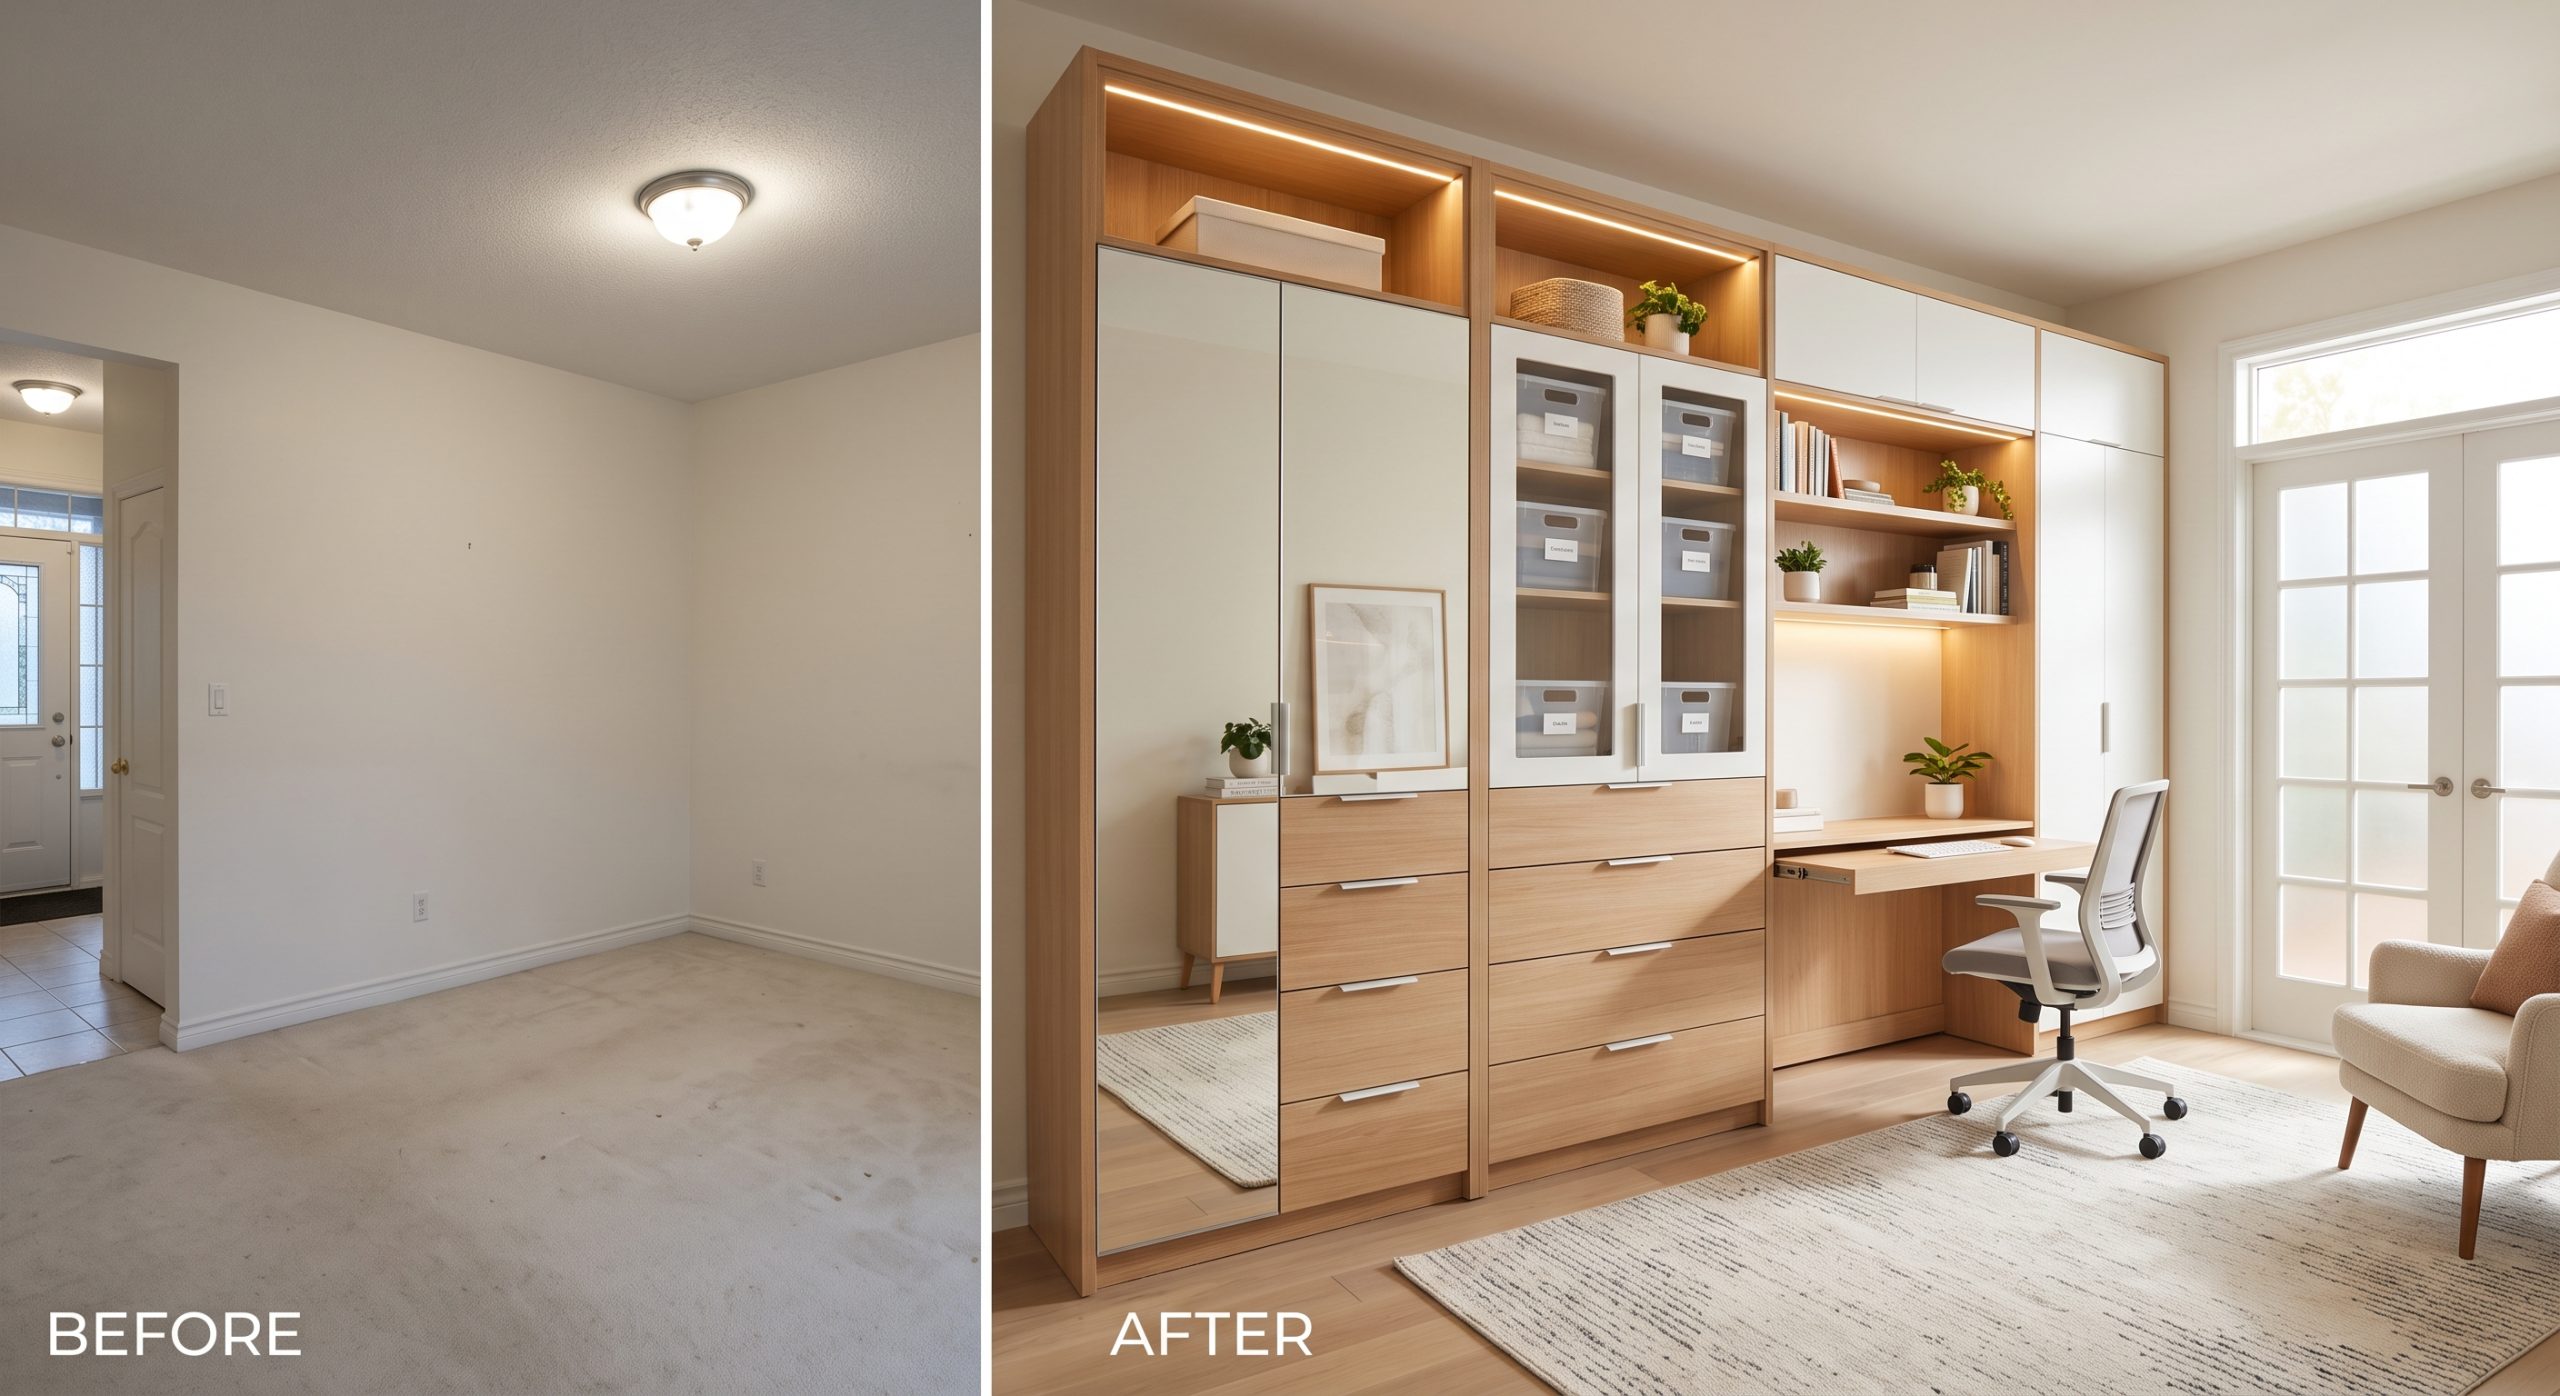
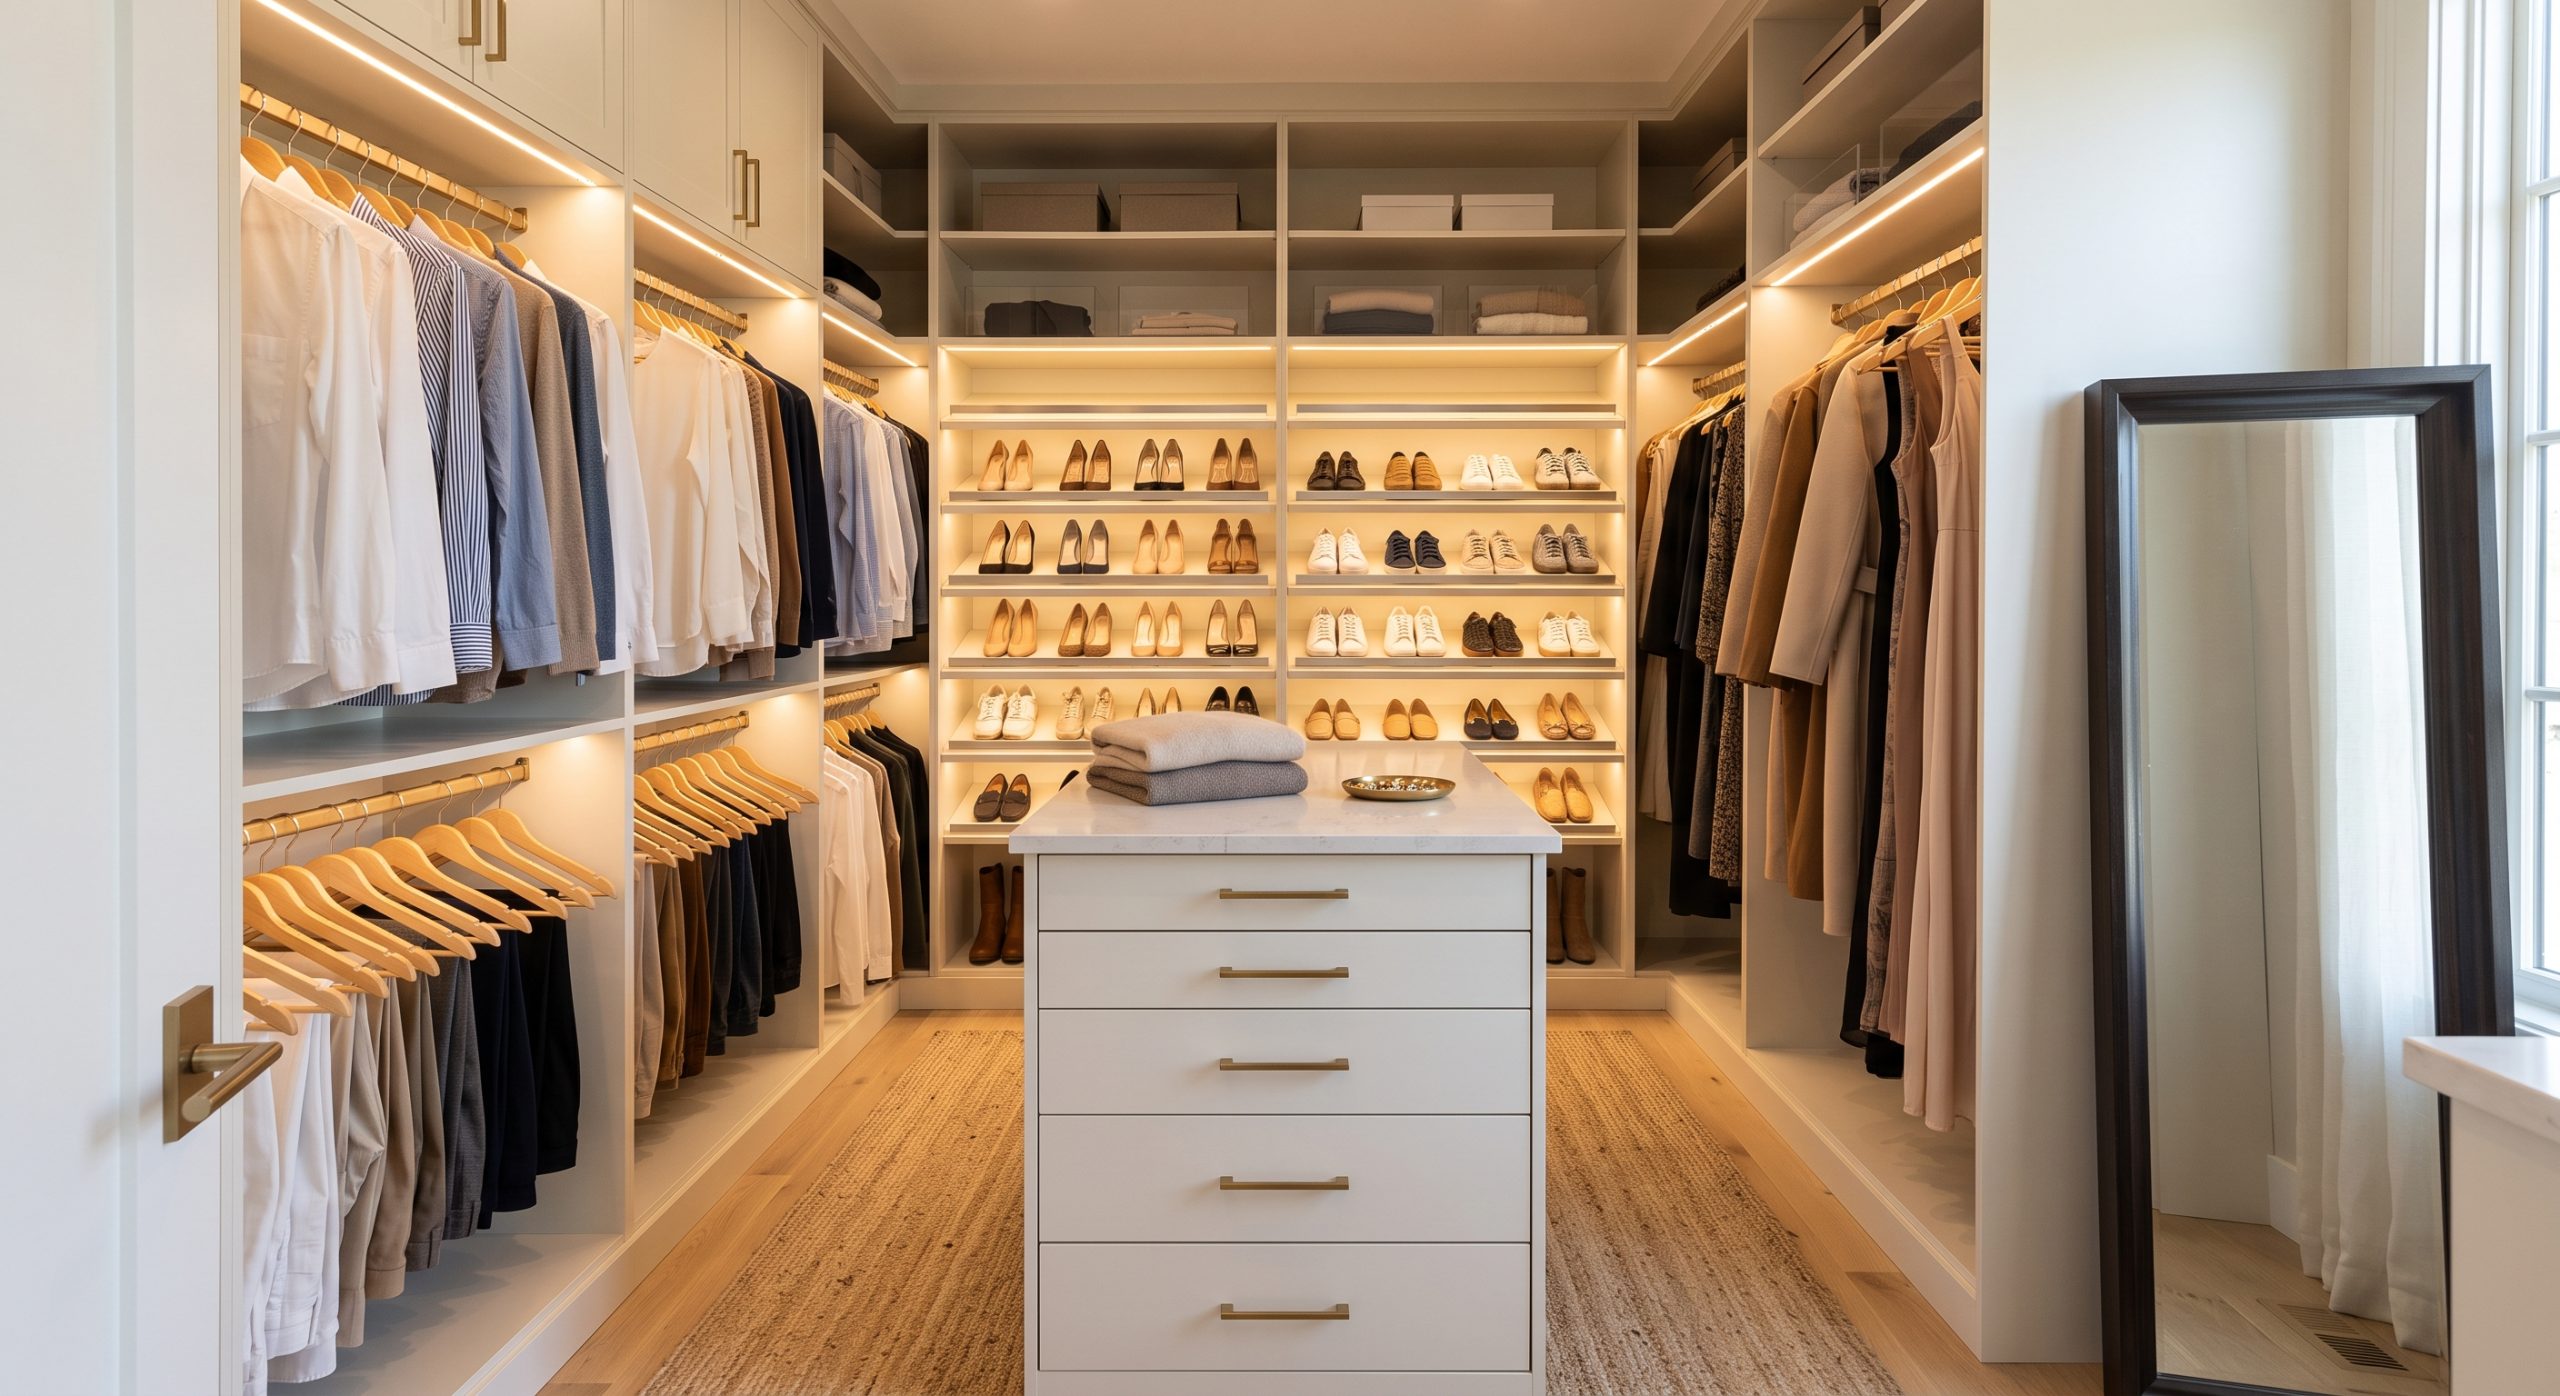
Working with a professional closet organizer in Atlanta allows you to transform cluttered closets into highly efficient, custom organization systems. By designing personalized layouts with high-quality custom cabinetry, adjustable shelving, and specialized hanging zones, local experts maximize your available wall space to store and protect your wardrobe while matching the specific architectural style of your home.

What is a Professional Closet Organizer and How Does It Work?

A professional closet organizer design is a tailored, structural solution engineered to maximize home storage capacity and simplify your daily dressing routine. These integrated systems replace basic wire racks with heavy-duty built-in storage towers, soft-closing drawers, and dedicated hanging zones configured to match your specific wardrobe inventory and bedroom layout.

For many homeowners across the Atlanta metro area, storage space is at a premium. Older homes in neighborhoods like Midtown, Virginia-Highland, and Buckhead often feature tiny, shallow closets that quickly turn into chaotic piles of clothes and shoes. Even in newer construction, standard builder-grade wire shelves fail to utilize the room's true vertical potential.

An organized custom system is essentially a high-performance piece of furniture built permanently into your wall studs. By utilizing professional space planning, designers divide your closet into functional zones. This ensures that every jacket, pair of shoes, accessory, and folded sweater has a clear, visible, and dedicated home.

What are the Main Benefits of Upgrading Your Closet Storage?

Upgrading your closet storage dramatically increases your usable space, shields your wardrobe from damage, and enhances your home's aesthetic appeal. In addition, replacing flimsy wire shelves with high-quality custom cabinetry creates a permanent, premium feature that elevates your home's structural quality and long-term resale value.

  • Maximized Space Planning: Custom layouts utilize your entire wall height from floor to ceiling, ensuring no vertical storage space is wasted.
  • Protection for Fine Fabrics: Smooth, flat wood shelves and velvet-lined drawers protect delicate knits, silk dresses, and leather bags from snags and dust.
  • Streamlined Routines: A clear, visible layout groups clothes by category and color, helping you find outfits in seconds and reducing morning stress.
  • Elevated Interior Design: Matching your closet's wood finishes and door styles to your bedroom's layout creates a beautiful, unified home environment.

How Much Does a Custom Closet Organizer Atlanta System Cost?

A custom closet system in Atlanta typically costs between $2,500 and $12,000+, depending on the closet size, material choice, and door configurations. While simple reach-in systems utilizing open-face melamine shelving sit at the lower end, large walk-in closets featuring hardwood veneers and custom lighting represent premium investments.

To help you budget for your home organization project, let us compare the typical price ranges for local installations:

Closet TypeAverage Price RangeKey Materials & Features Included
Premium Walk-In$8,000 – $20,000+
Premium wood veneers or painted cabinetry, center island, integrated LED lighting, soft-close drawers, decorative hardware, and custom storage accessories.
Custom Built-In$4,000 – $8,000Custom cabinetry, durable laminate or painted finishes, soft-close hardware, adjustable shelving, drawer units, and optional accent lighting.
Standard Reach-In$1,500 – $4,000Durable melamine shelving, double hanging rods, adjustable shelves, chrome hardware, and practical drawer or shelf configurations.

MDF vs. Plywood: Which Material is Best for Your Closet Shelves?

Choosing the best cabinet material depends on your budget, style goals, and preferred finish. High-density MDF is the industry-standard choice for smooth, painted lacquer finishes because it resists warping, while multi-layered plywood is the ideal structural choice for holding heavy-weight loads under natural wood veneers.

Core Cabinetry Materials Compared

When planning your custom cabinetry, the underlying materials determine both the strength and longevity of your shelves:

  • Medium-Density Fiberboard (MDF): Made from fine wood fibers and resin pressed under high pressure, MDF is incredibly flat, dense, and uniform. It does not have natural knots or wood grain patterns, making it the perfect choice for a flawless, painted finish on cabinet doors, drawer fronts, and decorative trim.
  • Cabinet-Grade Plywood: Constructed from thin, cross-laminated layers of wood veneer, plywood is exceptionally strong and holds screws tightly. It resists bowing under heavy weight, making it the ideal structural choice for long closet shelves and cabinet box frames.
  • White Oak and Walnut: These premium hardwoods are highly popular in luxury homes. White oak provides a bright, modern, and highly durable Scandinavian look, while walnut brings a deep, rich, and classic warmth to your home's millwork.

What Common Closet Organizing Mistakes Should You Avoid

The most frequent closet design mistakes are utilizing fixed-height shelves, neglecting your exact clothing inventory, and ignoring lighting needs. Designing deep stationary shelves without pull-out drawers or forgetting to leave room for long dresses leads to hard-to-reach, unorganized clutter and wasted space.

Keep these common design and layout pitfalls in mind to avoid costly mistakes:

  • Relying on Single Hanging Rods: A single rod placed 65 inches high leaves a massive amount of empty, wasted space underneath. Always use a double-hanging system for shorter shirts, jackets, and folded pants to instantly double your capacity.
  • Ignoring Shoe Storage Heights: Standard shoe cubbies are often too short for tall heels, boots, or high-top sneakers. Specify adjustable shelves so you can easily adjust heights as your shoe collection changes.
  • Forgetting to Audit Your Wardrobe: Never build a closet system based on guesswork. Always count your hanging shirts, long dresses, and shoes first. This concrete inventory ensures you build the exact ratio of rods to drawers that you need.
  • Leaving the Space Dark: Windowless closets are notoriously dark, making it hard to tell navy blue from black. Run low-voltage LED strip lights vertically along your cabinet face frames to keep every item fully visible.

How to Successfully Plan and Implement Your Closet Makeover

Implementing a successful closet layout requires evaluating your wardrobe, choosing a matching color palette, and zoning your storage vertical heights. Start by mapping out your active clothing reach zones, choosing durable wood or painted finishes, and completing the look with elegant crown moldings and hardware.

To design an organized and beautiful closet system, use this five-step design process:

  • Step 1: Audit and Count Your Clothing: Take everything out of your existing closet. Group your clothes into active wardrobe items, seasonal wear, and donation piles. Count exactly how many linear feet of hanging, folded, and footwear storage you require.
  • Step 2: Determine Your Cabinet Layout: Decide if a linear, L-shaped, or U-shaped layout works best for your space. If you are building a walk-in closet, ensure you maintain a comfortable walking path of at least 32 to 36 inches.
  • Step 3: Choose Your Materials and Finishes: Select your door styles, drawer fronts, and wood finishes. For a classic, transitional look, choose painted shaker cabinet doors with soft-close hinges. For a modern, organic feel, opt for warm white oak or rich walnut veneers.
  • Step 4: Build the Structural Boxes: Work with a custom cabinet maker to construct your cabinet frames. Ensure they use high-density plywood or moisture-resistant MDF frames for exceptional longevity.
  • Step 5: Install Trim and Finishes: Run your cabinets all the way to your ceiling. Wrap the top header with beautiful crown molding to give the entire system a seamless, custom built-in furniture look.

Expert Styling and Organization Tips for Your Wardrobe

  • Ditch Mismatched Hangers: Replace plastic and wire hangers with uniform wooden or velvet-flocked hangers. This instantly gives your closet the clean, high-end look of a retail store.
  • Incorporate a Pull-Out Valet Rod: This small metal rod mounts to your shelving and slides out to hold dry cleaning, your favorite jacket, or tomorrow's planned outfit.
  • Use Acrylic Drawer Dividers: Organize your socks, underwear, and ties inside your drawers using clear, adjustable acrylic dividers to keep small items perfectly sorted.
  • Organize Shoes by Style and Color: Arrange your shoe collection on adjustable shelves, facing them forward or alternating heel-to-toe to maximize visual appeal and space efficiency.

Frequently Asked Questions

How do I choose the best closet organizer in Atlanta?

Look for a local company with experience in custom carpentry and space planning. Ensure they offer detailed 3D design mockups, provide transparent pricing, use durable materials like plywood or MDF, and have excellent reviews from homeowners in your neighborhood.

Are custom built-in closets worth the cost?

Yes, absolutely. They maximize every cubic inch of a small bedroom, make daily routines much smoother, and act as high-value built-in features that elevate a home's structural quality and market value.

What is the standard depth of a closet organizer?

The standard depth for a custom closet cabinet is 14 inches for open shelving and 24 inches if you plan to install closed cabinet doors to keep hanging coats from getting pinched.

Can I install a closet island in a small walk-in?

To fit a central island, your walk-in closet should measure at least 10 feet by 10 feet. This ensures you maintain comfortable 36-inch pathways on all sides of the island to walk and open drawers comfortably.

What is the best lighting color temperature for a closet?

The best color temperature is between 3500K (neutral white) and 4000K (natural day white). This ensures clothing colors appear true to life, preventing frustrating styling mistakes.

Should I choose open shelving or closed cabinet doors?

A hybrid design works best. Use open shelving for frequently worn everyday items like shirts and folded sweaters. Use closed cabinets to hide less attractive items, bulk storage, and out-of-season gear.

How do soft-close hinges protect custom cabinetry?

Soft-close hinges use small hydraulic dampers to catch the cabinet door as it closes, gently pulling it shut. This prevents slamming, which reduces wear and tear on your wood frames.

How do I maximize a small reach-in closet?

Use a double-hanging rod system to instantly double your hanging capacity, install a central drawer tower to eliminate the need for an bulky bedroom dresser, and run shelves up to the ceiling for out-of-season storage.

Design Your Dream Space with Clear Closets

Are you ready to clear out your closet clutter, completely reorganize your wardrobe, and design a gorgeous, relaxing dressing area? The custom cabinetry and design experts at Clear Closets are here to help you bring your dream home storage to life. From modern walk-in master closets and efficient reach-ins to custom laundry rooms, pantries, and home offices, we manage the entire project—from 3D conceptual designs to professional, clean installation.

We proudly design and install premium home storage systems throughout Alpharetta, Roswell, Johns Creek, and the greater Atlanta metro area. Contact the design experts at Clear Closets to schedule your complimentary custom design consultation today.

Transparent Closet Design

Transparent Closet Design: Bringing Boutique Elegance Home

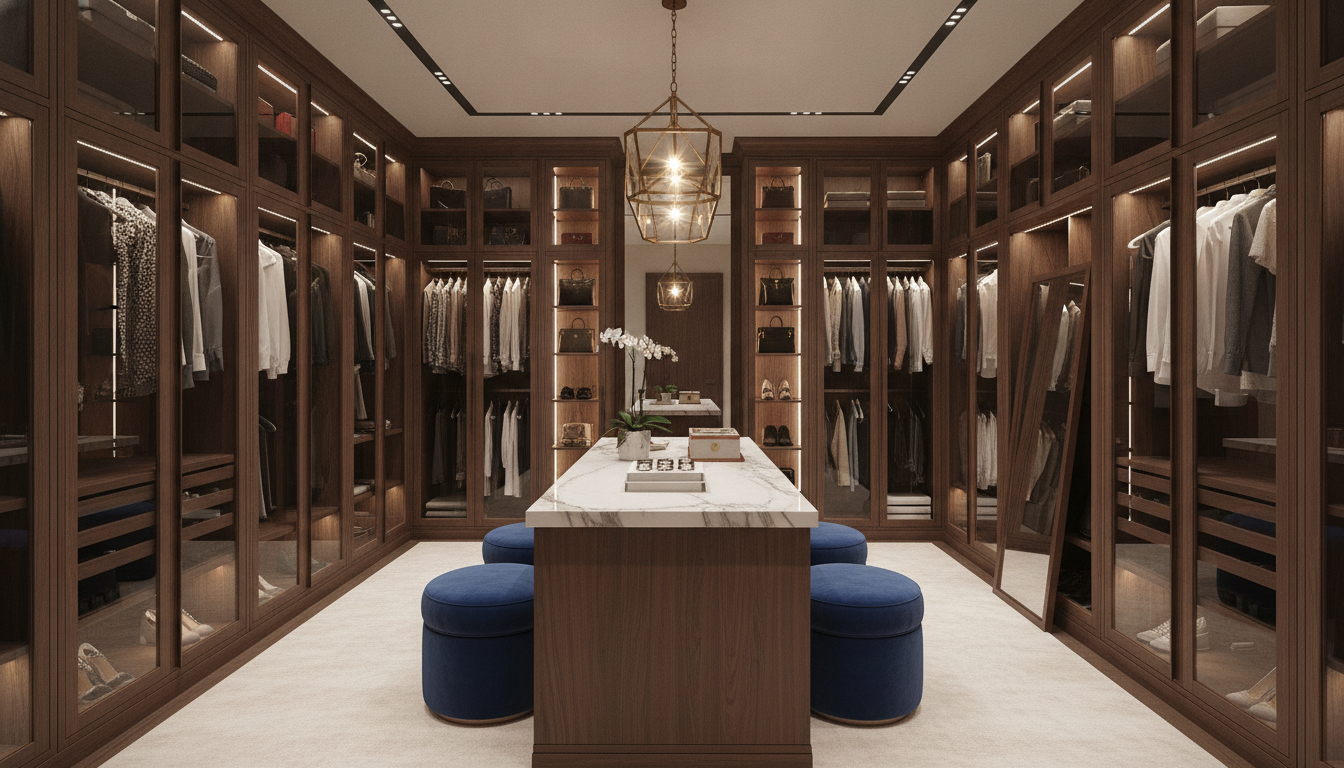
A transparent closet is a luxury wardrobe system featuring clear, tinted, or frosted glass doors framed in custom metal or wood profiles. Combining premium custom cabinetry with integrated LED lighting, a transparent wardrobe creates a highly visible, dust-free showcase for your clothing, elevating standard home storage into a striking visual focal point inspired by high-end fashion boutiques.

What is a Transparent Closet System?

A transparent closet represents the pinnacle of contemporary interior design, replacing solid wooden doors with tempered safety glass. These high-end organization systems blend architectural millwork with modern structural frames to turn your curated clothing, designer handbags, and footwear into a stunning exhibition, making them highly sought-after in luxury homes.

When you transition from traditional, closed-door wardrobes to a transparent layout, you are completely redefining how your bedroom or dressing room functions. Standard doors hide clutter, but they also shut out light and close off space. Glass doors do the exact opposite.

A transparent wardrobe acts as a spatial magnifier. It allows the eye to travel through the cabinet doors, instantly making a bedroom or master suite feel larger, brighter, and more sophisticated. The magic lies in the details—from the slim aluminum sash profiles to the whisper-quiet soft-close hinges and concealed drawer slides that make opening and closing each section an incredibly premium, tactile experience.

What are the Main Benefits of a Glass Closet System?

Designing a closet with glass doors dramatically increases room brightness, protects garments from environmental dust, and encourages long-term organization. Beyond these immediate visual advantages, custom glass wardrobes serve as permanent home upgrades that significantly boost your property’s overall modern appeal and market resale value.

  • Dust and Moisture Defense: Open closets look beautiful but leave clothes vulnerable to ambient dust, pet hair, and humidity. Glass doors offer the beautiful look of open shelves while keeping your wardrobe protected inside a sealed, clean environment.
  • Enhanced Spatial Openness: The reflective properties of clear or smoked glass bounce natural light around the room, making narrow walk-ins or small bedrooms feel twice as large.
  • Encouraged Orderliness: Knowing your wardrobe is on display naturally discourages clutter. It encourages you to keep your clothes neatly folded, hung symmetrically, and beautifully categorized.
  • Premium Material Integration: Combining glass with high-end hardwoods like white oak or rich walnut creates a striking texture contrast that elevates the room's aesthetic.

How Much Does a Transparent Closet Cost?

A custom transparent closet generally costs between $8,000 and $25,000+, depending on the running foot width, glass type, and framing materials. Because these systems require specialized structural engineering, high-end aluminum or solid wood door frames, and integrated low-voltage wiring, they demand a higher investment than standard built-in units.

To help you budget for your high-end dressing room renovation, let us break down the average costs:

Project TypePrice RangeFrame Materials & Glass Types
Luxury Glass Walk-In Closet$18,000 – $35,000+Anodized aluminum slim frames; iron-free ultra-clear or bronze-tinted glass; solid walnut or painted MDF backings; fully integrated smart LED strip lighting.
Custom Glass Walk-In Closet$9,000 – $18,000Custom-milled wood frames (such as shaker cabinets with glass inserts); plywood cabinet box cores; under-mount drawer slides; integrated overhead LED lighting.
Standard Glass Closet System$4,000 – $9,000Standard-sized steel or melamine frames; tempered clear glass doors; surface-mounted puck lights; basic adjustable shelving.

Clear vs. Smoked vs. Frosted Glass: Which is Best for Your Space?

Choosing the right glass type is a balance between your personal storage habits and your aesthetic goals. Clear glass is the ultimate choice for showing off a highly curated wardrobe, smoked or bronze-tinted glass offers a moody, luxury look that hides minor clutter, and frosted glass provides excellent privacy while letting light pass through.

Let us compare the three primary glass options to help you choose the best fit:

Glass TypeTransparency LevelBest Suited ForAesthetic Vibe
Ultra-Clear Glass100% TransparentShowcasing designer bags, shoes, and pristine color-coordinated clothes.Bright, modern, airy, and high-end boutique-like.
Smoked or Bronze Tinted40% - 60% Semi-TransparentAdding a layer of sophisticated mystery; subtly masking unevenly folded clothes or minor clutter.Warm, moody, masculine, and highly upscale.
Frosted or Fluted (Ribbed)10% - 20% TranslucentHomeowners who love the open, light-reflective look of glass but prefer to keep their actual garments completely private.Soft, minimalist, textured, and contemporary.

What Common Mistakes Should I Avoid with Glass Closets?

The most frequent mistakes when planning a transparent wardrobe are neglecting fingerprint management, choosing poor-quality lighting, and ignoring door weight. Forgetting to install high-quality soft-close hinges or failing to use low-temperature LEDs can lead to physical damage, warped frames, and faded clothing.

Avoid these critical design pitfalls when planning your layout:

  • Forgetting Fingerprint and Smudge Maintenance: Frameless glass doors require frequent cleaning. To minimize maintenance, opt for doors with integrated metal pull profiles or choose tinted or textured glass that naturally hides smudges.
  • Using High-Heat Halogen Lighting: Old-school halogen bulb fixtures generate significant heat inside enclosed glass cabinets. This heat can discolor delicate silk fabrics and dry out fine leather goods. Always use low-voltage, cool-to-the-touch LED lighting.
  • Using Weak Cabinet Hinge Hardware: Glass doors are heavy. If you mount them on standard hinges or budget MDF frames without a sturdy plywood structure, the doors will sag and fall out of alignment. Always specify heavy-duty hinges designed for heavy glass loads.
  • Neglecting Wardrobe Color Coordination: A transparent closet is only as beautiful as what is inside it. If your shelves are stuffed with mismatched, colorful athletic wear and plastic hangers, the glass will only highlight the clutter.

How to Successfully Implement a Transparent Wardrobe Layout

Setting up a glass closet requires a strategic mix of open hanging spaces, closed storage drawers, and specialized shoe displays. Start by dividing your closet into dedicated zones, placing your most visual pieces behind clear glass, and reserving solid wood drawers for folded items, socks, and smaller accessories.

If you are ready to design your own boutique-style wardrobe, follow this step-by-step design process:

  • Step 1: Focus on the Frame Profile: Work with a custom cabinet maker to select your frame material. Anodized black or champagne-gold aluminum frames offer a sleek, modern look, while wooden frames like white oak or walnut provide a warm, timeless feel.
  • Step 2: Build the Structural Box: Ensure your cabinet boxes are constructed from high-quality, cabinet-grade plywood or thick MDF. This solid backing is crucial for holding the weight of glass doors over years of daily use.
  • Step 3: Route Channels for LED Lighting: Do not simply stick LED tape to the ceiling. True custom millwork involves routing hidden, recessed channels into the cabinet vertical panels, casting a soft, seamless glow over your entire collection.
  • Step 4: Balance Glass with Solid Drawers: Keep your closet highly functional by placing a stack of solid wood drawers at the bottom. These should utilize premium undermount drawer slides to ensure smooth, quiet operation.
  • Step 5: Finish with Crown Molding: Finish the top of your custom cabinets with tailored crown molding to blend the wardrobe seamlessly with your home's ceiling and architectural trim.

Expert Design Tips for Your Glass Dressing Room

  • Incorporate Smart Motion Sensors: Install magnetic micro-switches in the door frames. This ensures your internal LED wardrobe lights turn on automatically when you open a door and dim softly when closed.
  • Mix Shaker Cabinets with Glass: If you love a transitional or farmhouse look, use classic shaker cabinets with glass center inserts instead of cold metal frames. This brings a beautiful touch of traditional custom carpentry to a modern closet.
  • Choose a Contrasting Backing Wood: If your room features light floors, choose a rich, dark wood backing like walnut for the interior of your glass cabinets. This creates a high-contrast backdrop that makes your clothes pop.
  • Invest in Uniform Wood Hangers: Mismatched hangers will instantly ruin the upscale aesthetic of a glass closet. Use high-quality, uniform wooden hangers in black, white, or natural oak to maintain a cohesive, clean look.
transparent closet

Frequently Asked Questions

Are glass closet doors hard to keep clean?

Clear glass doors do require occasional wiping to remove fingerprints, especially around the handles. However, you can significantly reduce cleaning time by opting for tinted, frosted, or ribbed fluted glass, which naturally hides smudges and dust.

What is the best wood to pair with transparent closet doors?

Premium hardwoods with rich, natural grains like walnut and white oak are the most popular choices for high-end glass wardrobes. For painted finishes, high-density MDF is the gold standard because it provides a perfectly smooth, warp-free surface.

Do transparent closets make a room feel larger?

Yes, dramatically so. Because the eye can see through the doors all the way to the back wall of the cabinet, the physical boundaries of the room are visually extended, making bedrooms and dressing areas feel much more spacious.

Can I install glass doors on an existing reach-in closet?

Yes. A professional custom closet builder can remove your old sliding or bifold doors, reinforce the existing closet frame, and install custom-milled glass doors along with integrated LED lighting.

How do I protect my clothes from fading inside a glass closet?

If your closet receives direct sunlight, make sure to specify glass doors with UV-filtering laminates. You can also opt for tinted glass, which naturally blocks a significant portion of harmful UV rays.

What is fluted glass, and is it good for closets?

Fluted glass has a ribbed, textured pattern. It is an excellent choice for closets because it allows light to pass through and create a bright, open feeling while beautifully blurring the shapes of your clothes for a tidy, private look.

How do soft-close hinges protect glass closet doors?

Soft-close hinges use small hydraulic dampers to catch the door as it closes, gently pulling it shut. This prevents the door from slamming, which protects the glass from cracking and prevents the cabinet frame from vibrating over time.

Can I run LED lighting inside my glass closet?

Yes, this is highly recommended. Low-voltage LED strip lights can be recessed into the vertical sides of the cabinet panels, providing beautiful, even illumination that turns your wardrobe into a luxurious home showcase.

Elevate Your Home with Clear Closets

Are you ready to bring the beauty of a luxury boutique into your daily routine? The master craftsmen and design experts at Clear Closets specialize in creating gorgeous, custom-engineered storage systems designed around your life. From stunning transparent glass wardrobes and custom master walk-ins to space-saving reach-ins and mudrooms, we handle every step—from 3D conceptual designs to a clean, professional installation.

We proudly serve homeowners in Alpharetta, Roswell, Johns Creek, and throughout the greater Atlanta metro area. Contact the design team at Clear Closets to schedule your complimentary custom design consultation today.

Reach-In Closet Design

Reach In Closet Design: Maximizing Style and Space Planning

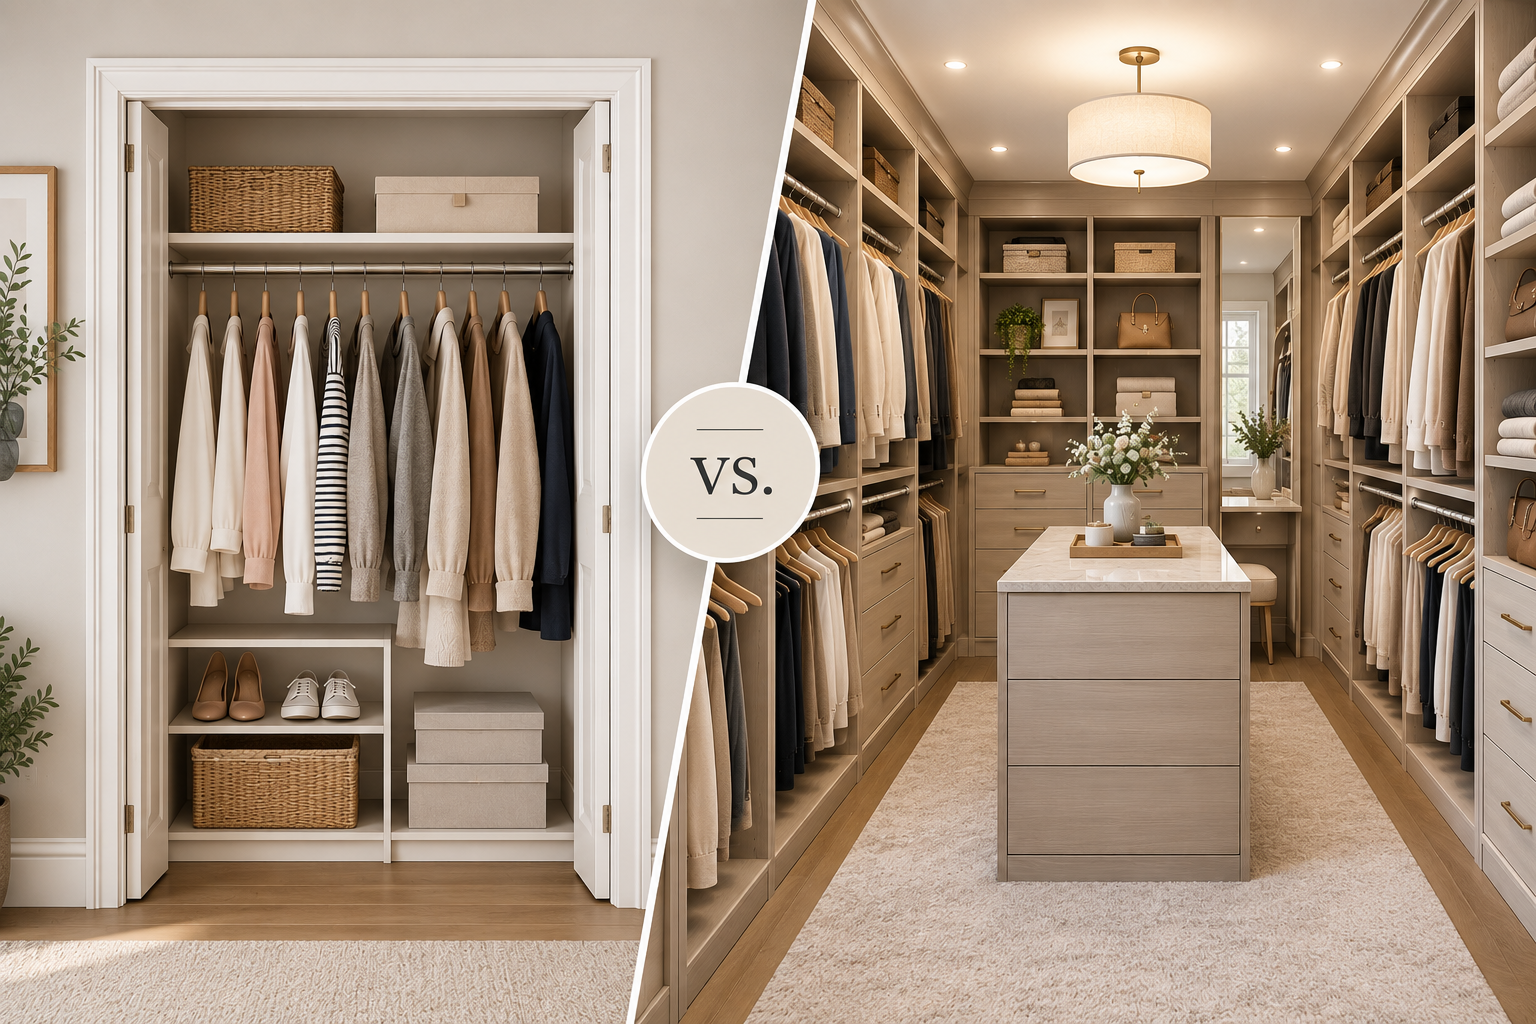
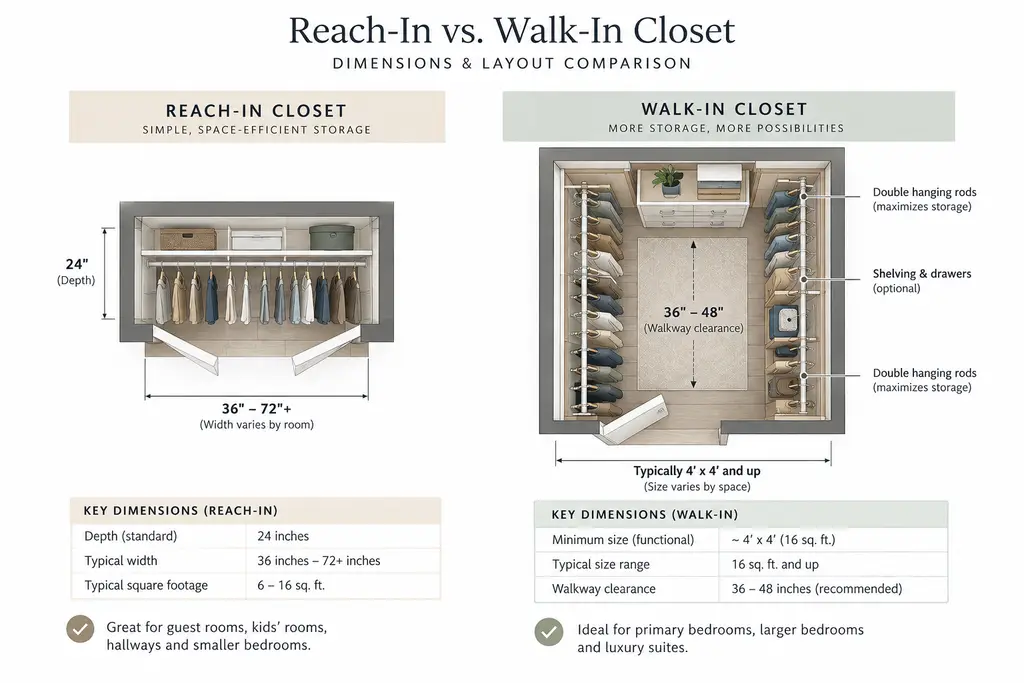
A reach in closet is a shallow, space-efficient storage unit typically measuring 2 feet deep and 3 to 8 feet wide, accessed through sliding, bi-fold, or hinged doors. Optimizing a reach in closet requires integrating custom cabinetry, double-hanging rods, adjustable shelving, and built-in drawers to maximize vertical wall space and eliminate dead corners common in standard bedroom layouts.

What is a Reach-In Closet and How Does It Fit Into Modern Homes?

A modern reach-in closet is a highly structured, shallow storage recess designed to save valuable floor space while keeping wardrobe essentials fully organized. Often found in secondary bedrooms, hallways, and entryways, these setups rely on meticulous space planning and custom millwork to match the storage capacity of much larger walk-in wardrobes.

Historically, the standard bedroom reach in closet was treated as an afterthought—usually featuring nothing more than a single wood shelf and a saggy metal rod. Today, premium interior design views these compact alcoves as critical components of a home’s overall organizational ecosystem.

In luxury homes, efficient storage is a baseline expectation. Elevating a small closet into a high-performance zone means stepping away from wire racks and investing in custom cabinetry. With precise custom carpentry, a modest wall recess becomes a beautiful, highly functional storage system that directly enhances your home's daily flow and resale value.

What are the Main Benefits of a Custom Reach-In Closet System?

Investing in a custom reach-in closet maximizes vertical storage density, eliminates visual clutter, and protects valuable personal items from damage. By replacing generic, loose shelving with tailored built-in storage, you create a highly organized environment that streamlines your daily routine and optimizes the structural footprint of any room.

  • Unmatched Space Efficiency: Tailored organization systems capture every inch of height, ensuring no vertical space between your top shelf and the ceiling goes to waste.
  • Aesthetic Integration: Using premium materials allows the interior of your closet to perfectly match your bedroom's color palette and architectural trim.
  • Durability Over Time: Custom-milled shelves do not bend or pull away from drywall when loaded with heavy stacks of denim, storage boxes, or books.
  • Higher Home Equity: Custom-built organization units are permanent structural additions that buyers look for, boosting overall market appeal.

How Much Does a Custom Reach-In Closet Cost?

A custom reach-in closet typically costs between $1,500 and $5,000+, depending on the width of the opening, selected materials, and the complexity of the cabinet design. While basic modular laminates represent the entry-level tier, bespoke hardwood systems with built-in drawers and integrated lighting occupy the premium price bracket.

To help you budget for your next home storage renovation, let us look at the standard pricing tiers:

Design TierAverage PriceKey Materials & Features
Luxury Custom Reach-In Closet$4,500 – $7,500+Floor-to-ceiling white oak or rich walnut veneers; shaker cabinets with glass inserts; custom crown molding; recessed LED lighting tracks.
Custom Reach-In Closet$2,500 – $4,500Furniture-grade MDF with custom painted lacquer; premium plywood structural box frames; soft-close hinges; under-mount drawer slides.
Standard Reach-In Closet$1,200 – $3,000Simple melamine panels; wall-hung steel rails; basic laminate drawers; chrome hanging rods; basic adjustable shelving.

How Do I Choose Between Different Closet Materials?

Choosing the best material depends on your budget, design goals, and preferred finish. High-density MDF is the industry-standard choice for smooth, painted lacquer finishes, while multi-layered plywood paired with premium hardwood veneers like white oak or walnut is necessary to achieve a warm, natural wood-grain look.

Material Options Compared: MDF vs. Plywood vs. Hardwood

When planning your custom cabinetry, the core materials determine both the cost and longevity of the build:

  • Medium-Density Fiberboard (MDF): Engineered from fine wood fibers bound with resin, MDF is incredibly flat, dense, and stable. It does not warp or expand under normal humidity changes, making it the perfect choice for a clean, painted surface.
  • Cabinet-Grade Plywood: Constructed from cross-laminated layers of wood veneer, plywood is exceptionally strong and holds screws extremely tight. It is the preferred structural frame material for high-end closet organizers.
  • White Oak & Walnut: These premium hardwoods are used for face frames, drawer fronts, and veneers. White oak offers a bright, modern, and highly durable Scandinavian look, while walnut brings a deep, rich, and classic warmth to the space.

What Common Mistakes Should I Avoid in Reach-In Closet Design?

The most frequent mistakes in shallow closet design are selecting the wrong door type, overlooking hanging ratios, and leaving dead corner spaces. Failing to account for hanger clearance depths or placing deep drawer stacks behind bi-fold door hinges leads to frustrating physical bottlenecks and wasted storage.

Avoid these common design errors when mapping out your space:

  • Choosing the Wrong Closet Doors: Sliding bypass doors are great for saving floor space, but they block half of your closet at any given time. Hinged double doors offer complete access to the interior, but they require a clear swing radius in your bedroom.
  • Ignoring the 24-Inch Depth Rule: A standard clothes hanger is roughly 17 to 18 inches wide. If your closet depth is shallower than 22 to 24 inches, your hanging clothes will rub against the back wall and get pinched by the closet doors.
  • Failing to Plan for Hinge Clearance: If you are installing pull-out drawers, ensure they are positioned toward the center of the closet. If they are placed too close to the edges, they can hit the door frame or hinges when pulled open.
  • Relying on Single Hanging Rods: A single rod placed 65 inches high leaves a massive amount of empty, wasted space underneath. Always use a double-hanging system for shirts and pants to instantly double your hanging capacity.

How to Implement a Custom Closet Layout in 4 Steps

Implementing a successful reach in closet design requires balancing double-hanging sections, central shelving, and lower drawers. Start by mapping your exact wardrobe inventory, placing daily essentials at eye level, using vertical partitions to separate hanging clothes from shelves, and wrapping the top with elegant moldings.

If you are ready to upgrade your bedroom storage, follow this structured setup process:

  • Step 1: Audit Your Wardrobe: Count your hanging shirts, long dresses, folded sweaters, and shoes. This concrete inventory determines the physical ratio of hanging rods to flat shelves in your final layout.
  • Step 2: Create a Central Drawer Tower: Place a stack of drawers right in the center of the closet. Utilize high-quality, under-mount drawer slides with soft-close mechanisms to keep movement silent and smooth.
  • Step 3: Flank with Double Hanging Rods: Install double-hanging rods on one side of the central tower for shorter shirts, jackets, and folded trousers. On the other side, leave a single, taller rod section for dresses and long coats.
  • Step 4: Install Upper Storage and Trim: Run your adjustable shelves all the way to the top of the wall. Wrap the top header with beautiful crown molding to give the unit a high-end, built-in furniture feel.

Expert Design Tips for Your Closet Oasis

  • Upgrade to Shaker Doors: If your budget allows, replace basic hollow-core doors with custom shaker cabinets or glass-panel doors to instantly dress up the entire bedroom.
  • Use Recessed LED Channels: Install motion-activated LED lighting vertical strips inside the cabinet face frames. This illuminates your clothing evenly without casting harsh shadows.
  • Incorporate a Pull-Out Valet Rod: This small metal rod mounts directly to the side of your shelving cabinet and slides out to hold dry cleaning, your favorite jacket, or tomorrow's planned outfit.
  • Ditch the Plastic Hangers: Invest in a single set of matching wooden or velvet-flocked hangers. Uniform hangers instantly give a small reach-in closet the elegant look of a boutique store.

Frequently Asked Questions

What is the minimum depth required for a reach in closet?

The minimum recommended depth is 24 inches. While you can build a closet as shallow as 20 or 22 inches, your hanging clothes will brush against the back wall and doors, which can lead to creasing and jammed doors.

Are custom built-in closets worth the investment?

Yes, absolutely. They maximize every cubic inch of a small bedroom, make daily routines much smoother, and act as high-value built-in features that elevate a home's structural quality and market value.

Can I install drawers inside a reach-in closet?

Yes, but you must ensure the drawers have plenty of clearance to pull out fully without hitting the closet door frames, bifold hinges, or sliding door tracks. Placing drawers in the middle of the closet is usually the safest layout.

What is the best door type for a small bedroom closet?

Hinged double doors are generally the best option because they swing completely open to give you full, unrestricted access to the entire closet. If bedroom floor space is limited, sliding barn doors or pocket doors are excellent alternatives.

How do I maximize shoe storage in a narrow closet?

Use flat, adjustable shelves rather than angled ones, as flat shelves fit more pairs of shoes in a tight space. Pull-out shoe racks are also fantastic for deep or narrow spots, allowing you to easily view shoes at the back.

What is the purpose of a soft-close hinge in a closet?

Soft-close hinges and drawer glides prevent doors and drawers from slamming shut. This reduces daily wear and tear on your custom cabinetry, keeps the closet quiet in the morning, and adds a premium, high-end feel to your storage.

How do I organize my closet if I have a lot of long dresses?

Incorporate a dedicated "long-hang" section with a rod height of 60 to 66 inches. If you only have a few long items, you can hang them on a double-sided pants hanger to save vertical space.

Should I choose painted MDF or stained wood for my built-in?

Choose painted MDF if you want a clean, modern, or classic look in colors like white, gray, or navy. If you prefer a warmer, rich, and more organic aesthetic, opt for stained plywood cores finished with natural wood veneers like oak or walnut.

reach in closet design shelves

Craft Your Dream Closet with Clear Closets

Is your current closet cramped, messy, or lacking functional storage space? The custom design and installation team at Clear Closets is here to help you maximize your home's layout. From bespoke master walk-ins and highly efficient reach ins to custom mudrooms and home offices, we guide you through the entire journey—from 3D conceptual sketches to professional, clean installation.

We proudly design and build premium home organization systems throughout Alpharetta, Roswell, Johns Creek, and the greater Atlanta metro area. Contact the team at Clear Closets to schedule your complimentary custom design consultation today.

Small Walk-In Closet Islands: Size & Design Rules

Small Walk-In Closet Islands: Size & Design Rules

Many homeowners operate under the misconception that walk-in closet islands are an exclusive luxury reserved for sprawling, mansion-sized dressing rooms. This pervasive design myth prevents countless individuals from maximizing their available storage and elevating their daily routine. The reality is that architectural ingenuity and precise spatial planning can seamlessly integrate an island into surprisingly modest square footage. By challenging traditional spatial assumptions, you can unlock a highly functional, centralized storage hub that transforms how you interact with your wardrobe.

Successfully executing this design requires abandoning the one-size-fits-all approach to cabinetry. Instead, it demands embracing customized, millimeter-perfect design strategies that respect the strict constraints of your specific floor plan. When executed correctly, a compact island provides invaluable surface area for folding, dedicated compartments for micro-accessories, and a visual anchor that elevates the entire aesthetic of the room. The secret lies in understanding exact clearance requirements and utilizing multi-functional furniture solutions.

Minimum Size Requirements for Closet Islands

To determine if your small walk-in closet can accommodate an island, you must first understand the strict mathematical realities of spatial clearance. The industry standard dictates that a walk-in closet should ideally measure at least ten feet by ten feet to comfortably house a traditional center island. However, custom cabinetry and innovative design allow for successful island integration in spaces as narrow as eight feet by ten feet. The island itself does not need to be a massive, monolithic structure; a highly functional footprint can be as compact as twenty-four inches wide by thirty-six inches long.

The most critical metric in closet island design is not the size of the island itself, but the clearance space surrounding it. You must maintain adequate walkway space to allow for the opening of drawers, the pulling out of wardrobe lifts, and comfortable human movement. While thirty-six inches of clearance on all sides is the ergonomic gold standard, high-functioning small closets can successfully operate with a strict twenty-four to thirty-inch clearance zone, provided the pathways are strategically managed and drawer depths are carefully calculated.

Calculating your available floor space requires accounting for the depth of your perimeter storage. Standard hanging sections consume approximately twenty-four inches of depth from the wall to accommodate the width of a standard suit jacket or gown on a hanger. Therefore, in an eight-foot-wide room, perimeter storage on both sides consumes four feet, leaving exactly four feet of open center space. This specific scenario would necessitate a narrower island or a single-sided hanging configuration to maintain viable walkways.

  • Absolute Minimum Island Size: 24 inches wide by 36 inches long, providing enough surface area for folding and temporary staging without overwhelming the room.
  • Standard Clearance Zone: 36 inches on all sides for optimal ergonomic flow, drawer extension, and dual-occupancy usage.
  • Compact Clearance Zone: 24 to 30 inches, acceptable only if drawers and cabinet doors do not impede the primary walking path when fully opened.
  • Perimeter Depth Allowance: Always deduct 24 inches per wall for hanging garments and shelving before calculating your available center floor space.
  • Drawer Extension Clearance: Ensure the distance between the island and the wall exceeds the maximum extension length of your deepest drawer by at least six inches.

Smart Design Solutions for Compact Islands

When dealing with limited square footage, standard prefabricated cabinetry often proves too bulky and inefficient. The solution lies in sourcing or commissioning highly customized, multi-functional furniture pieces that serve dual purposes without dominating the room. Narrow console tables, originally intended for entryways or sofa backing, can be brilliantly repurposed as elegant closet islands. These pieces often feature shallow top drawers perfect for jewelry and belts, while leaving the space underneath open to prevent the room from feeling visually heavy or cramped.

Custom built-ins offer the highest return on investment for small spaces because they can be tailored to your exact storage inventory. Instead of wasting valuable interior volume on generic shelving, a custom compact island can be engineered with specialized compartments. Think velvet-lined jewelry trays, tie racks, sunglass displays, and hidden charging stations for smartwatches and phones. By hyper-organizing the interior of the island, you justify its footprint by eliminating the need for accessory storage elsewhere in the closet.

Mobility is another highly effective strategy for small walk-in closets. Designing an island on heavy-duty, locking casters introduces unprecedented flexibility to the space. A mobile island can be rolled to the center of the room during outfit selection and packing, and then smoothly pushed against a wall or tucked under a window when maximum floor space is required. This dynamic approach allows the closet to adapt to different phases of your daily routine rather than forcing you to navigate around a static obstacle.

  1. Repurposed Consoles: Utilize narrow entryway tables to achieve a staging surface area without the visual bulk of heavy base cabinetry.
  2. Custom Micro-Islands: Commission pieces specifically sized to the millimeter of your available clearance zone to maximize efficiency.
  3. Mobile Storage Units: Install commercial-grade casters to allow the island to be relocated based on immediate spatial needs and daily routines.
  4. Open-Base Designs: Select islands with tall legs rather than solid plinths to allow light to pass underneath, increasing the perceived floor area.
  5. Integrated Laundry Hampers: Build tilt-out hamper baskets into the island base to consolidate utility functions into a single, centralized footprint.

Maximizing Vertical Space and Organization

In a constrained closet environment, the island must work exceptionally hard across all three dimensions. The top surface of the island is prime real estate that should be utilized strategically. Incorporating a tempered glass countertop allows you to see directly into the top drawer, effectively turning storage into a high-end display case for your most prized accessories. This eliminates the need to constantly open and close drawers to find specific items, streamlining your morning routine while adding a boutique-like aesthetic.

The internal configuration of the island's drawers dictates its overall efficiency. A smart vertical strategy involves graduating the depth of the drawers from top to bottom. The uppermost drawers should be incredibly shallow, perhaps only two to three inches deep, to house rings, watches, and cufflinks in single layers. As you move down the island, the drawers should progressively deepen to accommodate bulkier items like folded knitwear, denim, and even seasonal accessories. This graduated approach ensures zero vertical space is wasted on dead air.

Integrating seating into the island without expanding its footprint is a masterclass in small-space design. A pull-out bench or a nesting ottoman that slides entirely beneath the island's countertop provides a crucial place to sit while putting on shoes, without permanently blocking the walking path. When the seating is not in use, it disappears completely, maintaining the clean lines and essential clearances required in a compact walk-in closet.

  • Glass-Top Displays: Utilize transparent countertops to create visual depth and showcase accessories without needing to open compartments.
  • Graduated Drawer Depths: Design shallow top drawers for micro-accessories and deep bottom drawers for heavy folded garments to eliminate wasted air space.
  • Nesting Seating: Incorporate ottomans or low stools that slide flush beneath an overhanging countertop to provide seating without sacrificing floor space.
  • Pull-Out Trays: Install retractable staging shelves that expand your surface area only when actively folding laundry or packing a suitcase.
  • Double-Sided Access: If clearance allows, engineer drawers to open from both sides of the island for maximum utility and easier access.

Lighting and Visual Tricks for Small Closets

The introduction of an island into a small closet can inadvertently cast shadows and make the space feel claustrophobic if the lighting is not meticulously planned. Proper illumination is essential for expanding the perceived volume of the room. A dedicated light source directly above the island, such as a sleek linear suspension pendant or a cluster of mini-pendants, draws the eye upward and establishes the island as the deliberate focal point of the room. This vertical visual anchor distracts from the proximity of the surrounding walls.

Beyond overhead lighting, integrating illumination directly into the island itself yields spectacular results. LED strip lighting installed beneath the countertop overhang or along the toe-kick at the base of the island creates a floating effect. This subtle wash of light across the floor blurs the boundaries of the island's footprint, making the structure feel lighter and less intrusive. Additionally, motion-activated interior drawer lights ensure that you can easily navigate your compact storage without requiring blinding overhead lights early in the morning.

Material selection and color palette play a monumental role in tricking the eye. A small closet with an island should lean heavily on light, reflective, and monochromatic finishes. Wrapping the island in a high-gloss lacquer or utilizing mirrored drawer fronts bounces ambient light around the room, effectively doubling the visual space. Matching the island's finish exactly to the perimeter cabinetry creates a seamless, unbroken visual flow, preventing the island from looking like a disjointed obstacle dropped into the middle of the floor.

  1. Focal Point Pendants: Hang statement lighting directly over the island to draw attention upward and clearly define the center of the space.
  2. Toe-Kick Illumination: Install LED strips at the base of the island to create a lightweight, floating architectural effect that expands the floor.
  3. High-Gloss Finishes: Utilize reflective cabinet materials to bounce light and visually expand the room's overall dimensions.
  4. Mirrored Accents: Incorporate mirrored drawer fronts or side panels to create the optical illusion of continuous, unbroken floor space.
  5. Monochromatic Palettes: Match the island color exactly to the perimeter walls and cabinetry to reduce visual fragmentation and spatial clutter.

Peninsula and Narrow Console Alternatives

When meticulous measurements reveal that a freestanding center island is mathematically impossible, the dream of centralized storage does not have to die. The most effective alternative is the closet peninsula. By anchoring one end of the island structure to a wall or a bank of existing cabinetry, you eliminate the need for a clearance walkway on that specific side. This instantly reclaims twenty-four to thirty-six inches of floor space, allowing you to enjoy the surface area and drawer storage of an island in a significantly narrower room.

Another highly sophisticated alternative is the installation of a floating drawer stack. By mounting a robust, heavy-duty cabinet directly to the wall and leaving the floor entirely clear beneath it, you create a built-in credenza that functions identically to an island. The unbroken sightline of the floor extending beneath the floating cabinetry tricks the brain into perceiving a much larger room, while the top surface serves as the perfect staging area for folding clothes or organizing daily outfits.

Finally, consider the strategic use of back-to-back narrow shelving units. If you have a long, galley-style walk-in closet, placing two incredibly shallow, waist-high bookcases back-to-back in the center of the room creates a long, lean dividing console. This approach provides a massive amount of flat surface area and open shelving for shoes or folded sweaters, while maintaining a footprint that is often less than eighteen inches wide. It is a highly unconventional but remarkably effective way to introduce island functionality into a challenging, narrow footprint.

  • Wall-Anchored Peninsulas: Attach the structure to one wall to eliminate the need for a fourth clearance walkway, saving crucial square footage.
  • Floating Credenzas: Wall-mount your drawer storage to leave the floor visible, maximizing the perceived volume of the closet while adding surface area.
  • Galley Consoles: Utilize extra-long, shallow shelving units in narrow closets to create a continuous staging surface without blocking the path.
  • Dresser Integrations: Build a standard dresser directly into the center of a U-shaped closet layout to act as an attached, pseudo-island.
  • Fold-Down Tables: Install wall-mounted, drop-leaf tables that provide temporary island surface area only when actively needed for folding.

Action Point:

Ready to maximize your space? Explore our custom closet design tools today.

Contact Us

Pantry Organization: Pro Accessibility Tips

Pantry Organization: Pro Accessibility Tips

Professional designers understand that a pantry is the functional heart of a kitchen. It is not merely a closet for storing food, but a dynamic workspace that requires meticulous planning, strategic zoning, and rigorous maintenance systems. When executed correctly, professional pantry organization transcends basic tidiness, elevating the entire culinary experience by reducing meal preparation time and minimizing food waste. By focusing on the core principles of accessibility, visibility, and long-term maintenance, designers create spaces that intuitively support the daily rhythms of a household. Implementing these strategies requires a fundamental shift in how one views storage, moving away from haphazard stacking toward deliberate, engineered placement.

Strategic Zoning for Maximum Accessibility

The foundation of any professionally organized pantry lies in the implementation of strategic zoning. This methodology involves categorizing items not just by their culinary purpose, but by the frequency of their use and the ergonomic requirements of the household members. Professional organizers divide the vertical space into distinct tiers, reserving the prime real estate—the shelves situated between waist and eye level—for everyday essentials. This ensures that the items reached for most often require zero physical strain to retrieve, thereby streamlining the cooking process and reducing daily friction in the kitchen environment.

Conversely, the highest and lowest zones serve entirely different functions in a professionally designed layout. The uppermost shelves, which typically require a step stool to access, are dedicated to lightweight, infrequently used items such as holiday baking supplies, specialized entertaining platters, or extra paper goods. The floor level or bottom shelves are reserved for heavy, bulky items like oversized appliances, bulk beverage cases, and heavy root vegetable bins. This distribution of weight and frequency prevents daily fatigue and mitigates the risk of accidental drops or injuries when attempting to retrieve heavy items from above the head.

To successfully execute a zoned pantry, professionals rely on a detailed categorization process before a single container is purchased. This requires pulling everything out of the current space and grouping items into micro-categories based on the family's specific routines. Typical professional zones include the following strategic groupings:

  • Everyday breakfast items and cereals, positioned low enough on open shelving for children to access independently without requiring adult assistance.
  • Baking staples, often grouped together in a portable, handled bin that can be lifted and carried directly to the kitchen preparation counter as a single unit.
  • Dinner preparation components, including canned goods, dry pasta, and grains, kept strictly at eye level for quick inventory checks during meal planning.
  • Dedicated snack stations, decanted into clear, open-top bins to monitor consumption rates and facilitate easy grabbing for family members on the go.
  • Backstock and bulk overflow items, stored in opaque bins on higher shelves to prevent visual clutter while keeping necessary backup inventory on hand.

Elevating Visibility Through Decanting and Tiering

Visibility is arguably the most critical component of a functional pantry, as hidden food invariably leads to expired ingredients and wasted household funds. Professional designers combat the out-of-sight, out-of-mind phenomenon by employing rigorous decanting strategies. Removing items from their original, visually chaotic commercial packaging and transferring them into uniform, airtight, transparent containers instantly reduces visual noise. This uniformity allows the eye to sweep across the shelves effortlessly, instantly registering inventory levels without having to rummage through half-empty cardboard boxes or opaque plastic bags.

However, decanting is not a blanket solution for every single item; professionals apply this technique highly strategically. Dry goods such as flour, sugar, rice, pasta, and cereals are prime candidates for decanting because their original packaging is notoriously difficult to reseal and highly prone to tearing. When decanting, professionals always ensure that expiration dates and cooking instructions are meticulously preserved. This is often achieved by utilizing chalk markers on the glass or affixing custom adhesive labels to the back or bottom of the clear containers. This methodology marries the aesthetic appeal of a uniform pantry with the practical necessity of food safety and preparation information.

Beyond decanting, maximizing visibility across deep shelves requires the introduction of tiered storage solutions and specialized hardware. Deep shelves are notorious for swallowing small jars and cans, creating a dark, inaccessible abyss at the back. To counteract this, professionals utilize specific tools to elevate and reveal items in the rear.

  • Expandable tiered risers are deployed for canned goods and spice collections, ensuring the labels of the back row are elevated and just as visible as the front row.
  • Turntables, commonly known as lazy Susans, are installed in awkward corners to bring hidden items to the front with a simple spin, completely eliminating dead space.
  • Clear, deep acrylic bins are used as makeshift drawers on fixed shelves, allowing the user to slide the entire category out to view contents stored at the very back.
  • Under-shelf wire baskets are installed to maximize the vertical space between shelves, providing perfect storage for flat, delicate items like tortillas or bread without crushing them.
  • Door-mounted rack systems are integrated to transform previously unused vertical door space into prime storage for small, single-file items like hot sauces, extracts, and marinades.

Long-Term Maintenance and Intuitive Labeling Systems

The true test of a professionally organized pantry is not how it looks on the day of installation, but how flawlessly it functions six months later. To guarantee long-term maintenance, designers build systems that are entirely intuitive, requiring minimal cognitive effort from the household members to uphold. If putting an item away takes more than three seconds or requires moving multiple other items out of the way, the organizational system will inevitably fail. Therefore, professionals prioritize dedicated drop zones and leave intentional negative space on shelves to accommodate the fluctuating nature of weekly grocery shopping.

A cornerstone of this intuitive maintenance is a comprehensive, foolproof labeling system. Labels remove all guesswork from the space, acting as a silent set of instructions for every member of the family, as well as houseguests, babysitters, or extended family. Professional designers do not just label the decanted containers; they explicitly label the zones, the baskets, and the shelf edges. This macro and micro labeling strategy ensures that when a basket of snacks is depleted, its designated home on the shelf remains clear, preventing other random items from encroaching on that specific territory.

Maintaining the aesthetic and functional integrity of the pantry also involves establishing a routine micro-habit of inventory management. Professionals often recommend a first-in, first-out system, heavily mimicking commercial kitchen safety standards. When unpacking groceries, new items are placed at the back of the row or the bottom of the decanting jar, pushing the older stock to the front. To support this ongoing maintenance, professionals implement the following structural rules:

  • Implement a dedicated priority bin at eye level for items approaching their expiration date or open packages that require finishing before new ones are opened.
  • Utilize open-top bins for high-turnover items, removing the physical barrier of unlatching a lid, which drastically encourages family members to put things back properly.
  • Schedule a mandatory, ten-minute pantry reset before each major grocery shopping trip to clear out expired goods, wipe down shelves, and identify actual purchasing needs.
  • Designate a specific overflow basket for bulk purchases that do not fit into the primary decanting containers, preventing shelf overcrowding and structural damage.
  • Standardize container brands and styles to ensure that any future additions to the pantry will stack securely and align perfectly with the existing organizational system.

Hardware and Material Selection for Durability

The materials and hardware chosen for pantry organization directly impact both the functionality and the longevity of the space. Professional designers actively move away from flimsy plastic bins and invest heavily in durable, high-quality materials that can withstand the daily wear and tear of a busy kitchen environment. Solid wood or bamboo bins offer incredible durability and bring a touch of natural warmth to the space, effectively concealing visually chaotic items like individually wrapped snacks or brightly colored baking packets. These opaque materials are strategically used to balance the transparent decanting containers, creating a visually restful and sophisticated environment.

When transparent storage is absolutely required, professionals favor high-grade acrylic or tempered glass over standard, cheaper plastics. Polycarbonate and acrylic bins resist scratching and discoloration over time, ensuring that the visual clarity remains pristine even after years of heavy use. Glass jars, particularly those featuring thick silicone gaskets and heavy-duty metal clamp lids, provide the ultimate airtight seal to preserve maximum freshness and deter pantry pests. While glass is undeniably heavier, it is entirely non-porous, meaning it will never absorb odors from strong spices or acidic ingredients, making it a vastly superior choice for long-term food preservation.

Furthermore, the structural hardware of the pantry itself must be optimized to support the organizational layout. Fixed builder-grade wire shelving is often the very first thing professionals remove, as it causes items to tip over and creates massive amounts of wasted vertical space. Upgrading the structural components involves several professional-grade enhancements designed for heavy-duty use.

  • Installing solid, fully adjustable shelving on heavy-duty vertical tracks to allow the spatial configuration to evolve as the family's storage needs change over time.
  • Incorporating commercial-grade, full-extension drawer glides for lower pull-out shelves, effortlessly supporting up to one hundred pounds of bulk goods and heavy appliances.
  • Adding hardwired or motion-sensor LED strip lighting underneath every shelf to illuminate dark corners, drastically enhancing the visibility of labels and back-row inventory.
  • Utilizing heavy-duty, custom-cut shelf liners on existing wire racks if full replacement is not a viable option, creating a solid surface that prevents small items from falling through.
  • Integrating specialized pull-out wire racks specifically designed for heavy root vegetables, ensuring adequate air circulation to prevent rot and prolong organic shelf life.

Action Point:

Transform your kitchen today by implementing these professional pantry organization strategies.

Contact Us

Butler’s Pantry: Modern Home Investment Guide

Butler's Pantry: Modern Home Investment Guide

The modern architectural landscape has witnessed a significant resurgence of historical home features, meticulously reimagined for contemporary lifestyles. Among these architectural revivals, the butler's pantry stands as a premier addition to luxury and highly functional residences. Originally conceived as a secure storage space for family silver and formal china, this transitional zone bridging the kitchen and dining room has evolved into an indispensable hub for culinary preparation and sophisticated entertaining. By integrating advanced storage solutions and secondary prep stations, the modern butler's pantry effectively alleviates the functional burden placed on the primary kitchen. This architectural separation allows the main kitchen to maintain its aesthetic purity, serving as a pristine gathering space rather than a cluttered workshop.

Maximizing Kitchen Organization and Efficiency

The primary operational advantage of integrating a butler's pantry into a modern floor plan lies in the profound enhancement of overall kitchen organization. In contemporary open-concept homes, the primary kitchen is perpetually on display, leaving no visual barrier between culinary chaos and the living areas. A butler's pantry provides a dedicated, concealed zone where the demanding, often messy work of food preparation can occur away from the critical eyes of guests. By relocating heavy-duty tasks, homeowners can maintain the pristine visual integrity of their primary kitchen island, transforming it from a chaotic workstation into an elegant focal point for socialization.

Furthermore, this transitional space serves as the ultimate sanctuary for small appliance management. Modern culinary enthusiasts typically possess a vast array of specialized equipment, ranging from high-performance espresso machines and stand mixers to sous-vide water ovens and heavy food processors. Storing these items on primary kitchen counters creates visual clutter, while burying them in deep cabinets discourages their regular use. A well-designed butler's pantry offers accessible, always-plugged-in stations for these appliances, effectively creating a highly functional appliance garage that streamlines daily routines without compromising the aesthetic minimalism of the main kitchen.

Beyond appliance housing, the butler's pantry revolutionizes household inventory management. With the increasing popularity of bulk purchasing and the necessity of maintaining extensive pantries for diverse dietary requirements, standard kitchen cabinetry often proves insufficient. The butler's pantry offers expansive, floor-to-ceiling shelving systems capable of accommodating bulk dry goods, oversized serving platters, and seasonal culinary tools. This dedicated storage infrastructure ensures that the primary kitchen cabinets remain reserved for everyday essentials, drastically reducing the time spent searching for ingredients and optimizing the overall workflow of the household.

  • Dedicated zones for messy food preparation and plating.
  • Permanent, accessible housing for heavy countertop appliances.
  • Expansive vertical storage for bulk dry goods and non-perishables.
  • Reduction of visual clutter in the primary open-concept kitchen.
  • Streamlined daily workflow through strategic item placement.

Elevating the Art of Entertaining Guests

For homeowners who frequently host dinner parties, holiday gatherings, or catered events, the butler's pantry transcends mere storage to become a critical operational staging area. During complex, multi-course meals, the logistical challenge of plating food, clearing dishes, and preparing subsequent courses can overwhelm even the most spacious primary kitchens. The butler's pantry acts as a vital buffer zone, providing caterers or the host with a dedicated surface to stage appetizers, pour beverages, and arrange desserts. This behind-the-scenes capability ensures a seamless flow of service, elevating the guest experience by maintaining an atmosphere of effortless hospitality.

The acoustic and visual separation provided by this architectural feature is particularly invaluable during formal entertaining. As guests transition from the living room to the dining area, the last thing a host wants is the clatter of pots and pans or the sight of stacked, dirty cookware disrupting the ambiance. A butler's pantry equipped with a secondary sink and dishwasher allows for the immediate concealment and processing of soiled plates and glassware. This strategic containment of the post-meal mess preserves the elegance of the dining environment and allows the host to remain fully engaged with their guests rather than retreating to the kitchen to manage the cleanup.

Moreover, the modern butler's pantry frequently doubles as a sophisticated beverage center or wet bar, further enhancing its utility during social events. By integrating specialized features such as built-in ice makers, wine preservation columns, and dedicated glassware displays, the space becomes a self-sufficient hub for mixology and wine service. This prevents a bottleneck of guests congregating in the main cooking area to refill their drinks. Instead, the beverage service is elegantly decentralized, encouraging a natural circulation of guests throughout the home while keeping the primary kitchen clear for the final stages of culinary preparation.

  1. Stage complex hors d'oeuvres and multi-course platings out of sight.
  2. Utilize secondary dishwashers to immediately conceal dirty dinnerware.
  3. Operate a dedicated beverage station to prevent main kitchen bottlenecks.
  4. Provide caterers with a private workspace to prep and organize.
  5. Store specialized entertaining pieces like chafing dishes and tiered stands.

Advanced Storage Solutions and Cabinetry

The architectural design of a butler's pantry allows for highly specialized cabinetry that is rarely feasible within the constraints of a standard kitchen layout. This space is the traditional and ideal repository for fine china, crystal stemware, heirloom silver, and delicate serving pieces that require careful preservation. Custom-designed cabinetry can incorporate felt-lined, tarnish-resistant drawers specifically calibrated for silverware, as well as reinforced, glass-front upper cabinets that safely display heavy crystal while protecting it from dust and grease. This level of customized storage ensures that valuable investments in tableware are both protected and easily accessible for formal occasions.

Climate control and specialized environmental preservation represent another sophisticated storage capability inherent to the modern butler's pantry. High-end iterations frequently incorporate dual-zone wine refrigerators, humidor drawers for cigars, and precisely calibrated cooling drawers for artisan cheeses and charcuterie. By isolating these sensitive items in a dedicated micro-environment, homeowners can guarantee optimal preservation conditions that might fluctuate in the high-heat, high-humidity environment of the primary kitchen. This meticulous approach to storage reflects a deep appreciation for culinary arts and fine dining.

The ergonomic workflow of these advanced storage solutions is paramount to their success. Unlike the primary kitchen, which must prioritize the classic work triangle of stove, sink, and refrigerator, the butler's pantry can be linearly optimized for storage density and specific task execution. Cabinetry depths can be customized; shallow shelves can be implemented for single-row spice and preserve storage, preventing items from getting lost in the back, while extra-deep lower cabinets can be engineered with heavy-duty pull-out glides to accommodate the immense weight of cast-iron cookware or oversized stand mixers.

  • Felt-lined, tarnish-resistant drawer inserts for heirloom silverware.
  • Reinforced glass-front cabinetry for displaying heavy crystal stemware.
  • Integrated climate-control appliances like dual-zone wine refrigerators.
  • Shallow shelving configurations for high-visibility pantry inventory.
  • Heavy-duty, full-extension glides for oversized culinary equipment.

Assessing the Investment Value and Space Requirements

Determining whether to invest in a butler's pantry requires a comprehensive analysis of both the anticipated lifestyle benefits and the financial implications of the construction. From a real estate perspective, a well-appointed butler's pantry is highly coveted in the luxury housing market, often serving as a key differentiator that elevates a property above its comparables. Prospective buyers of premium homes increasingly expect this level of architectural sophistication, viewing it as a hallmark of a property designed for high-end entertaining and uncompromising culinary standards. Consequently, the addition of this space can yield a substantial return on investment by significantly enhancing the home's marketability and overall valuation.

However, the feasibility of this investment is heavily contingent upon the available square footage and the structural layout of the existing home. A functional butler's pantry requires a minimum footprint to ensure comfortable movement and operational efficiency, typically demanding an area no smaller than five by eight feet. Carving out this space often necessitates the reallocation of square footage from adjacent rooms, such as a formal dining room, a walk-in closet, or an oversized hallway. Homeowners must carefully evaluate whether the sacrifice of space in one area is adequately justified by the functional and aesthetic gains provided by the new pantry.

The capital expenditure required to execute a butler's pantry extends far beyond standard cabinetry and drywall. To maximize the utility of the space, significant investments in plumbing, electrical, and ventilation infrastructure are usually mandatory. Installing a secondary sink, a dishwasher, and dedicated circuits for high-wattage appliances requires extensive rough-in work, particularly in renovation scenarios where existing utility lines must be extended. Furthermore, if the space is to be used for active food preparation, adequate ventilation and task lighting must be meticulously planned and executed to ensure the environment is both safe and comfortable for extended use.

  • Evaluate the potential increase in property valuation and market appeal.
  • Assess the availability of necessary square footage within the floor plan.
  • Calculate the costs of extending plumbing for wet bar and sink functionality.
  • Determine electrical requirements for high-draw countertop appliances.
  • Weigh the loss of adjacent room space against the pantry's utility.

Action Point:

Consult with our architectural design team today to start planning your custom butler's pantry.

Contact Us

Home Storage Solutions: Designing Your Ideal Space

Home Storage Solutions: Designing Your Ideal Space

Effective storage solutions require a strategic combination of open shelving, closed cabinetry, and specialized accessories engineered to fit your specific space. To implement the best custom storage, you must integrate furniture-grade cabinetry and maximize vertical wall space to turn high-traffic zones like closets, pantries, and entryways into organized, clutter-free environments that enhance daily livability and overall home value.

What are Custom Home Storage Solutions?

A modern custom storage system is a tailored organization layout designed to fit the exact physical dimensions and daily needs of your household. Unlike generic freestanding plastic bins or modular retail shelves, these systems rely on built-in cabinetry, durable frames, and high-quality hardware to create cohesive, permanent storage spaces.

When you look at high-end interior design, you will notice a common theme: spaces are open, serene, and entirely free of visual clutter. This is not because the homeowners do not own things; it is because they have invested in smart, integrated custom home storage solutions.

Standard reach-in closets and bare pantry walls are notorious for creating dead, unusable space. By applying professional space planning, you can transform these overlooked spaces. Converting raw corners, hallway recesses, or under-stairs alcoves into beautifully milled storage ensures every household item has an accessible and logical place to live.

What are the Benefits of Built-In Storage Systems?

Upgrading your home with professional built-in storage improves your daily organizational routine, protects your personal items from damage, and maximizes room traffic patterns. Additionally, high-quality custom systems serve as permanent architectural features that directly elevate your property's long-term resale value.

  • Optimized Vertical Space Planning: Custom cabinetry runs from the floor all the way to your ceiling, ensuring no storage footprint is wasted.
  • Protection for Valuables: Flat, smooth wood shelves and velvet-lined drawers protect delicate clothing, leather bags, and electronics from dust and scratches.
  • A Balanced Home Aesthetic: Built-in systems allow you to carry matching wood finishes, paint colors, and classic designs like shaker cabinets throughout your home.
  • Quiet and Smooth Movement: Premium systems utilize quiet soft-close hinges and full-extension drawer slides to prevent slamming and ensure drawers glide effortlessly.

How Much Do Custom Storage Solutions Cost?

A professional custom storage installation typically costs between $3,000 and $15,000+, depending heavily on the size of the room, chosen materials, and construction details. While a basic, open-shelf reach-in organizer sits at the lower end, large walk-in closets, kitchen pantries, or wall units represent premium investments.

To help you budget for your home storage upgrade, let us break down the typical local price ranges:

Storage TypeAverage Price RangeKey Materials & Structural Features
Walk-In Wardrobes$8,000 – $25,000+Floor-to-ceiling premium natural white oak or walnut veneers; central islands; integrated LED lighting channels; custom hardware.
Pantry & Mudroom Units$4,000 – $10,000Heavy-duty plywood or MDF frames; painted shaker doors; soft-close drawers; heavy-duty hooks.
Reach-In & Closet Organizers$2,000 – $6,000Wall-mounted modular melamine towers; adjustable shelves; chrome hanging rods; basic slide-out wire baskets.

MDF vs. Plywood: Which Material is Best for Built-Ins?

Choosing the best cabinetry material depends on your preferred design style, budget, and durability needs. High-density MDF is the gold standard for smooth, painted finishes because it resists cracking, while multi-layered cabinet-grade plywood is the ideal structural choice for holding heavy-weight loads under gorgeous wood veneers.

Core Cabinetry Materials Compared

When planning your custom cabinetry, the underlying materials determine both the strength and longevity of your shelves:

  • Medium-Density Fiberboard (MDF): Made from fine wood fibers and resin pressed under high pressure, MDF is perfectly flat, stable, and uniform. It does not warp or split with seasonal humidity changes, making it the perfect choice for a flawless, painted finish on cabinet doors, drawer fronts, and decorative shaker cabinets.
  • Cabinet-Grade Plywood: Constructed from thin, cross-laminated layers of wood veneer, plywood is exceptionally strong and holds screws tightly. It resists bowing under heavy weight, making it the ideal structural choice for long closet shelves, pantry towers, and custom TV units.
  • White Oak and Walnut: These premium hardwoods are highly popular in luxury homes. White oak provides a bright, modern, and highly durable Scandinavian look, while walnut brings a deep, rich, and classic warmth to your home's millwork.

What Common Home Storage Mistakes Should You Avoid?

The most frequent mistakes in storage planning are utilizing fixed-height shelves, neglecting your exact clothing inventory, and ignoring lighting needs. Designing deep stationary shelves without pull-out drawers or forgetting to leave room for long dresses leads to hard-to-reach, unorganized clutter and wasted space.

Keep these common design and layout pitfalls in mind to ensure your project runs smoothly:

  • Using Fixed-Height Shelving: A fixed 12-inch shelf height is too short for tall winter boots or bulk paper towels, and too tall for small accessory items, leading to wasted vertical space. Always specify adjustable shelf pins.
  • Forgetting Full-Extension Drawers: Standard deep drawers only pull out halfway, leaving items lost at the back. Ensure your custom drawers utilize high-quality, full-extension drawer slides so you can easily view your entire inventory.
  • Leaving Closets and Cabinets Dark: Windowless closets are notoriously dark, making it hard to tell navy blue from black. Run low-voltage LED strip lights vertically along your cabinet face frames to keep every item fully visible.
  • Matching Wood Tones Too Closely: If your bedroom has red oak hardwood floors, building a closet with the exact same red oak finish can look monotonous. Instead, create contrast by pairing dark floors with light oak cabinetry, or light floors with deep walnut shelving.

How to Successfully Plan and Implement a Custom Storage Project

Implementing a successful storage layout requires evaluating your wardrobe, choosing a matching color palette, and zoning your storage vertical heights. Start by mapping out your active clothing reach zones, choosing durable wood or painted finishes, and completing the look with elegant crown moldings and hardware.

To design an organized and beautiful storage system, follow this structured, five-step design process:

  • Step 1: Audit and Count Your Belongings: Take everything out of your existing closet or cabinets. Group your items into active wardrobe items, seasonal wear, and donation piles. Count exactly how many linear feet of hanging, folded, and footwear storage you require.
  • Step 2: Determine Your Cabinet Layout: Decide if a linear, L-shaped, or U-shaped layout works best for your space. If you are building a walk-in closet, ensure you maintain a comfortable walking path of at least 32 to 36 inches.
  • Step 3: Choose Your Materials and Finishes: Select your door styles, drawer fronts, and wood finishes. For a classic, transitional look, choose painted shaker cabinet doors with soft-close hinges. For a modern, organic feel, opt for warm white oak or rich walnut veneers.
  • Step 4: Build the Structural Boxes: Work with a custom cabinet maker to construct your cabinet frames. Ensure they use high-density plywood or moisture-resistant MDF frames for exceptional longevity.
  • Step 5: Install Trim and Finishes: Run your cabinets all the way to your ceiling. Wrap the top header with beautiful crown molding to give the entire system a seamless, custom built-in furniture look.

Expert Styling and Space-Saving Tips for Your Home

  • Ditch Mismatched Hangers: Replace plastic and wire hangers with uniform wooden or velvet-flocked hangers. This instantly gives your closet the clean, high-end look of a boutique retail store.
  • Incorporate a Pull-Out Valet Rod: This small metal rod mounts to your shelving and slides out to hold dry cleaning, your favorite jacket, or tomorrow's planned outfit.
  • Use Acrylic Drawer Dividers: Organize your socks, underwear, and ties inside your drawers using clear, adjustable acrylic dividers to keep small items perfectly sorted.
  • Organize Shoes by Style and Color: Arrange your shoe collection on adjustable shelves, facing them forward or alternating heel-to-toe to maximize visual appeal and space efficiency.

Frequently Asked Questions

What is the standard depth of a custom closet organizer?

The standard depth for a custom closet cabinet is 14 inches for open shelving and 24 inches if you plan to install closed cabinet doors to keep hanging coats from getting pinched.

Are custom built-in closets worth the investment?

Yes, absolutely. They maximize every cubic inch of a small bedroom, make daily routines much smoother, and act as high-value built-in features that elevate a home's structural quality and market resale value.

Can I install a closet island in a small walk-in?

To fit a central island, your walk-in closet should measure at least 10 feet by 10 feet. This ensures you maintain comfortable 36-inch pathways on all sides of the island to walk and open drawers comfortably.

What is the best lighting color temperature for a closet?

The best color temperature is between 3500K (neutral white) and 4000K (natural day white). This ensures clothing colors appear true to life, preventing frustrating styling mistakes.

Should I choose open shelving or closed cabinet doors?

A hybrid design works best. Use open shelving for frequently worn everyday items like shirts and folded sweaters. Use closed cabinets to hide less attractive items, bulk storage, and out-of-season gear.

How do soft-close hinges protect custom cabinetry?

Soft-close hinges use small hydraulic dampers to catch the cabinet door as it closes, gently pulling it shut. This prevents slamming, which reduces wear and tear on your wood frames.

How do I maximize a small reach-in closet?

Use a double-hanging rod system to instantly double your hanging capacity, install a central drawer tower to eliminate the need for an bulky bedroom dresser, and run shelves up to the ceiling for out-of-season storage.

Which wood grain looks best in modern homes?

Natural white oak and rich walnut are the most popular wood-grain choices. White oak provides a bright, modern, and airy feel, while walnut adds a deep, rich, and classic warmth to the space.

Design Your Dream Space with Clear Closets

Are you ready to clear out your closet clutter, completely reorganize your wardrobe, and design a gorgeous, relaxing dressing area? The custom cabinetry and design experts at Clear Closets are here to help you bring your dream home storage to life. From modern walk-in master closets and efficient reach-ins to custom laundry rooms, pantries, and home offices, we manage the entire project—from 3D conceptual designs to professional, clean installation.

We proudly design and install premium home storage systems throughout Alpharetta, Roswell, Johns Creek, and the greater Atlanta metro area. Contact the design experts at Clear Closets to schedule your complimentary custom design consultation today.

Custom Entertainment Centers Designed for Modern Homes

Custom Entertainment Centers Designed for Modern Homes

A custom entertainment center is a tailored media wall and cabinetry system engineered to house a television, conceal wiring, and store audio-visual equipment. Unlike generic television stands, these units integrate furniture-grade custom cabinetry, ventilated shelving, and smart cord-routing channels to transform your living room wall into a highly organized, cohesive design centerpiece that maximizes home storage.

What Exactly is a Custom Entertainment Center?

A custom entertainment center is a bespoke media wall designed to fit the exact dimensions of your living space while matching your home's architectural style. These integrated systems combine sturdy wall frames with customized cabinetry to organize media players, streaming devices, soundbars, and decorative accessories into a clean, unified layout.

The living room is the primary gathering space in the modern home. Because the television and its associated media components usually sit at the physical center of this room, how you present them has a major impact on your entire home's interior design. A freestanding retail media console often leaves you looking at a tangled web of power cords, dusty components, and visible power strips.

Upgrading to a custom entertainment center turns a blank wall or a pair of awkward fireplace alcoves into a highly functional focal point. By utilizing professional space planning, designers can build custom cabinetry that frames your television beautifully, completely conceals messy cables, and provides dedicated drawers for games, blankets, and remotes.

What are the Main Benefits of Custom Media Built-Ins?

Installing custom entertainment centers maximizes your room's vertical storage footprint, eliminates cord clutter, and protects fragile electronics from overheating. These permanent structural additions match your home’s existing moldings to create a cohesive design flow that directly elevates your property's market appeal and long-term resale value.

  • Flawless Space Planning: Custom cabinetry runs from wall-to-wall or floor-to-ceiling, transforming wasted wall cavities and alcoves into useful storage space.
  • Completely Hidden Cord Management: Integrated wire chases, cable grommets, and double-backed panels route power cords and HDMI cables completely out of sight.
  • Protection for Expensive Equipment: Dedicated shelves keep delicate media consoles, audio receivers, and streaming devices organized, clean, and elevated away from dust and pet hair.
  • Unified Architectural Flow: Custom units can be built to match your home's existing trim, utilizing details like shaker cabinets and decorative crown molding to look original to the home.

How Much Does a Custom Entertainment Center Cost?

A custom entertainment center typically costs between $4,000 and $15,000+, depending on the wall dimensions, material choice, and custom configurations. While simple floating media consoles sit at the lower end of the range, large, full-wall units with built-in fireplaces and accent lighting occupy the premium tier.

To help you budget for your next living room upgrade, let us break down the typical cost structures:

ConfigurationAverage Price RangeKey Materials & Built-In Features
Custom Media Wall$8,000 – $20,000+Full-wall footprint; premium natural white oak or walnut cabinetry; built-in electric fireplace; integrated LED lighting.
Built-In Entertainment Center$4,000 – $10,000Painted MDF cabinetry or sturdy cabinet-grade plywood construction; closed lower storage; full-extension drawer slides.

Floating Entertainment Center
$1,500 – $4,500Wall-mounted horizontal console; smooth wood veneer or painted lacquer finish; soft-close flip-down doors; built-in cable management.

MDF vs. Plywood: What is the Best Cabinet Material?

Selecting the best material depends on your preferred design style, budget, and durability needs. High-density MDF is the gold standard for smooth, painted finishes because it resists cracking, while multi-layered cabinet-grade plywood is the ideal structural choice for holding heavy-weight loads under gorgeous wood veneers.

Core Cabinetry Materials Compared

When planning your custom cabinetry, the underlying materials determine both the strength and longevity of your shelves:

  • Medium-Density Fiberboard (MDF): Made from fine wood fibers and resin pressed under high pressure, MDF is perfectly flat, stable, and uniform. It does not warp or split with seasonal humidity changes, making it the perfect choice for a flawless, painted finish on cabinet doors, drawer fronts, and decorative shaker cabinets.
  • Cabinet-Grade Plywood: Constructed from thin, cross-laminated layers of wood veneer, plywood is exceptionally strong and holds screws tightly. It resists bowing under heavy weight, making it the ideal structural choice for long shelves, cabinet box frames, and drawers.
  • White Oak and Walnut: These premium hardwoods are highly popular in luxury homes. White oak provides a bright, modern, and highly durable Scandinavian look, while walnut brings a deep, rich, and classic warmth to your home's millwork.

What Common Entertainment Center Design Mistakes Should You Avoid?

The most frequent mistakes in media unit design are calculating future TV size upgrades poorly, neglecting proper ventilation for hot electronics, and blocking outlet access. Failing to use heavy-duty wall anchors or forgetting to route wire pathways behind backing panels leads to saggy shelves and exposed cords.

Make sure to avoid these critical design and structural pitfalls:

  • Designing Only for Your Current TV: Televisions get larger and cheaper every year. If you build a tight, custom wood alcove around a 55-inch TV, you will not be able to upgrade to a 65-inch or 75-inch screen later without tearing down your cabinetry. Always leave ample breathing room around the TV opening.
  • Trapping Hot Electronics in Closed Cabinets: Game consoles, cable boxes, and home theater receivers generate a massive amount of heat. If you trap them inside unventilated wood cabinets, they can overheat and break down. Always include louvred doors, open wire shelves, or hidden cooling fans.
  • Forgetting Access to Wall Outlets: Never block wall outlets with a heavy, permanent wooden back panel. Ensure your cabinetry design includes cutouts, removable backing panels, or magnetic covers so you can easily plug in new devices or reset your router.
  • Using Weak, Indoor-Grade Drawer Slides: Heavy gaming controllers, soundbars, and Blu-ray collections can weigh a lot. Ensure your lower media drawers are equipped with high-quality, full-extension drawer slides rated for heavy weight loads.

How to Successfully Implement a Custom Media Wall Layout

Designing a successful custom media unit requires dividing your wall space into distinct zones for display, active media gear, and concealed storage. Start by mapping out your television's viewing height, placing lower cabinets on soft-close hinges, routing hidden wire channels, and wrapping the top with elegant moldings.

To build a reliable and organized entertainment wall, use this five-step design process:

1.Audit Your Electronics and Decor:Step 1.

Count and measure your game consoles, soundbars, streaming boxes, books, and decorative vases. This physical inventory determines the ratio of closed cabinets to open shelves in your final layout.

2.Map the Perfect TV Viewing Height:Step 2.

The center of your television screen should sit at comfortable eye level when you are seated on your couch—typically 39 to 42 inches above the finished floor. Avoid mounting your TV too high, as this causes neck strain over long viewing periods.

3.Construct the Lower Storage Base:Step 3.

Build a sturdy lower cabinet console using high-density plywood. This base should house your active media gear and include deep drawers on smooth drawer slides to hide loose cords, game controllers, and manuals.

4.Configure the Upper Shelves and Wire Pathways:Step 4.

Mount open shelves or accent backing panels above the console. Route all power cords and HDMI lines through hidden channels behind the backing panels directly to the wall outlets below.

5.Finish with Architectural Trim:Step 5.

Finish the top edge of your wall unit with elegant crown molding to blend the cabinetry seamlessly with your living room ceiling and existing home trim.

Expert Styling and Wire-Management Tips for Your Living Space

  • Install Low-Voltage LED Strip Lights: Run warm LED lighting channels behind your television or along the undersides of open shelves. This provides gorgeous ambient light that reduces eye strain in dark rooms.
  • Upgrade to Shaker Style Doors: Use classic shaker cabinets for your lower storage doors to add a touch of traditional craftsmanship that works beautifully in both modern and classic homes.
  • Mount Your TV on an Articulating Arm: Instead of mounting your television flat to the back panel, use an adjustable wall mount. This allows you to pull the TV out or angle it toward the kitchen or dining table when needed.
  • Use Fabric Panels for Speakers: If you have large surround-sound speakers, hide them inside your custom cabinets using acoustic fabric panel doors. This keeps your speakers completely invisible without dampening the sound quality.

Frequently Asked Questions

What is the ideal depth for a custom tv unit?

The standard depth for a custom media console or lower cabinet system is 16 to 18 inches. This depth provides plenty of room for deep cable boxes, audio receivers, and game consoles, while leaving space behind them for ventilation and wire connections.

How high should my TV be mounted on a custom wall unit?

The middle of your television screen should be mounted at comfortable eye level, which is typically 39 to 42 inches from the floor for a standard living room couch. If you are mounting your TV above a fireplace, you may need to tilt the screen slightly downward.

Can I build a custom tv unit next to a fireplace?

Yes, absolutely. Building custom bookshelves and media cabinets on either side of a fireplace mantel is one of the most popular ways to create a symmetrical, high-end focal point in a living room.

Are custom built-in entertainment centers worth the investment?

Yes. They dramatically reduce daily living room clutter, completely hide messy cords, protect expensive electronics, and act as highly desirable built-in features that directly increase a home's overall aesthetic and resale value.

How do I prevent my electronics from overheating inside closed cabinets?

You can incorporate small, silent exhaust fans inside your cabinets, leave the cabinet back open to allow air to circulate against the wall, or use slatted wood doors or metal grilles instead of solid cabinet fronts.

What is the best wood to pair with a custom TV unit?

Premium hardwoods with rich, natural wood grains like walnut and white oak are the most popular choices for modern media walls. For painted finishes, industrial-grade MDF is the gold standard because it provides a perfectly smooth, warp-free surface.

How do I hide a TV when it is not in use?

You can mount your television behind custom sliding wood panels, hide it inside a cabinet with a motorized TV lift, or use a specialized television (like the Samsung Frame) that displays high-resolution art when turned off.

Should I choose floating cabinets or a floor-to-ceiling media wall?

Choose a floating console if you want a sleek, minimalist, and modern look in a smaller room. If you need maximum storage for books, decorations, and toys in a large living room, a floor-to-ceiling media wall is the best option.

Elevate Your Living Space with Clear Closets

Are you ready to clear out living room clutter, completely hide messy cords, and create a gorgeous focal point for your family gatherings? The design and master cabinet-making team at Clear Closets is here to help you bring your dream media wall to life. From custom TV units and living room bookshelves to beautiful walk-in closets, pantries, and laundry systems, we handle every step of the project—from initial 3D design sketches to professional, clean installation.

We proudly design and install premium home storage solutions throughout Alpharetta, Roswell, Johns Creek, and the greater Atlanta metro area. Contact the design experts at Clear Closets to schedule your complimentary custom design consultation today.

Built In Closets Designed for Permanent Storage in Your Home

Built In Closets Designed for Permanent Storage in Your Home

Built in closets are permanent home storage systems custom-engineered and anchored directly into a room’s wall studs. To design a highly functional built-in system, you must combine custom cabinetry frames, adjustable open shelving, integrated drawers, and specialized hanging rods. This structural integration maximizes your vertical wall space, eliminates dusty gaps, and seamlessly matches your home's interior design.

What Exactly is a Built-In Closet?

A modern built-in closet is a permanent, custom-fit storage solution designed to integrate completely with your room's wall structure. Far more durable than freestanding wardrobes, these systems use custom cabinetry, decorative moldings, and sturdy frames to maximize your available footprint while looking like an original architectural feature of the home.

When you evaluate home organization, there is a massive difference between temporary retail organizers and true built in storage. Freeestanding clothing racks and wire shelf kits are prone to sagging, collect dust in the gaps behind them, and fail to utilize the full height of your room.

A professionally built closet system is constructed as a permanent upgrade. Using precise custom carpentry, builders construct cabinet boxes that sit flush against your drywall, running from the floor all the way to your ceiling. This seamless fit not only provides a clean, dust-free environment but also visually expands your room, making it a highly valued feature in luxury homes.

What are the Main Benefits of Built-In Storage Systems?

Investing in permanent built-in storage systems dramatically increases your usable space, organizes daily clutter, and preserves your wardrobe. Because these structures are physically anchored to your home's framing, they serve as high-quality architectural additions that directly elevate your property's long-term resale value.

  • Flawless Space Planning: Custom configurations can be engineered to fit around awkward sloped ceilings, windows, and structural wall columns where retail furniture cannot go.
  • Protection for Fine Fabrics: Smooth, solid wood shelves and velvet-lined drawers protect delicate knits, designer bags, and jewelry from getting snagged, dusty, or misshapen.
  • A Balanced Home Aesthetic: Built in units allow you to carry matching wood finishes, paint colors, and classic door styles like shaker cabinets throughout your home.
  • Whisper-Quiet Daily Use: High-quality cabinetry utilizes soft-close hinges and full-extension drawer slides to ensure doors and drawers glide silently, preventing noise during early morning routines.

How Much Do Built-In Closets Cost?

A permanent built-in closet typically costs between $3,000 and $15,000+, depending heavily on the closet's overall size, door style selections, and chosen materials. While simple reach-in systems utilizing open-face melamine panels sit on the lower end, massive walk-in dressing rooms featuring hardwood veneers represent premium investments.

To help you budget for your home storage upgrade, let us break down the typical cost structures:

Closet StyleAverage Price RangeKey Materials & Built-In Features
Custom Walk-In Closet$8,000 – $20,000+Large room footprint; natural white oak or warm walnut wood veneers; central storage island; recessed LED lighting channels; custom trim.
Built-In Reach-In Closet$3,000 – $8,000Custom-milled painted MDF or sturdy cabinet-grade plywood frames; closed doors; full-extension drawer slides.
Melamine Reach-In Closet$1,500 – $4,000Compact wall-mounted frames; durable white or gray melamine panels; open adjustable shelving; basic chrome hanging rods.

MDF vs. Plywood: What is the Best Material for Built-Ins?

Selecting the best cabinet material depends on your preferred design style, budget, and durability needs. High-density MDF is the gold standard for smooth, painted finishes because it resists cracking, while multi-layered cabinet-grade plywood is the ideal structural choice for holding heavy-weight loads under gorgeous wood veneers.

Core Cabinetry Materials Compared

When planning your custom cabinetry, the underlying materials determine both the strength and longevity of your shelves:

  • Medium-Density Fiberboard (MDF): Made from fine wood fibers and resin pressed under high pressure, MDF is perfectly flat, stable, and uniform. It does not warp or split with seasonal humidity changes, making it the perfect choice for a flawless, painted finish on cabinet doors, drawer fronts, and decorative shaker cabinets.
  • Cabinet-Grade Plywood: Constructed from thin, cross-laminated layers of wood veneer, plywood is exceptionally strong and holds screws tightly. It resists bowing under heavy weight, making it the ideal structural choice for long shelves, cabinet box frames, and drawers.
  • White Oak and Walnut: These premium hardwoods are highly popular in custom closets. White oak provides a bright, modern, and highly durable Scandinavian look, while walnut brings a deep, rich, and classic warmth to your home's millwork.

What Common Built-In Closet Design Mistakes Should You Avoid?

The most frequent mistakes in closet design are utilizing fixed-height shelves, neglecting your exact clothing inventory, and ignoring lighting needs. Designing deep stationary shelves without pull-out drawers or forgetting to leave room for long dresses leads to hard-to-reach, unorganized clutter and wasted space.

Avoid these critical design and layout pitfalls when planning your project:

  • Using Fixed-Height Shelves: Fixed shelves do not allow you to adapt your storage. If you buy tall winter boots or large storage bins, you will struggle to fit them. Always specify adjustable shelf pins.
  • Failing to Measure Hanging Clearance: Long winter coats, maxi dresses, and trousers hung from the cuff need "long-hang" vertical spaces (60 to 66 inches). Standard shirts and folded pants only need "double-hang" spaces (40 inches). Plan your wardrobe ratios ahead of time.
  • Overlooking Drawer Placement: If you install deep storage drawers, ensure they are placed in the middle of your closet. Placing them too close to the side walls can cause them to hit door frames or hinges when pulled open.
  • Leaving the Space Dark: If your closet relies on a single overhead bulb, half of your clothes will sit in dark shadows. Run low-voltage LED strip lights vertically along your cabinet face frames to keep every item fully visible.

How to Successfully Plan and Implement a Built-In Closet Project

Implementing a successful closet layout requires evaluating your wardrobe, choosing a matching color palette, and zoning your storage vertical heights. Start by mapping out your active clothing reach zones, choosing durable wood or painted finishes, and completing the look with elegant crown moldings and hardware.

To design an organized and beautiful built-in system, follow this structured, five-step design process:

  • Step 1: Audit and Count Your Clothing: Take everything out of your existing closet. Group your clothes into active wardrobe items, seasonal wear, and donation piles. Count exactly how many linear feet of hanging, folded, and footwear storage you require.
  • Step 2: Determine Your Cabinet Layout: Decide if a linear, L-shaped, or U-shaped layout works best for your space. If you are building a walk-in closet, ensure you maintain a comfortable walking path of at least 32 to 36 inches.
  • Step 3: Choose Your Materials and Finishes: Select your door styles, drawer fronts, and wood finishes. For a classic, transitional look, choose painted shaker cabinet doors with soft-close hinges. For a modern, organic feel, opt for warm white oak or rich walnut veneers.
  • Step 4: Build the Structural Boxes: Work with a custom cabinet maker to construct your cabinet frames. Ensure they use high-density plywood or moisture-resistant MDF frames for exceptional longevity.
  • Step 5: Install Trim and Finishes: Run your cabinets all the way to your ceiling. Wrap the top header with beautiful crown molding to give the entire system a seamless, custom built-in furniture look.

Expert Styling and Space-Saving Tips for Your Wardrobe

  • Ditch Mismatched Hangers: Replace plastic and wire hangers with uniform wooden or velvet-flocked hangers. This instantly gives your closet the clean, high-end look of a boutique retail store.
  • Incorporate a Pull-Out Valet Rod: This small metal rod mounts to your shelving and slides out to hold dry cleaning, your favorite jacket, or tomorrow's planned outfit.
  • Use Acrylic Drawer Dividers: Organize your socks, underwear, and ties inside your drawers using clear, adjustable acrylic dividers to keep small items perfectly sorted.
  • Organize Shoes by Style and Color: Arrange your shoe collection on adjustable shelves, facing them forward or alternating heel-to-toe to maximize visual appeal and space efficiency.

Frequently Asked Questions

What is the standard depth of a built-in closet?

The standard depth for a custom closet cabinet is 14 inches for open shelving and 24 inches if you plan to install closed cabinet doors to keep hanging coats from getting pinched.

Are built in closets worth the cost?

Yes, absolutely. They maximize every cubic inch of your room, keep clothes organized, protect delicate fabrics, and act as high-value built-in features that appeal heavily to home buyers.

Can I install a closet island in a small walk-in?

To fit a central island, your walk-in closet should measure at least 10 feet by 10 feet. This ensures you maintain comfortable 36-inch pathways on all sides of the island to walk and open drawers comfortably.

What is the best lighting color temperature for a closet?

The best color temperature is between 3500K (neutral white) and 4000K (natural day white). This ensures clothing colors appear true to life, preventing frustrating styling mistakes.

Should I choose open shelving or closed cabinet doors?

A hybrid design works best. Use open shelving for frequently worn everyday items like shirts and folded sweaters. Use closed cabinets to hide less attractive items, bulk storage, and out-of-season gear.

How do soft-close hinges protect custom cabinetry?

Soft-close hinges use small hydraulic dampers to catch the cabinet door as it closes, gently pulling it shut. This prevents slamming, which reduces wear and tear on your wood frames.

How do I maximize a small reach-in closet?

Use a double-hanging rod system to instantly double your hanging capacity, install a central drawer tower to eliminate the need for an bulky bedroom dresser, and run shelves up to the ceiling for out-of-season storage.

Which wood grain looks best in modern homes?

Natural white oak and rich walnut are the most popular wood-grain choices. White oak provides a bright, modern, and airy feel, while walnut adds a deep, rich, and classic warmth to the space.

Design Your Dream Space with Clear Closets

Are you ready to clear out your closet clutter, completely reorganize your wardrobe, and design a gorgeous, relaxing dressing area? The custom cabinetry and design experts at Clear Closets are here to help you bring your dream home storage to life. From modern walk-in master closets and efficient reach-ins to custom laundry rooms, pantries, and home offices, we manage the entire project—from 3D conceptual designs to professional, clean installation.

We proudly design and install premium home storage systems throughout Alpharetta, Roswell, Johns Creek, and the greater Atlanta metro area. Contact the design experts at Clear Closets to schedule your complimentary custom design consultation today.

Home Remodeling

Home Remodeling: Smart Planning, Budgets, and Storage Solutions

A successful home remodeling project requires a clear, step-by-step master plan that balances structural updates, modern design choices, and smart spatial organization. To maximize your home remodel, you must integrate custom cabinetry, durable structural materials, and targeted storage upgrades like walk-in closets, kitchen pantries, and living room media walls to increase everyday livability while boosting your property's long-term resale value.

What is a Modern Home Remodel?

A modern home remodel is a comprehensive architectural and interior update designed to modernize your living space, improve energy efficiency, and resolve functional bottlenecks. Modern remodeling projects rely heavily on open-concept space planning, high-quality millwork, and integrated storage systems to harmonize daily household traffic with beautiful, contemporary style.

When you invest in home remodeling, you are not just updating paint colors or replacing outdated appliances. You are changing how your family experiences and moves through your home. The most successful projects are those that look closely at daily habits to design highly functional, stress-free environments.

Modern residential design prioritizes seamless, decluttered spaces. Moving from generic, freestanding furniture to custom built-in storage is a key step in this transition. By working with precise custom carpentry, you can transform empty, underutilized wall cavities, hallways, and corners into beautiful storage systems that streamline your entire household routine.

What are the Main Benefits of a Strategic Home Remodeling Project?

Executing a strategic remodel drastically improves your home’s spatial efficiency, lowers monthly utility bills, and provides a healthier, more organized indoor environment. From a financial perspective, investing in high-quality materials and smart storage solutions significantly elevates your property's market appeal, equity, and overall resale value.

  • Improved Space Planning: Custom built-ins and architectural adjustments capture every square inch of vertical space, making smaller footprints feel incredibly open.
  • Protection for Valuables: Properly designed storage zones protect your wardrobe, kitchen goods, and electronics from environmental dust, moisture, and wear.
  • A Unified Aesthetic Flow: Custom cabinetry allows you to carry matching wood finishes, paint colors, and details like shaker cabinets throughout your entire house.
  • Enhanced Financial Returns: High-quality home organization systems are consistently ranked by real estate experts as top-tier features that draw luxury buyers.

How Much Does a Home Remodel Cost?

A typical home remodel costs between $15,000 and $150,000+, depending on the project's overall scope, structural changes, and material selections. While localized room updates like a closet makeover or media wall installation sit on the lower end, full-scale kitchen, master suite, or whole-house renovations represent major structural investments.

To help you budget for your upcoming home transformation, here is a breakdown of average project costs:

Renovation ScopeAverage Price RangeMaterials & Project Highlights
Major Living Area/Suite Remodel$40,000 – $100,000+Structural wall removals; premium natural white oak or walnut millwork; full-suite custom cabinetry; integrated LED lighting systems.
Single-Room Remodel$15,000 – $40,000Moisture-resistant MDF or cabinet-grade plywood built-ins; new flooring; updated doors with soft-close hinges.
Custom Storage Installation$3,000 – $15,000Custom walk-in closets, kitchen pantries, mudrooms, or custom TV units featuring adjustable shelves and smooth drawer slides.

MDF vs. Plywood: Which Material is Best for Custom Built-In Cabinets?

Selecting the best cabinetry material depends on your preferred design style, budget, and durability needs. High-density MDF is the gold standard for smooth, painted finishes because it resists cracking, while multi-layered cabinet-grade plywood is the ideal structural choice for holding heavy-weight loads under gorgeous wood veneers.

Core Cabinetry Materials Compared

When planning your custom cabinetry, the underlying materials determine both the strength and longevity of your shelves:

  • Medium-Density Fiberboard (MDF): Made from fine wood fibers and resin pressed under high pressure, MDF is perfectly flat, stable, and uniform. It does not warp or split with seasonal humidity changes, making it the perfect choice for a flawless, painted finish on cabinet doors, drawer fronts, and decorative shaker cabinets.
  • Cabinet-Grade Plywood: Constructed from thin, cross-laminated layers of wood veneer, plywood is exceptionally strong and holds screws tightly. It resists bowing under heavy weight, making it the ideal structural choice for long closet shelves, pantry towers, and custom TV units.
  • White Oak and Walnut: These premium hardwoods are highly popular in luxury homes. White oak provides a bright, modern, and highly durable Scandinavian look, while walnut brings a deep, rich, and classic warmth to your home's millwork.

What Common Home Remodeling Mistakes Should You Avoid?

Section Answer Block

The most frequent mistakes in home remodeling are budgeting poorly for unexpected repairs, ignoring functional storage needs, and choosing low-quality materials. Failing to plan for hidden plumbing lines or installing cheap, non-adjustable shelving leads to unorganized, hard-to-reach clutter and frustrating daily bottlenecks.

Keep these common design and layout pitfalls in mind to ensure your project runs smoothly:

  • Underestimating the Contingency Fund: When you open up walls, you may discover outdated wiring, old plumbing leaks, or uneven framing. Always set aside an extra 10% to 20% of your total budget to cover these unexpected repairs.
  • Focusing on Cosmetics Over Function: It is easy to get caught up in choosing paint colors and decorative tile. However, if your newly remodeled kitchen or master suite lacks adequate, accessible storage, the space will quickly become cluttered and frustrating to use.
  • Using Cheap, Low-Quality Hardware: Budget hinges and drawer glides wear out quickly, leading to sagging doors and sticky drawers. Always specify heavy-duty soft-close hinges and full-extension drawer slides that keep daily movement quiet and smooth.
  • Failing to Plan Around Natural Light: Painting a windowless room or a deep walk-in closet in a dark color can make the space feel like a cave. Always balance your color choices with integrated, warm LED lighting channels.

How to Successfully Plan and Implement Your Home Remodeling Project

Implementing a successful remodel requires a clear sequence of planning, demolition, structural framing, cabinetry installation, and finishing touches. Start by mapping out your family's daily functional needs, choosing durable materials, working with experienced craftsmen, and finishing the space with elegant moldings and hardware.

To ensure your home remodeling project is completed on time and within budget, follow this structured, five-step process:

  • Step 1: Define Your Goals and Inventory: Walk through your home and list the daily bottlenecks you face. Count your storage items, evaluate your traffic patterns, and determine exactly which areas need structural updates or custom cabinetry.
  • Step 2: Establish a Realistic Budget: Research local material and labor costs, obtain detailed estimates from trusted local home improvement professionals, and set aside a 15% contingency fund for unexpected repairs.
  • Step 3: Focus on High-Performance Cabinetry: Work with a custom cabinet maker to design your built-ins. Ensure they use high-density plywood or moisture-resistant MDF frames, and incorporate soft-close door hardware to keep movement quiet.
  • Step 4: Integrate Smart Lighting and Electrics: Run low-voltage wire conduits during the framing phase. This allows you to easily install motion-activated LED strip lights inside your closets, under kitchen cabinets, and along media shelves.
  • Step 5: Complete the Look with Custom Molding: Finish the top edge of your new cabinets, closets, and wall units with elegant crown molding to blend the custom cabinetry seamlessly with your home's ceiling and existing trim.

Expert Styling and Space-Saving Tips for Your Remodel

  • Install a Hidden Slide-Out Countertop: Build a slide-out wood or stone board directly above your laundry appliances or inside your custom pantry. This provides a clean, sturdy workspace that slides out of sight when not in use.
  • Ditch Mismatched Hangers: Replace plastic and wire hangers with uniform wooden or velvet-flocked hangers. This instantly gives your newly remodeled closet the clean, high-end look of a luxury retail boutique.
  • Use Acrylic Drawer Dividers: Organize your socks, underwear, and ties inside your drawers using clear, adjustable acrylic dividers to keep small items perfectly sorted.
  • Organize Shoes by Style and Color: Arrange your shoe collection on adjustable shelves, facing them forward or alternating heel-to-toe to maximize visual appeal and space efficiency.

Frequently Asked Questions

How do I choose the best contractor for my home remodel?

Look for a local company with experience in custom carpentry, space planning, and high-end home cabinetry. Ensure they are fully licensed and insured, offer detailed 3D design plans, provide transparent pricing, and have excellent reviews from homeowners in your neighborhood.

Are custom built-in closets worth the investment?

Yes, absolutely. They maximize every cubic inch of a small bedroom, make daily routines much smoother, and act as high-value built-in features that elevate a home's structural quality and market resale value.

What is the standard depth of a custom closet cabinet?

The standard depth for a custom closet cabinet is 14 inches for open shelving and 24 inches if you plan to install closed cabinet doors to keep hanging coats from getting pinched.

Can I install a closet island in a small walk-in?

To fit a central island, your walk-in closet should measure at least 10 feet by 10 feet. This ensures you maintain comfortable 36-inch pathways on all sides of the island to walk and open drawers comfortably.

What is the best lighting color temperature for a closet?

The best color temperature is between 3500K (neutral white) and 4000K (natural day white). This ensures clothing colors appear true to life, preventing frustrating styling mistakes.

Should I choose open shelving or closed cabinet doors?

A hybrid design works best. Use open shelving for frequently worn everyday items like shirts and folded sweaters. Use closed cabinets to hide less attractive items, bulk storage, and out-of-season gear.

How do soft-close hinges protect custom cabinetry?

Soft-close hinges use small hydraulic dampers to catch the cabinet door as it closes, gently pulling it shut. This prevents slamming, which reduces wear and tear on your wood frames.

How do I maximize a small reach-in closet?

Use a double-hanging rod system to instantly double your hanging capacity, install a central drawer tower to eliminate the need for an bulky bedroom dresser, and run shelves up to the ceiling for out-of-season storage.

Transform Your Home with Clear Closets

Are you ready to say goodbye to household clutter, completely reorganize your living spaces, and design a gorgeous, functional home that matches your family's style? The custom cabinetry and design experts at Clear Closets are here to help you bring your dream home storage to life. From modern walk-in master closets and efficient reach-ins to custom laundry rooms, pantries, and home offices, we manage the entire project—from 3D conceptual designs to professional, clean installation.

We proudly design and install premium home storage systems throughout Alpharetta, Roswell, Johns Creek, and the greater Atlanta metro area. Contact the design experts at Clear Closets to schedule your complimentary custom design consultation today.